
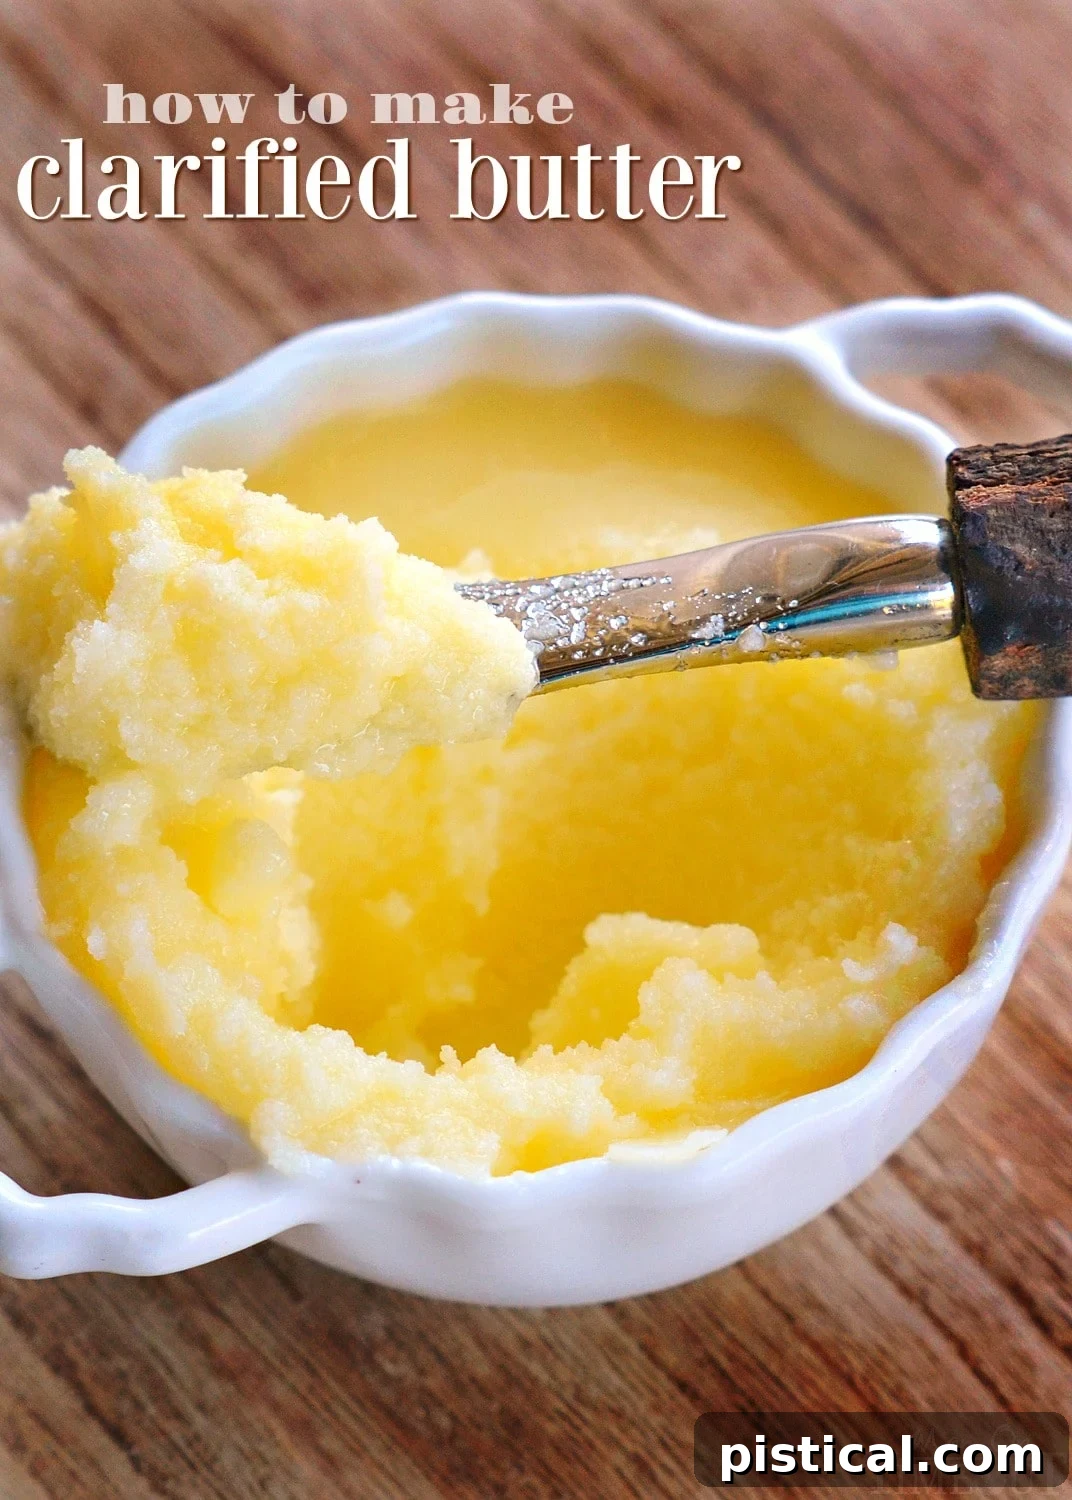
Mastering Clarified Butter: Your Essential Guide to Dairy-Free Delight
Discover the ancient secret to a versatile and healthy fat – clarified butter. This essential ingredient, perfect for the Whole30 diet, ketogenic, paleo lifestyles, or anyone avoiding dairy, elevates your cooking to new heights. Say goodbye to burned butter and hello to rich, nutty flavor that transforms everyday meals into culinary masterpieces. In this comprehensive guide, we’ll walk you through the simple, step-by-step process of making clarified butter at home, complete with practical tips and creative uses. Get ready to embrace a staple that will save your sanity and add incredible depth to countless dishes.
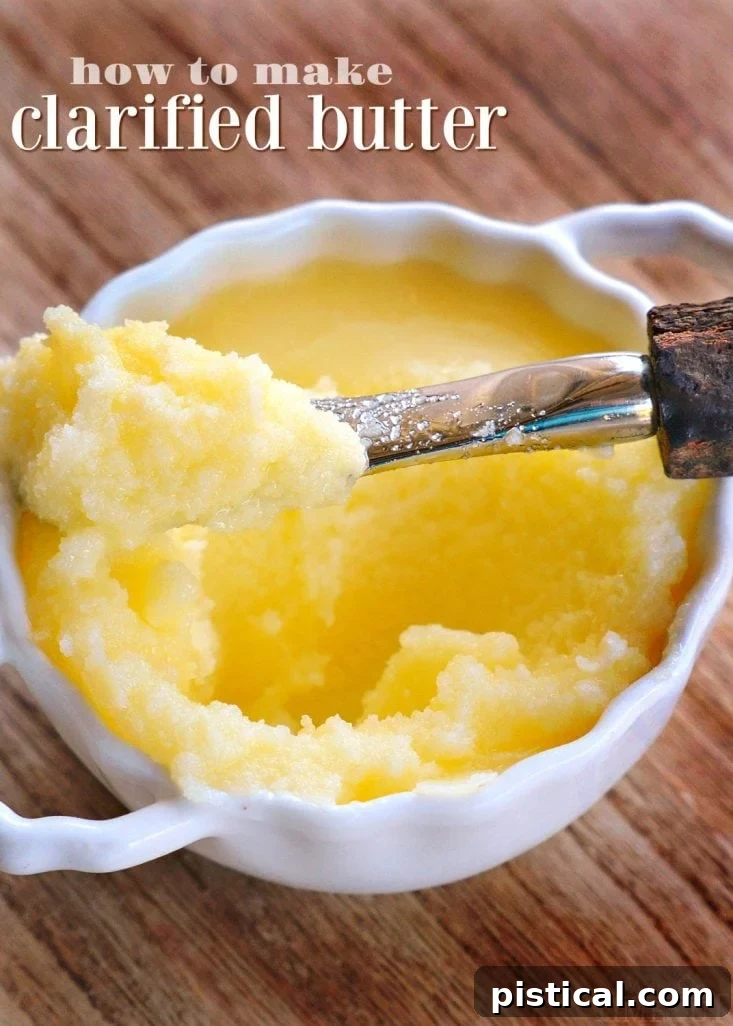
What Exactly is Clarified Butter?
At its core, clarified butter is pure butterfat. The process of “clarifying” involves gently heating regular butter to separate its three main components: water, milk solids (proteins like casein, sugars like lactose), and butterfat. As the butter melts, the water evaporates, and the milk solids coagulate and either float to the surface as a foam or sink to the bottom of the pan. What remains is a golden, transparent liquid – the pristine butterfat.
This golden liquid is distinct from regular butter in several key ways. While regular butter contains water and milk solids, which can burn easily at high temperatures and trigger dairy sensitivities, clarified butter is free from these elements. This makes it an ideal fat for various cooking applications and dietary needs. Think of it as butter in its purest, most resilient form, ready to infuse your dishes with rich flavor without the drawbacks of traditional butter.
Clarified Butter vs. Ghee: What’s the Difference?
You might have heard of ghee, especially in Indian cuisine, and wondered how it compares to clarified butter. While very similar, there’s a subtle but important distinction. Clarified butter is typically cooked just long enough to separate and remove the milk solids. Ghee, on the other hand, is cooked a bit longer. During this extended cooking time, the milk solids that have settled at the bottom of the pan begin to caramelize and brown, imparting a deeper, nuttier, and more intense flavor to the butterfat. This browning process also gives ghee its characteristic aroma and often a darker golden hue. Both are dairy-free and share similar high smoke points, but ghee offers a more pronounced, toasted flavor profile, while clarified butter has a cleaner, milder butter taste. For many home cooks, the simpler process of clarified butter is a perfect starting point.
Why You Should Make Clarified Butter at Home
Making clarified butter is more than just a culinary technique; it’s a gateway to healthier, more flavorful cooking, especially for those navigating dietary restrictions. Here’s why it’s an indispensable addition to your kitchen arsenal:
1. Essential for Dairy-Free Diets
For individuals following strict dietary protocols like Whole30, ketogenic, paleo, or simply those with lactose intolerance or casein sensitivity, regular butter is off-limits due to its milk solids. Clarified butter is a game-changer because the clarifying process removes virtually all lactose and casein. This means you can still enjoy the delicious, comforting taste of butter without experiencing digestive upset or breaking your dietary commitments. It allows you to maintain the rich flavor you love while adhering to a dairy-free lifestyle.
2. High Smoke Point for Superior Cooking
One of the most significant advantages of clarified butter is its remarkably high smoke point, which is around 450°F (232°C). In contrast, regular butter has a much lower smoke point, typically around 302-350°F (150-177°C), due to the presence of water and milk solids. These solids burn easily at higher temperatures, leading to an acrid taste and potentially harmful compounds. Clarified butter’s high smoke point makes it ideal for sautéing, searing, pan-frying, and roasting at higher heats without the risk of burning. This preserves the integrity of your food and prevents undesirable flavors.
3. Enhanced, Richer Flavor Profile
While often described as “pure butterfat,” clarified butter offers a unique and more concentrated flavor than regular butter. It has a clean, nutty, and slightly sweet taste that deepens and enhances the natural flavors of the ingredients it cooks with. The absence of distracting milk solids allows the true essence of butter to shine through, adding a gourmet touch to everything from simple scrambled eggs to sophisticated sauces.
4. Extended Shelf Life and Versatile Storage
Another practical benefit is clarified butter’s impressive shelf life. Because the water and milk solids, which are prone to spoilage, have been removed, clarified butter is much more stable than regular butter. It can be stored at room temperature in an airtight container for up to three months, making it incredibly convenient for everyday use. Refrigerated, it can last up to six months, offering a reliable, ready-to-use fat whenever you need it without worrying about it going rancid quickly.
5. Cost-Effective and Convenient
While specialty clarified butter or ghee can be purchased at health food stores, making it at home is surprisingly simple and significantly more economical. All you need is a good quality unsalted butter and a few basic kitchen tools. This DIY approach not only saves you money but also ensures you have a fresh, high-quality product tailored to your needs. The ease of preparation makes it a practical skill for any home cook.
By making clarified butter a regular part of your cooking, you unlock a world of flavor, health benefits, and culinary possibilities. It’s a small effort with a huge payoff in terms of taste and dietary freedom.
The Simple Science Behind Clarifying Butter
The magic of clarifying butter lies in a straightforward physical separation process. When butter is gently heated, the emulsion of fat, water, and milk solids begins to break down. The water content, being lighter, starts to evaporate as steam. Simultaneously, the milk proteins (casein) and sugars (lactose) denature and coagulate, becoming denser than the butterfat. These solids then either float to the surface as a foamy layer or sink to the bottom, leaving behind the pure, golden butterfat suspended in the middle. This separation allows for easy removal of the components that cause burning and dairy sensitivities, yielding a stable, delicious fat.
Step-by-Step Guide to Homemade Clarified Butter
Making clarified butter at home is a rewarding process that requires minimal effort and simple kitchen tools. Follow these detailed steps to create your own batch of pure, golden butterfat.
What You’ll Need:
- **Unsalted Butter:** This is crucial. Salted butter introduces extra water and minerals that can affect the purity and flavor of your clarified butter. Choose high-quality butter for the best results. You can start with any amount, typically half a pound (8 oz) or a full pound for a good batch.
- **Small Saucepan:** Select a saucepan that comfortably fits your butter, allowing enough space for the butter to melt and for the foam to rise without overflowing. A light-colored pan can help you better observe the separation of solids.
- **Fine-Mesh Skimmer or Large Spoon:** For gently removing the foamy milk solids from the surface. A soup spoon works perfectly.
- Cheesecloth: Essential for the final straining step. We recommend at least 5 layers to ensure all remaining fine milk solids are captured.
- **Heatproof Glass Bowl or Mason Jar:** To collect the clarified butter after straining and for long-term storage. A Mason jar is ideal for both.
The Process:
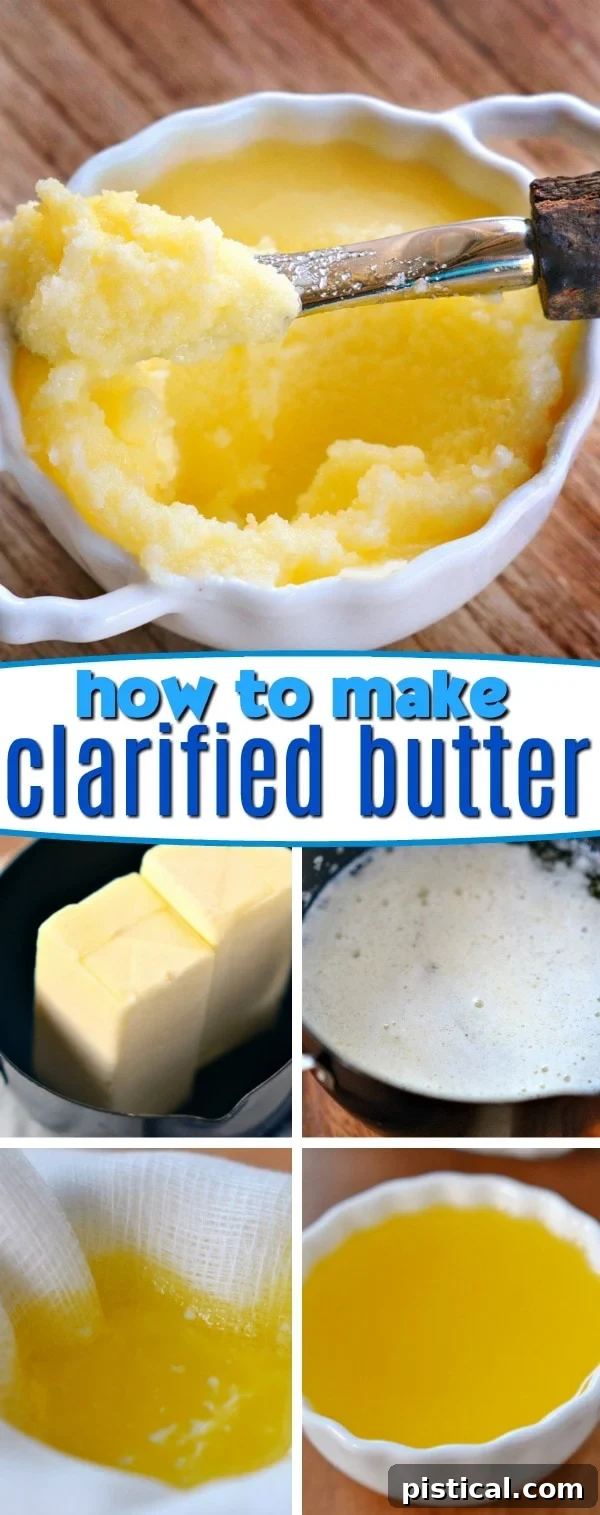
Step 1: Gentle Melting and Simmering
Place your chosen amount of unsalted butter into the small saucepan. Heat the butter over very low heat. The key here is patience and gentleness. Allow the butter to melt slowly and naturally. Resist the urge to stir it. As it melts, it will begin to simmer softly, and you’ll notice small bubbles forming. This low and slow approach prevents the milk solids from browning too quickly and allows them to separate effectively.
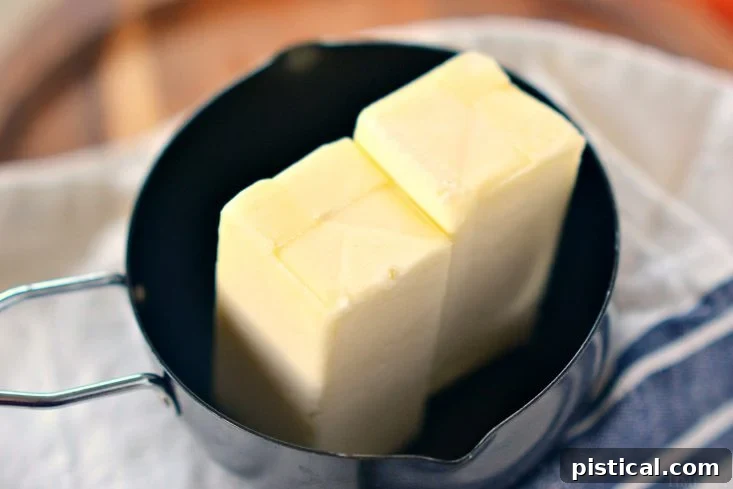
Step 2: Observing and Skimming the Milk Solids
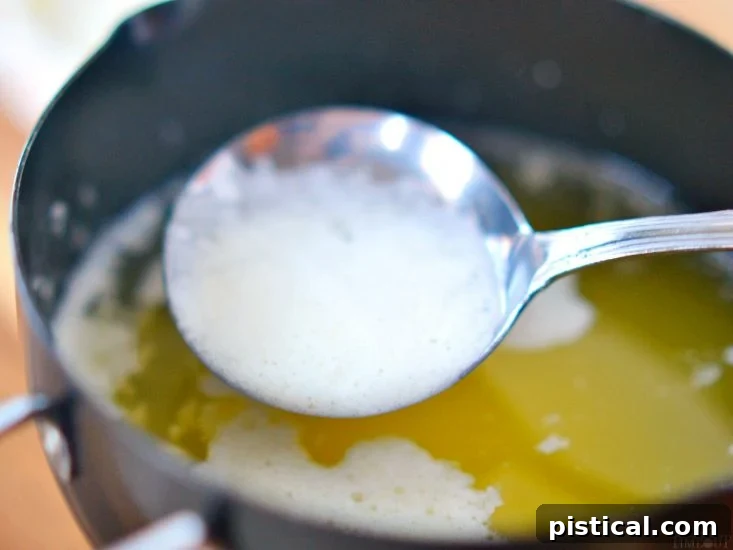
As the butter continues to simmer, white, foamy milk solids will begin to rise to the surface. These are the proteins and sugars you want to remove. They will form a visible layer on top of the liquid butter. Do not stir at this stage, as stirring can recombine the solids with the butterfat, making them harder to separate. Let them collect on the surface.
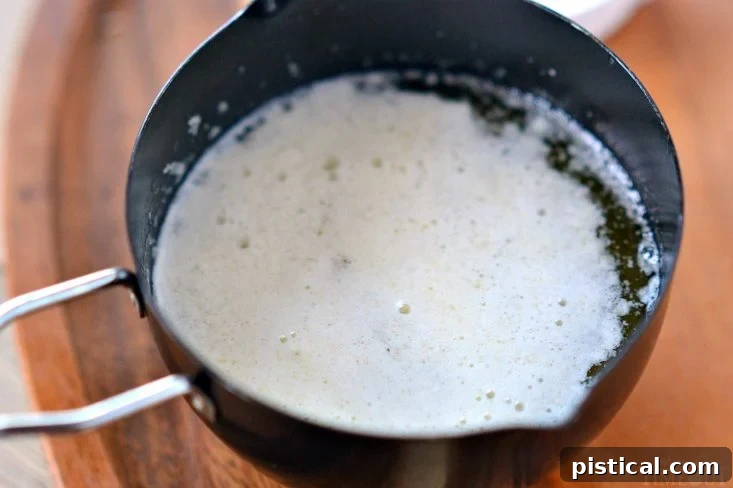
Once a good amount of foam has collected, it’s time to gently remove it. Carefully skim the surface with a clean spoon. Try to remove as much of the white, foamy layer as possible. Don’t worry about getting every single speck; the next step will handle the finer particles.
Step 3: Straining for Purity
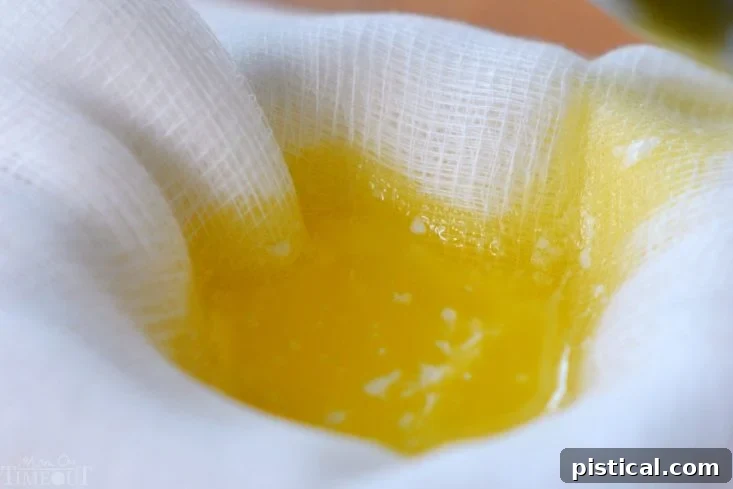
After skimming, you’ll still have some fine milk solids suspended in the butterfat, and some might have settled at the bottom. To achieve true clarity, straining is essential. Place at least 5 layers of cheesecloth over the mouth of a clean glass bowl or Mason jar. The multiple layers are important to catch even the tiniest particles. Carefully pour the hot butterfat through the cheesecloth. Be mindful of any browned solids at the very bottom of the saucepan; try not to pour them into the cheesecloth if you want pure clarified butter (if making ghee, you’d integrate them for flavor).
Step 4: Cooling and Storing Your Golden Elixir
Once all the butter has been strained, discard the cheesecloth and the captured milk solids. Allow the clarified butter to cool down to room temperature. As it cools, it will solidify into a beautiful, vibrant golden color. Once solid, transfer it to a covered glass container for storage.
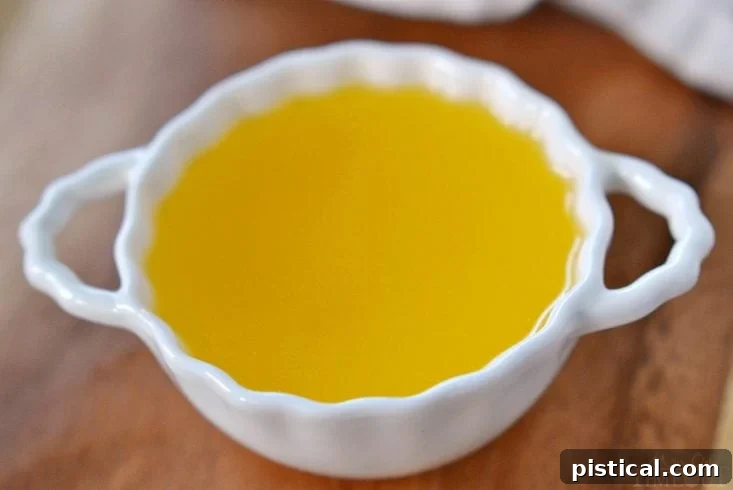
Store the cooled clarified butter in a covered glass container. You can keep it at room temperature for up to three months in a cool, dark pantry, or refrigerate it for up to six months. Its extended shelf life makes it a fantastic pantry staple!
Clarified Butter Recipe Card
Summary
Step-by-step instructions on how to easily make clarified butter at home. Clarified butter is a must-have in the Whole30 diet or any diet that restricts or eliminates dairy. This guide provides detailed instructions, complete with pictures, on how to easily clarify butter at home. This is definitely a recipe you want to keep on hand!
Course: Side
Cuisine: American
Keyword: clarified butter, condiment, dairy-free, Whole30, healthy fat
Prep Time: 5 minutes
Cook Time: 5 minutes
Total Time: 10 minutes
Servings: 16 (approximately 8 oz of butterfat)
Ingredients
- 8 oz unsalted butter
Instructions
- Place unsalted butter in a small saucepan. Heat the butter over low heat, allowing it to melt completely and come to a gentle simmer. Do not stir during this initial melting phase.
- Observe as white, foamy milk solids rise to the surface. Carefully skim these solids off the surface with a spoon, discarding them. Remove as much of the foam as possible.
- Prepare your straining setup: Place at least 5 layers of cheesecloth over the top of a clean glass bowl or Mason jar. Slowly pour the remaining liquid butterfat through the cheesecloth, ensuring it catches any lingering milk solids.
- Once all the butter has been strained, discard the used cheesecloth and the collected milk solids.
- Allow the clarified butter to cool completely to room temperature. Once solid, transfer it to a covered glass container for storage. Store at room temperature for up to three months, or refrigerate for up to six months.
Nutrition (per serving, approximate)
Calories: 101kcal | Fat: 11g | Saturated Fat: 7g | Cholesterol: 30mg | Sodium: 1mg | Potassium: 3mg | Vitamin A: 355IU | Calcium: 3mg
Author: Trish – Mom On Timeout
Tips for Perfect Clarified Butter Every Time
Achieving perfectly clear and delicious clarified butter is easy with a few simple techniques:
- **Always Use Unsalted Butter:** This is a golden rule. Salted butter contains extra water and salt crystals that can interfere with the clarification process and alter the taste of your final product. Unsalted butter allows for a purer, cleaner butterfat.
- **Low Heat is Non-Negotiable:** Patience is key. Heating butter too quickly can cause the milk solids to burn at the bottom of the pan before they have a chance to separate properly. Burnt solids will impart an unpleasant, acrid flavor to your clarified butter. Keep the heat consistently low and gentle.
- **Resist the Urge to Stir:** Once the butter is melting and simmering, avoid stirring. Stirring can reincorporate the separating milk solids back into the butterfat, making it harder for them to coalesce and be skimmed off or strained.
- **Don’t Rush the Skimming:** Take your time removing the foamy layer from the top. While the cheesecloth will catch the finer particles, removing the larger foam ensures a cleaner butterfat from the start.
- **Layer Your Cheesecloth:** A single layer of cheesecloth might not be enough to catch all the fine milk solids. Using at least 5 layers provides a dense enough filter to ensure maximum purity and clarity in your finished clarified butter. If you don’t have cheesecloth, a clean coffee filter placed in a fine-mesh sieve can work in a pinch, though it will strain much slower.
- **Observe the Bottom of the Pan:** As the butter clarifies, you’ll see a clear separation. The milk solids will either float to the top or settle as a thin, sometimes slightly browned, layer at the bottom. Be careful not to disturb these bottom solids when pouring to strain, especially if you desire pure clarified butter rather than ghee.
Creative Ways to Use Your Homemade Clarified Butter
Once you have a jar of golden clarified butter, its culinary applications are endless. Here are some ideas to get you started:
- **Sautéing and Pan-Frying:** Its high smoke point makes it perfect for cooking vegetables, searing meats (chicken, steak, fish), and frying eggs without burning. It imparts a beautiful golden crust and rich flavor.
- **Roasting:** Drizzle clarified butter over root vegetables (like potatoes, carrots, sweet potatoes) or whole chickens before roasting for incredibly crispy, flavorful results.
- **Sauces:** Use it as the base for classic sauces like Hollandaise or Béarnaise, where a pure butterfat is essential for stability and flavor.
- **Seafood Enhancer:** It’s the traditional accompaniment for steamed lobster, crab, or shrimp. A warm bowl of clarified butter for dipping is simply divine.
- **Baking (Dairy-Free):** In some recipes, clarified butter can replace regular butter or other fats, particularly when you need a pure fat or a dairy-free option for richness. It’s excellent in pie crusts or certain cookies where butterfat is crucial.
- **Bulletproof Coffee/Tea:** For those on ketogenic diets, a tablespoon of clarified butter blended into your morning coffee or tea provides sustained energy and a creamy texture.
- **Popcorn Topping:** Melted clarified butter makes a gourmet topping for homemade popcorn, adding rich flavor without sogginess.
- **Garnish:** Drizzle a little warm clarified butter over steamed greens, grilled asparagus, or baked potatoes for an instant flavor boost.
- **Confit:** Clarified butter can be used for confit methods, where ingredients are slow-cooked submerged in fat, resulting in incredibly tender and flavorful dishes.
Storage and Shelf Life
Proper storage ensures your homemade clarified butter remains fresh and ready for use over an extended period. Thanks to the removal of water and milk solids, clarified butter is significantly more stable than regular butter.
- **At Room Temperature:** For immediate and frequent use, store your clarified butter in an airtight, covered glass container (like a Mason jar) in a cool, dark pantry. It will remain fresh for up to three months. Avoid direct sunlight or warm spots near appliances, as excessive heat can reduce its shelf life. It will solidify at room temperature and become liquid when warmed.
- **Refrigerated:** For longer-term storage, transfer the cooled clarified butter to an airtight container and place it in the refrigerator. It can last for up to six months. Refrigerated clarified butter will be very firm, similar to cold butter, and may need to be gently warmed to soften or melt for use.
- **Freezing:** For even longer preservation, you can freeze clarified butter for up to a year. Portion it into ice cube trays or small containers before freezing. Once solid, transfer the cubes to a freezer-safe bag.
- **Signs of Spoilage:** While highly stable, clarified butter can eventually go bad. Look for signs like an off smell (rancid, sour, or metallic), visible mold, or discoloration that isn’t its natural golden hue. If in doubt, it’s always best to discard it.
Frequently Asked Questions About Clarified Butter
Q: Can I use salted butter to make clarified butter?
A: While technically possible, it is not recommended. Salted butter contains added salt and potentially more water, which can affect the purity and flavor of your clarified butter. For the best results and a clean, neutral flavor, always use unsalted butter.
Q: What if I don’t have cheesecloth? Are there alternatives?
A: Cheesecloth is ideal for its fine weave and breathability. If you don’t have it, you can try a few alternatives:
- **Fine-Mesh Sieve:** A very fine-mesh sieve might catch most larger solids, but it won’t be as effective for truly microscopic particles.
- **Coffee Filters:** Line a fine-mesh sieve with a few coffee filters. This will create a very effective filter, similar to cheesecloth, but the straining process will be significantly slower due to the density of the filters. Be patient if using this method.
- **Paper Towels:** In a pinch, a few layers of paper towels can be used, but ensure they are unbleached and sturdy enough not to tear when wet. This is generally a last resort.
Q: Why is my clarified butter sometimes a different color or has sediment?
A: The color of your clarified butter can vary slightly depending on the quality of the butter you start with (e.g., grass-fed butter tends to be a deeper yellow). If you see a thin layer of white sediment at the bottom of your cooled clarified butter, it means some milk solids were not fully removed during the skimming and straining process. This is common and usually harmless, especially if the butter was otherwise clarified properly. To avoid it, ensure you use enough layers of cheesecloth and pour carefully during straining.
Q: Can I make a large batch of clarified butter?
A: Absolutely! Making a large batch is highly recommended, especially if you use it frequently. Clarified butter has an excellent shelf life, so making a bigger quantity will save you time in the long run. Simply scale up the amount of unsalted butter, and use a larger saucepan and storage container accordingly. The process remains the same.
Q: Is clarified butter the same as ghee?
A: While often used interchangeably, there’s a slight difference. Clarified butter is cooked just until the milk solids separate and are removed. Ghee is cooked slightly longer, allowing the milk solids to brown at the bottom of the pan, which imparts a deeper, nuttier flavor and aroma. Both are essentially pure butterfat and are dairy-free.
Q: Can I use the milk solids that are removed?
A: The skimmed foam and bottom solids are essentially denatured milk proteins and sugars. While some chefs save the browned solids (from ghee making) for a flavorful addition to certain dishes, the white foam from clarified butter is generally discarded as it doesn’t offer much culinary value and can quickly spoil.
Other Delicious Recipes to Explore
Expand your culinary repertoire with these mouth-watering dishes, many of which can be adapted to be dairy-free using your homemade clarified butter:
- Homemade Baked Mac and Cheese (Can be made dairy-free with alternative cheeses and clarified butter for roux base)
- The BEST Tater Tot Casserole (Clarified butter can be used for cooking meats and vegetables)
- The BEST Dinner Rolls (Clarified butter can replace regular butter for brushing or enriching the dough)
- Easy Chicken Stir Fry Recipe (Clarified butter is an excellent high-heat cooking fat for stir-fries)
- Easy Stuffed Shells (Use clarified butter for sautéing aromatics or in sauces)

For all appetizer recipes, go HERE.
For all dessert recipes, go HERE.
Sign up to get emails when I post new recipes!
For even more great ideas follow me on Facebook – Pinterest – Instagram – Twitter – Bloglovin’.