
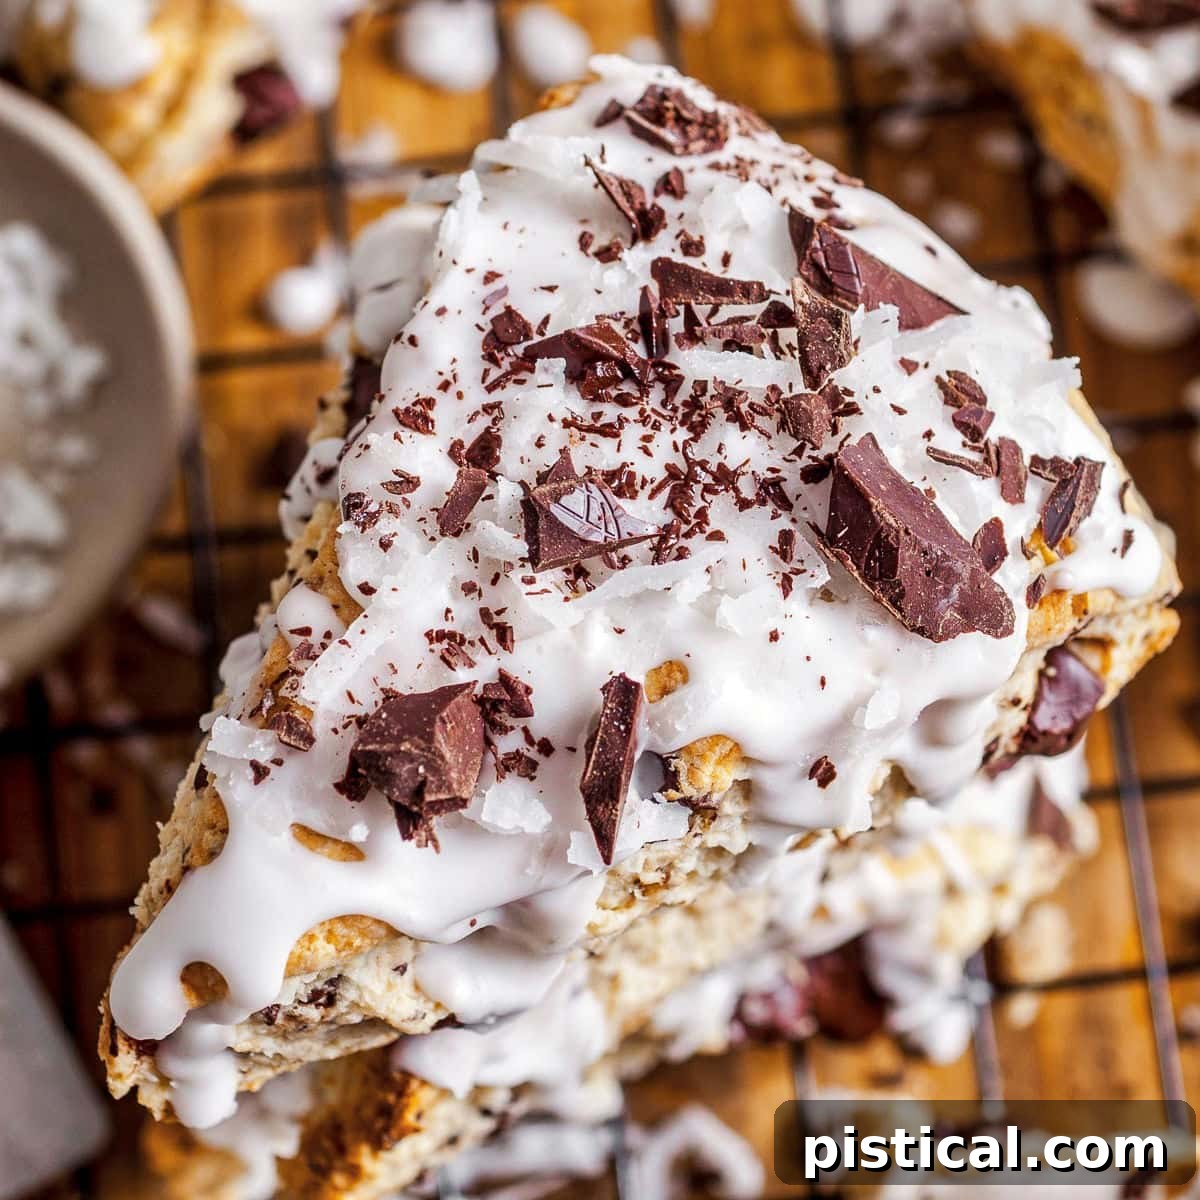
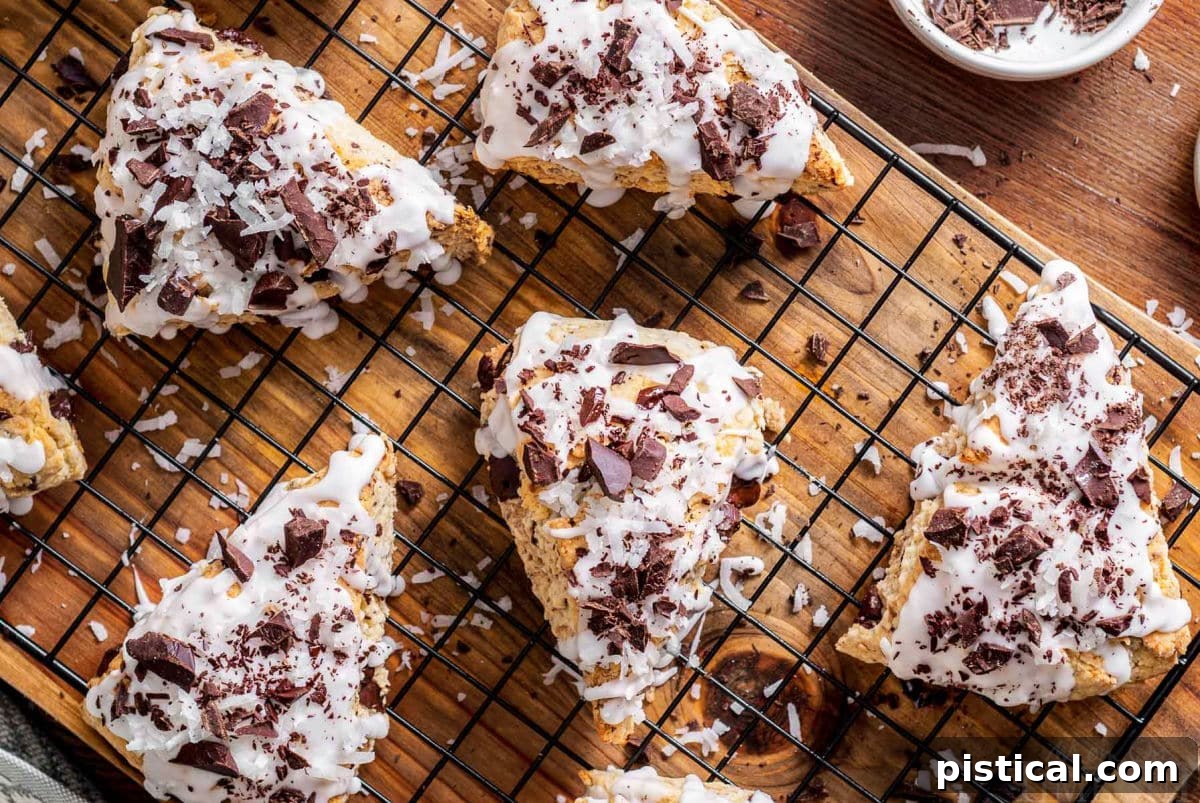
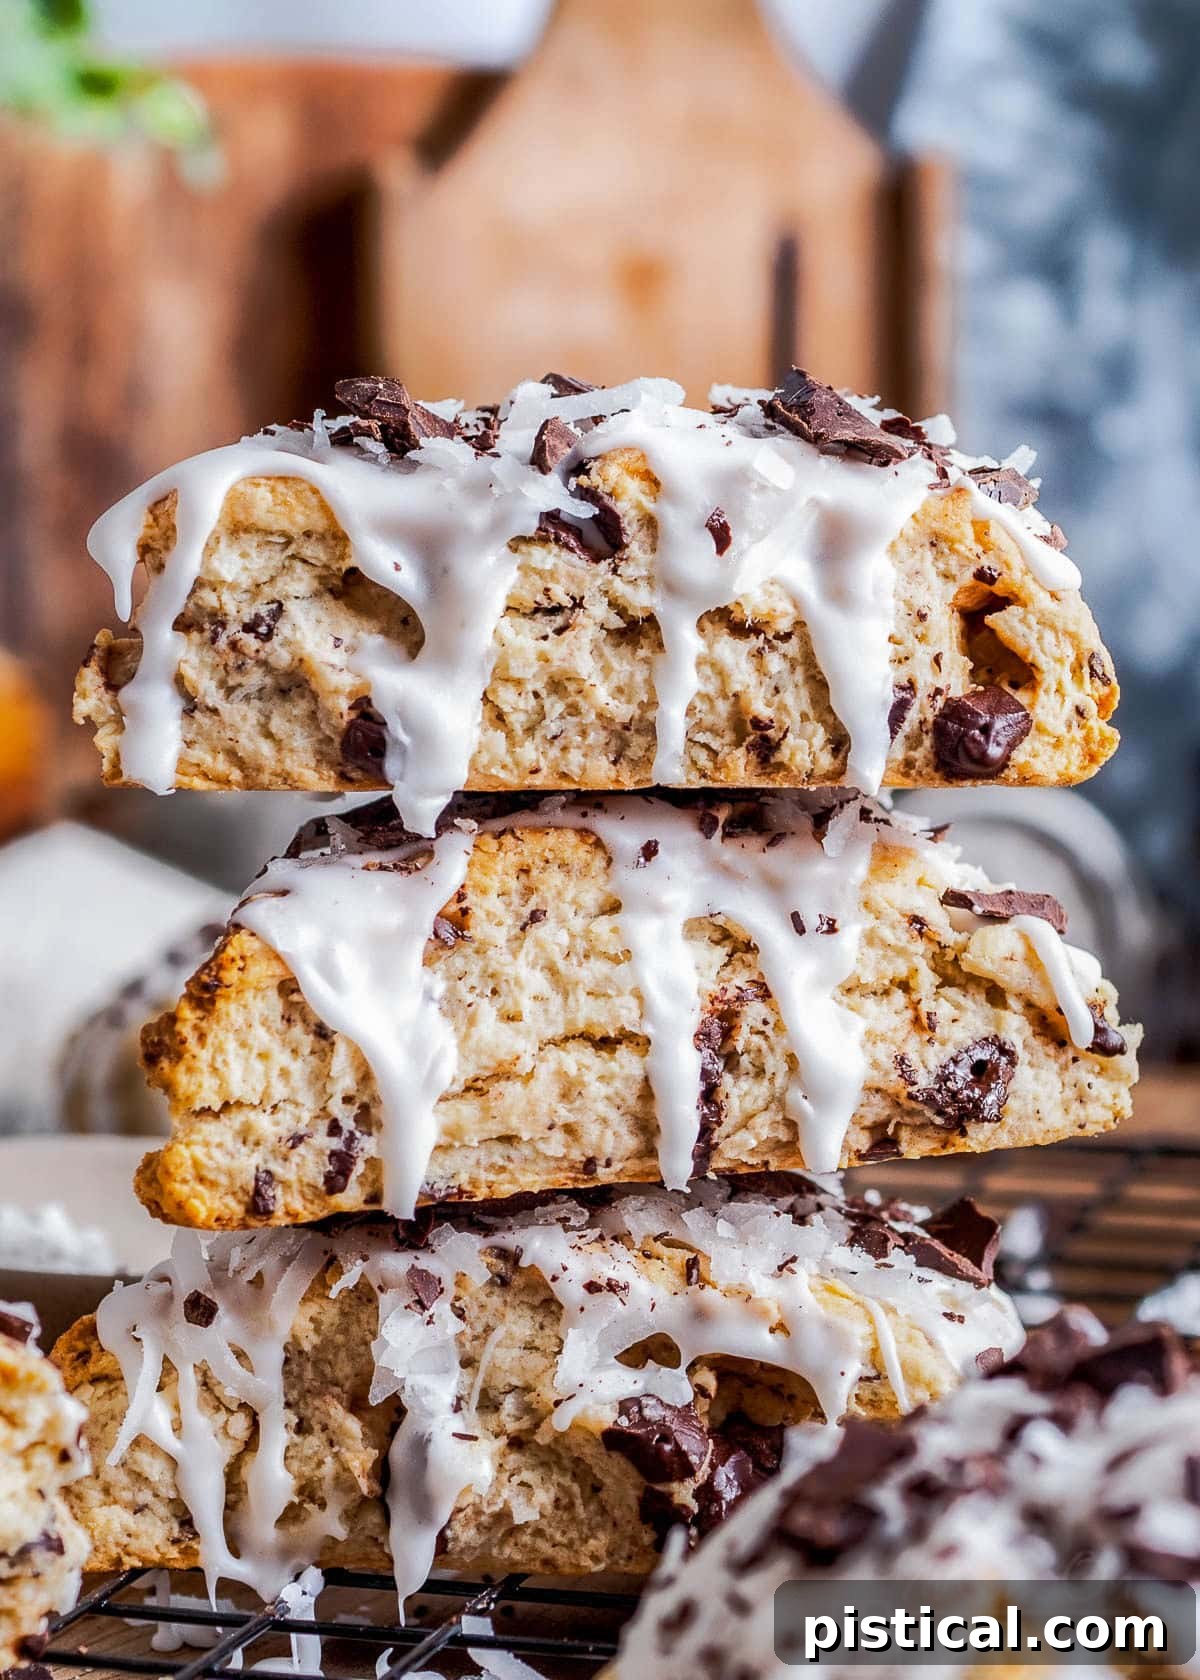
These absolutely delightful Chocolate Coconut Scones are a true labor of love and a guaranteed crowd-pleaser. Each scone is generously studded with rich dark chocolate and crowned with a luscious, decadent coconut icing, creating a symphony of flavors and textures in every bite. This easy-to-follow chocolate coconut scones recipe yields a wonderfully tender crumb, bursting with an authentic coconut flavor that makes them perfect for any occasion – be it a leisurely weekend brunch, a special breakfast treat, or an elegant afternoon tea. Prepare to indulge in a truly exceptional baking experience.
If you have a penchant for exquisite homemade scones, you’ll definitely want to explore some of our other beloved recipes. Be sure to try our vibrant Lemon Blueberry Scones for a burst of fruity freshness, the festive Cranberry Orange Scones for a comforting classic, and our warmly spiced Pumpkin Scones, perfect for autumn gatherings.
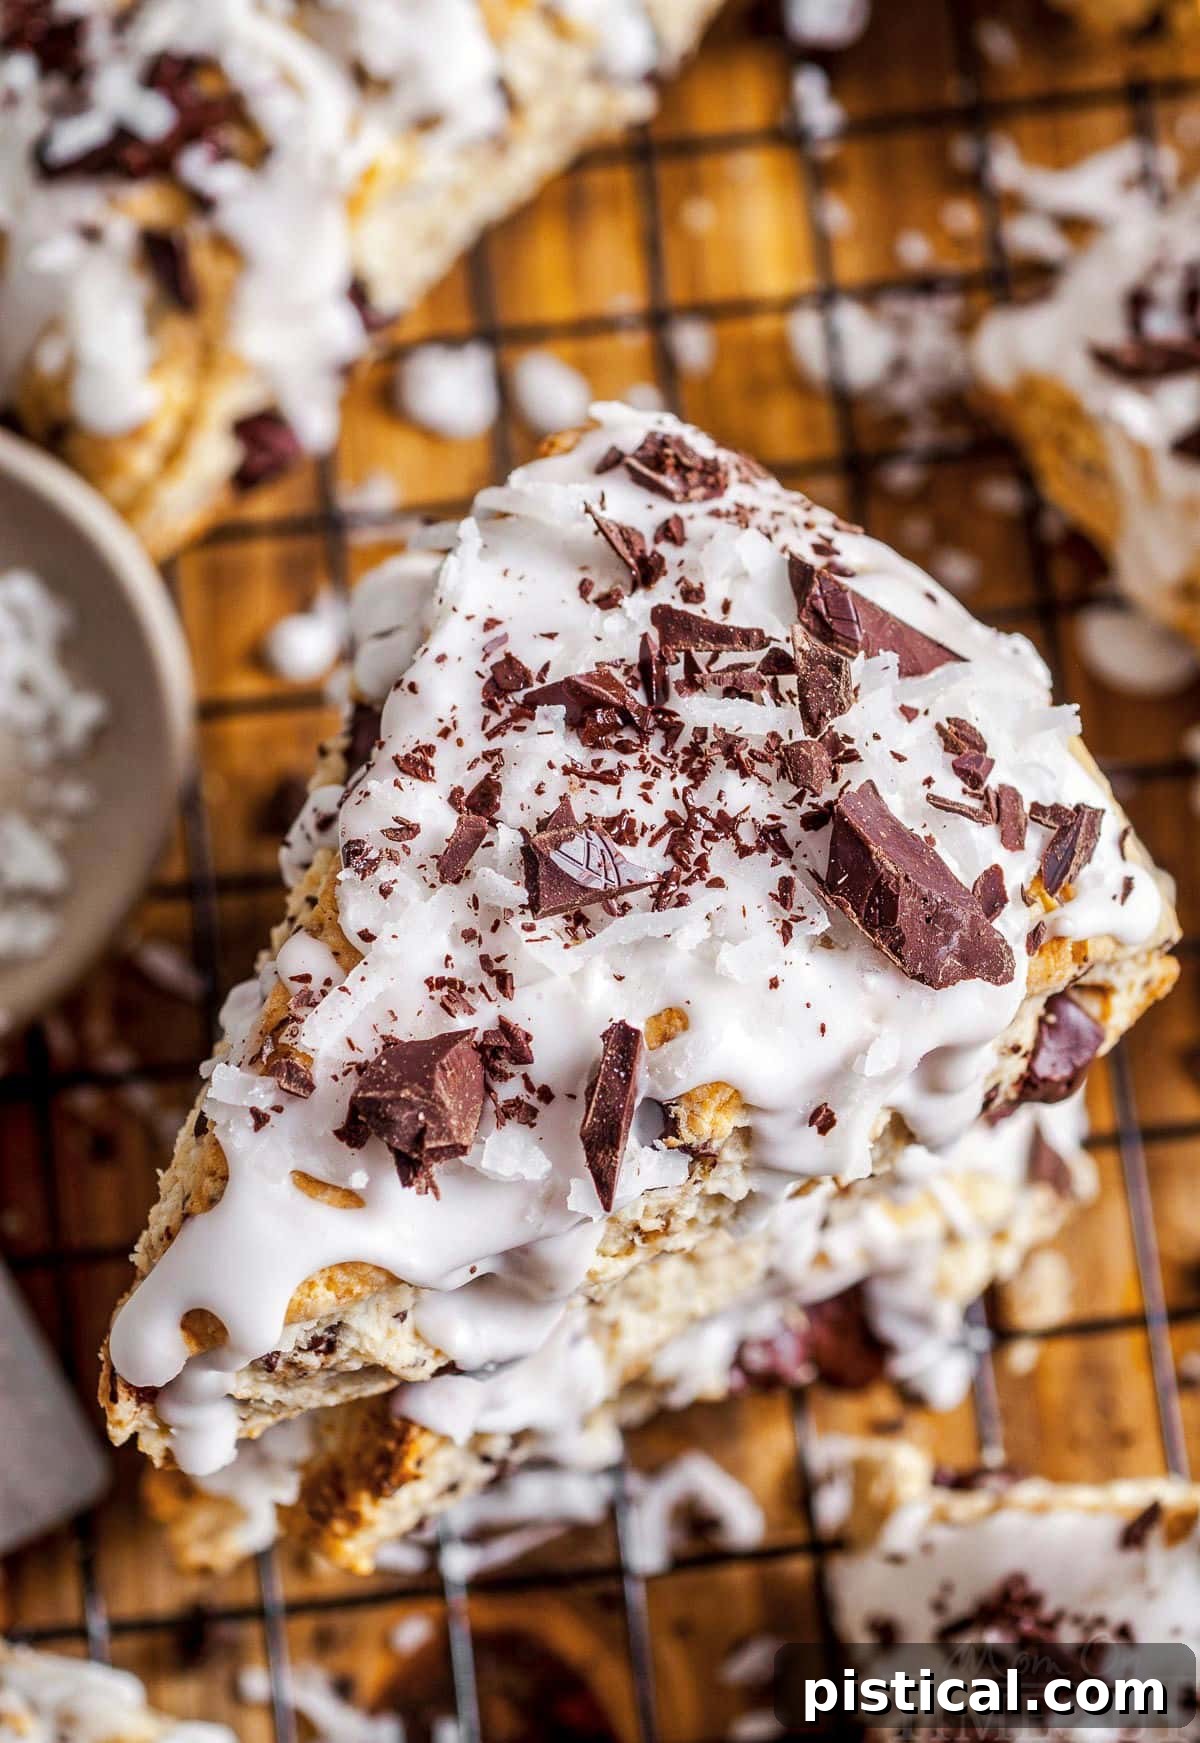
Indulge in the Ultimate Chocolate Coconut Scones Recipe
The timeless pairing of coconut and chocolate stands out as one of my absolute favorite flavor combinations – a delicious obsession that truly explains my enduring love for Almond Joy candy! While coconut, in its natural form, offers a uniquely sweet and fragrant experience, when expertly paired with the deep, rich notes of chocolate, it transforms into something utterly extraordinary. This recipe elevates that classic duo into a sophisticated yet comforting baked good.
These incredibly easy-to-make scones are a fantastic and delightful addition to any brunch spread or breakfast menu. Their comforting sweetness and exotic flavor profile also make them an equally delicious companion to a freshly brewed cup of coffee or a soothing mug of tea during an afternoon snack. While the creamy coconut icing is technically optional, we highly recommend it as it adds an extra layer of sweetness and moisture that perfectly complements the tender scones, enhancing the overall experience to truly decadent levels.
Unlike many traditional scone recipes that rely on heavy cream for their richness, this particular recipe cleverly utilizes unsweetened coconut cream. This strategic substitution is key to intensely amplifying the inherent coconut flavor, ensuring every bite delivers a powerful and authentic tropical essence that sets these scones apart from the rest. The result is a scone that is not only rich and tender but also bursting with the distinctive taste of coconut.
Scones vs. Biscuits: Unraveling the Delicious Differences
Often, scones and biscuits are mistakenly thought to be interchangeable, but a closer look reveals distinct differences in their preparation, flavor profile, and ultimate texture. While both are quick breads, these nuances are what give each its unique charm and place on the breakfast table.
Primarily, the distinguishing factor lies in the liquid used during preparation. Scones are most frequently crafted with rich, heavy cream, which contributes to their characteristic tender, almost cake-like crumb. In contrast, traditional American biscuit recipes typically call for milk or buttermilk, often resulting in a lighter, flakier, and sometimes more savory end product. The higher fat content in cream not only enriches the scone but also affects its structure, making it less prone to drying out.
Flavor-wise, scones tend to be notably sweeter than their biscuit counterparts. Many scone recipes incorporate a generous amount of sugar into the dough, and it’s not uncommon to find them adorned with a sparkling sprinkle of sanding sugar on top, which not only enhances their visual appeal but also adds a delicate crunch and extra sweetness. Biscuits, on the other hand, are generally less sweet, often leaning towards a more neutral or even savory flavor profile, making them ideal for pairing with gravies, cheeses, or fried chicken.
When it comes to texture, while both aim for tenderness, the way they achieve it differs. Scones, with their cream base, tend to have a tighter, more cohesive crumb, often described as tender and slightly dense, yet still wonderfully moist. Biscuits, especially Southern-style ones, are famed for their distinct, buttery layers that pull apart easily, offering a light and airy texture that can be incredibly flaky. This flakiness in biscuits often comes from specific folding techniques and the aggressive cutting of cold butter into the flour, creating pockets of steam during baking.
Finally, serving traditions also set them apart. Scones are typically enjoyed at room temperature or slightly warm, making them perfect for leisurely breakfasts, brunches, or afternoon tea. They are often served with clotted cream, jam, or fruit curds. Biscuits, conversely, are almost always served piping hot, straight from the oven, to best appreciate their delicate layers and melt-in-your-mouth quality, frequently accompanied by butter, jam, or savory toppings.
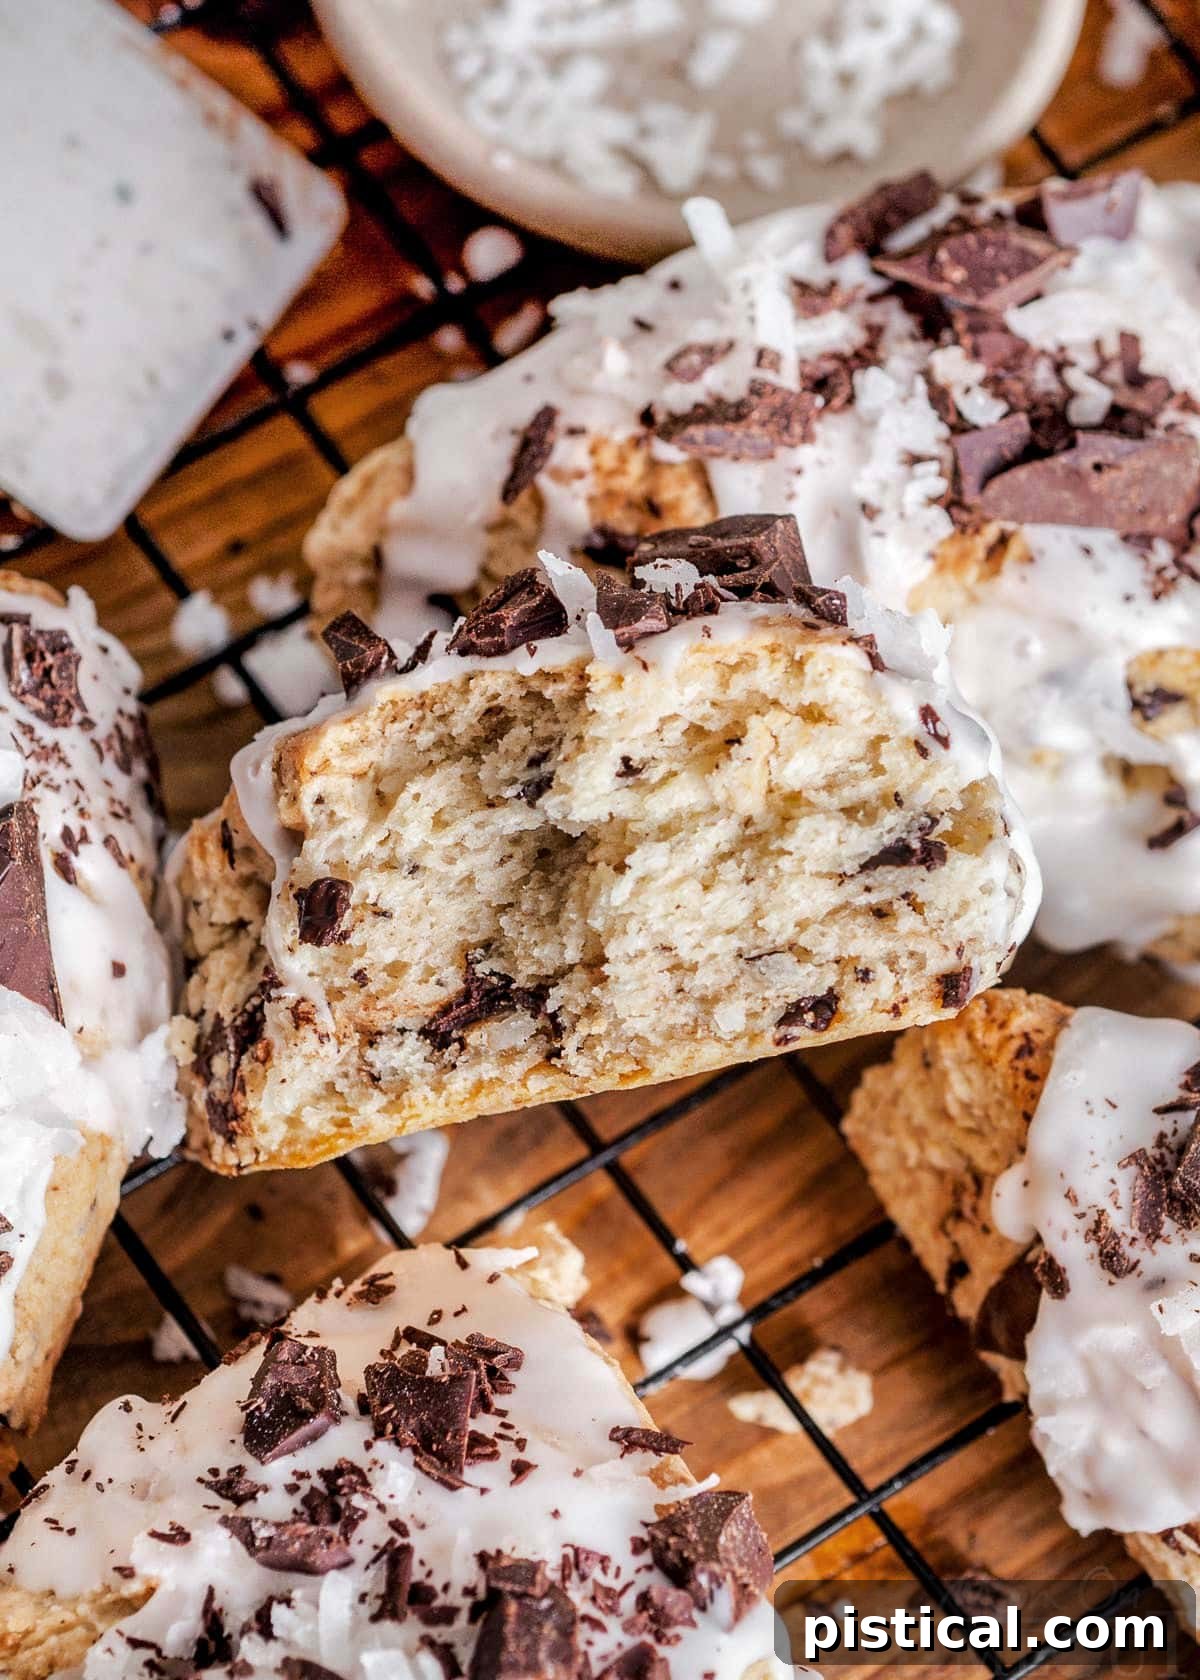
Essential Ingredients for Your Perfect Coconut Scones
This easy scone recipe is a delightful homage to the classic Almond Joy candy bar, meticulously crafted to deliver an irresistible and potent coconut punch in every single bite. The resulting scones are versatile and utterly perfect for any occasion, from a comforting breakfast or a celebratory brunch to a satisfying after-school snack or even a sophisticated dessert. As always, you will find the comprehensive printable recipe, complete with precise measurements and detailed instructions, in the dedicated recipe card section at the conclusion of this post. Let’s explore the key ingredients you’ll need to create these heavenly treats.
For The Coconut Scones
- Sweetened Coconut Flakes: These flakes are integral to both the flavor and texture of our scones. A portion of the coconut flakes will be finely processed to ensure that a rich, pervasive coconut flavor is evenly distributed throughout the dough. The remaining, larger flakes are then folded in to provide a delightful chewiness and textural contrast to the tender scone.
- All-Purpose Flour: This foundational ingredient provides the essential structure for our scones. Using the correct amount is crucial for achieving the perfect balance between a tender crumb and a sturdy, shapeable dough.
- Granulated Sugar: Beyond adding a pleasant sweetness, sugar also contributes to the beautiful golden-brown crust of the scones during baking, enhancing both flavor and visual appeal.
- Baking Powder: As the primary leavening agent in this recipe, baking powder is responsible for giving the scones their much-desired lift and contributing to a light, airy, and tender texture. It reacts with moisture and heat to create gas bubbles, making the scones rise.
- Salt: A small but mighty ingredient, salt is essential for balancing and enhancing the sweet and savory notes of all the other scone ingredients, ensuring a well-rounded and complex flavor profile.
- Dark Chocolate: To truly capture the essence of a gourmet treat, opt for a high-quality dark chocolate bar with at least 70% cacao. This will provide a deep, intense chocolate flavor that beautifully complements the sweet coconut. Chopping the bar yourself allows for a variety of chunk sizes, creating pockets of gooey chocolate throughout.
- Salted Butter: The butter must be well-chilled and cut into small cubes. Cold butter is absolutely vital for developing a tender crumb and ensuring the flakiness of the scones. As the butter melts in the oven, it creates steam, separating the layers of dough and resulting in a light, flaky texture. If using unsalted butter, simply add an extra pinch of salt to the flour mixture.
- Unsweetened Coconut Cream: This is a star ingredient that sets these scones apart. While many scone recipes call for heavy cream, using unsweetened coconut cream not only adds incredible richness but also intensely amps up the natural coconut flavor, ensuring a truly tropical experience. You can find it in cans in the Asian foods section of most grocery stores.
- Vanilla Extract and Coconut Extract: These two extracts work in harmony to infuse the scones with layers of warm, aromatic flavor. Vanilla provides a classic sweetness and depth, while coconut extract enhances and brightens the natural coconut notes, making them even more pronounced and delightful.
For The Coconut Icing
- Unsweetened Coconut Cream: This forms the liquid base for our icing, lending a luxurious creaminess and contributing a significant boost of coconut flavor. You can adjust the consistency by adding a little more if the icing is too thick, or a teaspoon of milk or heavy cream if preferred for slight variation.
- Coconut Extract: To ensure an unmistakably vibrant coconut flavor in the icing, an additional dash of coconut extract is included. For those who prefer, vanilla extract can be substituted for a milder, more classic sweetness.
- Powdered Sugar (Confectioners’ Sugar): This fine sugar not only sweetens the icing to perfection but also acts as the primary thickening agent, creating a smooth, pipeable consistency. If you find the icing too thin, gradually add a little more powdered sugar until your desired texture is achieved.
How To Masterfully Make Chocolate Coconut Scones
Crafting these delectable Chocolate Coconut Scones is a straightforward process, designed to bring joy to bakers of all skill levels. Follow these detailed steps to achieve perfect, tender, and flavorful scones every time.
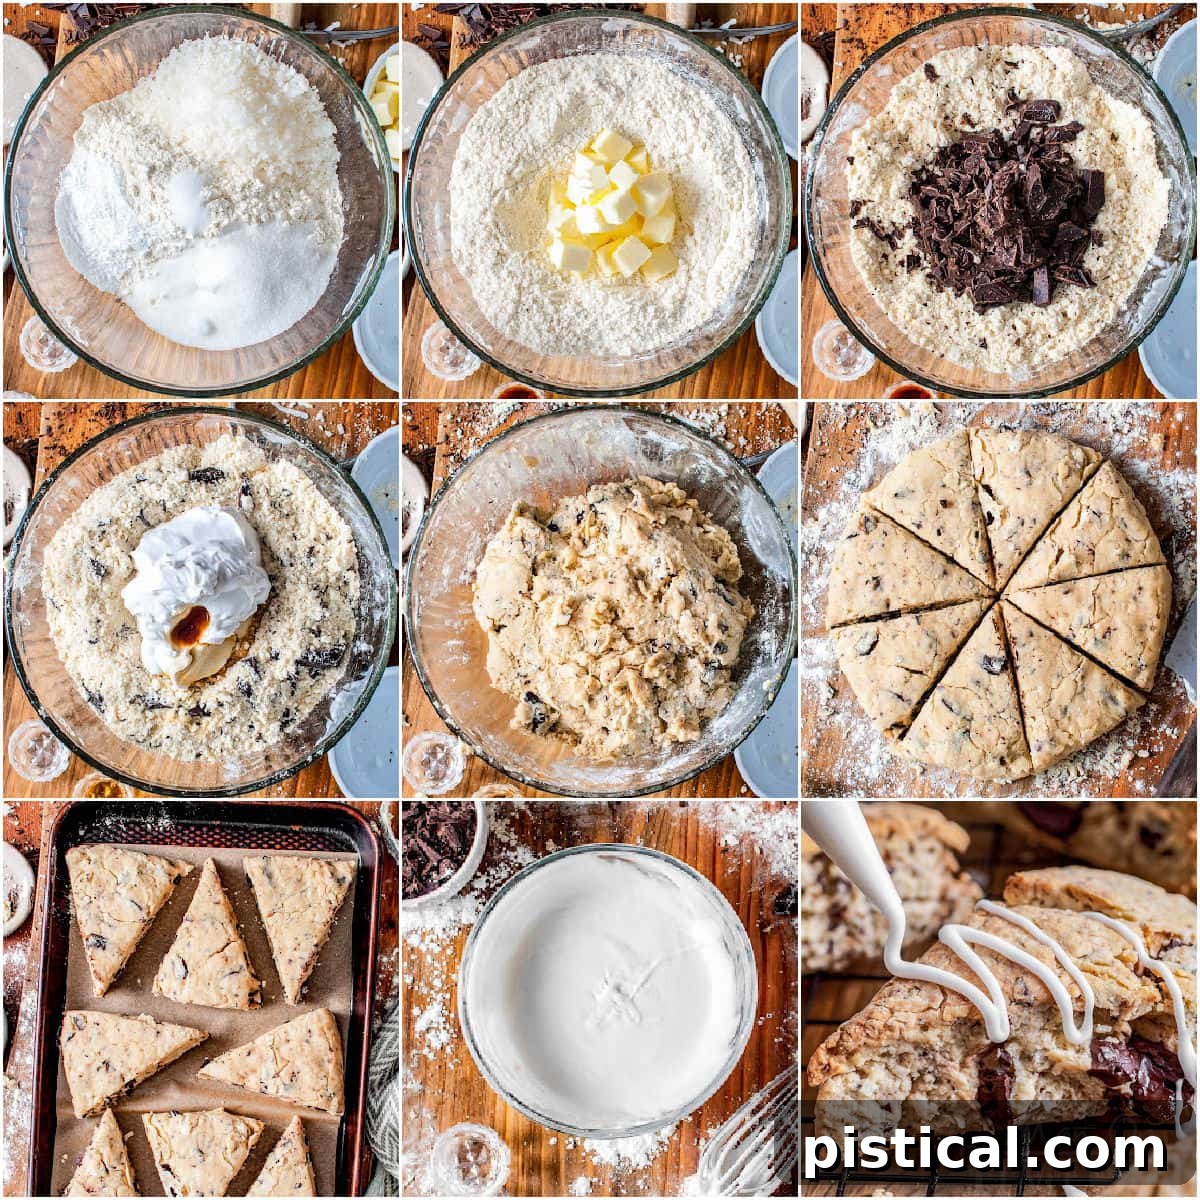
- Prepare Your Workspace and Oven: Begin by preheating your oven to a precise 400°F (200°C). This ensures the oven is at the optimal temperature when your scones are ready to bake, contributing to their perfect rise. Line a sturdy baking sheet with parchment paper or a silicone baking mat. This crucial step prevents sticking and makes transferring the delicate scones much easier. Set the prepared baking sheet aside.
- Process the Coconut and Combine Dry Ingredients: In the bowl of a food processor, add ¾ cup of the sweetened coconut flakes. Pulse them intermittently until they transform into a finely granular consistency, almost like coarse flour. This processing step is vital for evenly distributing the intense coconut flavor throughout the dough, ensuring every bite is infused with tropical essence without any undesirable stringy texture. Transfer the processed coconut to a large mixing bowl. Add the all-purpose flour, granulated sugar, baking powder, and salt to the bowl. Whisk these dry ingredients together thoroughly until they are well combined, ensuring the leavening agent and flavorings are evenly dispersed.
- Incorporate the Dark Chocolate: Take your chosen dark chocolate and chop it into a variety of sizes – from delightful small slivers to more substantial chunks. This variation in size ensures a delightful textural experience, with pockets of gooey chocolate throughout the scone. Reserve about ¼ of the chopped chocolate to use later as a stunning topping. Add the remaining ¾ of the chopped chocolate to the bowl with the flour mixture and gently stir to distribute it evenly amongst the dry ingredients.
- Cut in the Cold Butter and Add Wet Ingredients: Add the cold, cubed salted butter directly into the bowl with your dry ingredients. Using your fingertips, a pastry cutter, or even two knives, work the butter into the flour mixture. Continue until the mixture resembles coarse, sandy crumbs with some pea-sized pieces of butter still visible. Avoid overworking it, as this can lead to tough scones. In a separate small bowl, whisk together the unsweetened coconut cream, vanilla extract, and coconut extract. Pour this fragrant wet mixture into the bowl of dry ingredients. Stir gently with a spatula or your hands until a shaggy dough just begins to form. The key is to mix until it barely comes together; the dough should be on the drier side and cohesive, not overly sticky or wet. If your dough feels too wet, sprinkle in an extra tablespoon of flour. Conversely, if it seems too dry and crumbly to come together, add a teaspoon more of coconut cream until the desired consistency is achieved.
- Shape, Cut, and Bake to Perfection: Turn the scone dough out onto a lightly floured cutting board or clean countertop. Gently press and shape the dough into a uniform 8-inch (approximately 20 cm) circle, aiming for an even thickness of about 1 to 1.5 inches. Take care to round the edges smoothly and gently press any visible cracks around the perimeter together to ensure even baking. Using a sharp knife or a bench scraper, cut the circle of dough into 8 equal wedges, much like slicing a pizza. Carefully transfer these delicate scone wedges to your prepared baking sheet, leaving adequate space between each for even air circulation. Bake the scones in your preheated oven for approximately 25 to 30 minutes. Keep a close eye on them; they are done when their edges are lightly golden brown and the tops feel set and firm to the touch. Immediately remove the baked scones from the oven and transfer them to a wire cooling rack to cool completely. This prevents the bottoms from becoming soggy and allows them to achieve their perfect texture.
Crafting the Decadent Coconut Icing
No Chocolate Coconut Scone is truly complete without its signature creamy icing. This simple yet luscious topping adds the perfect finishing touch of sweetness and moisture.
- Combine Icing Ingredients: In a small, clean bowl, whisk together the unsweetened coconut cream, coconut extract, and powdered sugar until the mixture is completely smooth and free of lumps. Aim for an icing consistency that is fairly thick but still fluid enough to be easily piped or drizzled. If your icing appears too thick, gradually add very small amounts of additional coconut cream (a teaspoon at a time) until it reaches your desired consistency. Conversely, if it’s too thin, incorporate a little more powdered sugar until it thickens sufficiently. Once perfect, transfer the icing to a piping bag with a small tip snipped off, or even a sturdy zip-top bag with one corner cut.
- Artfully Ice Your Cooled Scones: Patience is key here – ensure your baked scones have cooled completely on the wire rack before you begin icing. Once they are at room temperature, pipe a beautiful crosshatch pattern of the prepared coconut icing over the top of each scone. This not only adds visual appeal but ensures a lovely coating in every bite.
- Garnish and Serve: While the icing is still wet, immediately sprinkle the tops of the iced scones with the remaining shredded coconut and the reserved chopped dark chocolate. This final flourish adds an extra layer of texture and reinforces the delightful chocolate-coconut theme. Your heavenly Chocolate Coconut Scones are now ready to be enjoyed immediately! For optimal freshness and flavor, serve them as soon as possible.
Perfecting Your Scone Shape: Tips for Beautiful Results
The beauty of homemade scones lies not only in their taste but also in their rustic charm, which often comes from their varied shapes and sizes. While traditional bakers might favor specific techniques, there are several easy methods to achieve stunning results.
One classic approach involves using a biscuit cutter to create perfectly round scones. This method yields uniformly sized and shaped scones, which can look quite elegant, especially for a formal tea. Simply press the cutter straight down into the dough (avoid twisting, as this seals the edges and can inhibit rise), then lift it straight up. Gather and re-roll the scraps gently to cut additional scones.
For those seeking an even easier, more rustic option, “drop scones” are a fantastic choice. With this method, you simply scoop out portions of dough (using an ice cream scoop or two spoons) and drop them directly onto a prepared baking sheet. These irregularly shaped scones bake up wonderfully, often with delightfully crispy edges, and require minimal handling of the dough, which is a key to tender scones.
However, my preferred method for shaping these delicious Chocolate Coconut Scones involves forming the dough into a neat disc and then cutting it into wedges. This technique offers a wonderful balance between ease and a classic appearance. After gently pressing the dough into an 8-inch circle on a lightly floured surface, use a sharp knife or a bench scraper to cut the circle into 8 equal triangular wedges. This method minimizes dough handling, helps create those desirable flaky layers, and results in a beautiful, uniform presentation that is both charming and inviting. Whichever method you choose, remember that gentle handling is crucial to keeping the scones tender.
Storage Information and Reheating Tips
To ensure your freshly baked Chocolate Coconut Scones remain as delicious as possible, proper storage is key. Scones are truly at their peak on the day they are baked, offering the best texture and flavor. However, if you find yourself with leftovers, they should be stored at room temperature in an airtight container. This will help maintain their tenderness and prevent them from drying out for up to 2 days.
For longer preservation, these scones freeze beautifully. Once they have completely cooled to room temperature, transfer them to a freezer-safe, airtight container or a heavy-duty freezer bag. Ensure they are well-wrapped or sealed to protect them from freezer burn. They can be frozen for up to 3 months. To enjoy, simply thaw the frozen scones at room temperature for several hours. For a warm treat, you can gently reheat them in the microwave for about 20-30 seconds on medium heat, or for a crispier exterior, warm them in a preheated oven at 300°F (150°C) for 10-15 minutes until heated through.
Essential Tools You’ll Need for Scone Success
Creating these delightful scones is made even easier with the right kitchen tools. You likely have most of these on hand, but here’s a quick overview of the essential equipment that will help you achieve perfect results:
- Large Baking Sheet: A standard half-sheet pan is perfectly sized for baking a batch of 8 scones, allowing adequate space for them to rise and bake evenly.
- Parchment Paper or Silicone Baking Mat: Lining your baking sheet with either of these is indispensable. It prevents the scones from sticking, ensures even baking, and makes transferring them from the baking sheet to a cooling rack effortless and mess-free.
- Pastry Cutter: This specialized tool makes incredibly quick work of cutting cold butter into the flour, which is a crucial step for flaky scones. If you don’t have one, don’t worry – you can effectively achieve the same result using two knives, a fork, or even your fingertips (just work quickly to keep the butter cold).
- Bench Scraper or Large Knife: A bench scraper is incredibly handy for gathering dough and, more importantly, for cleanly cutting the dough disc into perfect wedges. A large, sharp kitchen knife will also perform this task admirably.
Frequently Asked Questions About Scones
Can these scones be frozen?
Absolutely! Scones freeze beautifully. Allow them to cool completely after baking, then transfer them to a freezer-safe zip-top bag or an airtight container. They can be frozen for up to 3 months. When you’re ready to enjoy, you can reheat them in the microwave for about 20-30 seconds on medium heat, or simply let them thaw at room temperature for a few hours. For a crispier texture, a few minutes in a low oven works wonders.
Can scones be made in advance?
While scones are undeniably best enjoyed fresh on the day they are baked, they can certainly be made in advance. After baking, they will remain delicious for approximately 2 days when stored properly. For longer planning, freezing them (as detailed above) is an excellent option that allows you to have fresh-tasting scones ready whenever a craving strikes.
How do I store these scones?
To keep your scones fresh, store them at room temperature. The best method is to place them in an airtight container. This helps to lock in moisture and prevents them from becoming stale too quickly. Alternatively, they can be stored loosely covered. For slightly extended freshness, especially in warmer climates, you can also store them in the fridge, again in an airtight container.
Trish’s Expert Tips and Tricks for Scone Perfection
- Understanding Coconut Cream: It’s crucial to distinguish coconut cream from coconut milk; they are not the same. Coconut cream is much thicker and richer, almost resembling the consistency of yogurt or sour cream. You’ll typically find it in cans within the Asian foods section of most grocery stores, or wherever canned coconut milk is stocked. This thickness is key for both the scone’s tenderness and the icing’s richness.
- The Power of Processed Coconut: I highly recommend not skipping the food processor step for the coconut. Pulsing a portion of the coconut flakes finely chops them, ensuring that the incredible coconut flavor permeates every single bite of the scone. More importantly, it eliminates the stringy texture that some people dislike in whole coconut flakes, resulting in a smoother, more palatable scone with maximum flavor impact. If you don’t own a food processor, don’t worry! You can absolutely use the flakes whole, though the texture might be slightly different, and the flavor slightly less uniform, it will still be utterly delicious.
- Chocolate, Glorious Chocolate: For these specific scones, I opted for a dark chocolate to provide a deep, sophisticated contrast to the sweet coconut. However, the beauty of baking is personalization! You have the freedom to choose your preferred level of darkness – go really intense with a high cacao percentage for a bolder flavor, or opt for a semi-sweet chocolate if you prefer a milder, sweeter chocolate note. The quality of your chocolate will significantly impact the final taste, so choose wisely!
More Irresistible Coconut Treats You’ll Adore
If you’re a fellow coconut enthusiast, just like me, then you’re in for a real treat! The unique flavor and texture of coconut are incredibly versatile, lending themselves beautifully to a myriad of desserts and baked goods. Here are some of our absolute favorite coconut-infused creations that you absolutely won’t want to miss. Prepare to add these to your must-bake list!
- Classic Coconut Cream Pie
- Easy 4-Ingredient Almond Joy Cookies
- Homemade Copycat Almond Joy Candy Bars
- Perfect Chewy Coconut Macaroons
- Luscious Raspberry Coconut Magic Bars
How To Make Chocolate Coconut Scones

Chocolate Coconut Scones
These delightful Coconut Scones are studded with dark chocolate and topped with a decadent coconut icing. This easy chocolate coconut scones recipe has a tender crumb and is full of coconut flavor – perfect for brunch, breakfast or afternoon tea!
Course: Breakfast, Brunch
Cuisine: American
Keyword: almond joy scones, coconut scones, chocolate coconut scones
Prep Time: 15 minutes
Cook Time: 25 minutes
Servings: 8
Author: Trish – Mom On Timeout
Ingredients
Scones
- 1 cup sweetened coconut flakes
- 2 ½ cups all-purpose flour
- ¼ cup granulated sugar
- 1 tablespoon baking powder
- ½ teaspoon salt
- 6 ounces dark chocolate (chopped, I used two bars)
- 7 tablespoons salted butter (cubed and chilled)
- 1 cup unsweetened coconut cream
- 1 teaspoon vanilla extract
- ½ teaspoon coconut extract
Coconut Icing
- 3 tablespoons unsweetened coconut cream
- ½ teaspoon coconut extract
- ¾ cup powdered sugar
Instructions
- Preheat your oven to 400°F (200°C). Prepare a baking sheet by lining it with parchment paper or a silicone baking mat. Set aside.
- In a food processor, pulse ¾ cup of the sweetened coconut flakes until they are finely ground and granular. This helps distribute the coconut flavor evenly throughout the scones. Transfer the processed coconut to a large mixing bowl.
- Add the all-purpose flour, granulated sugar, baking powder, and salt to the bowl with the coconut and whisk thoroughly to combine.
- Chop the dark chocolate into varying sizes, from small chunks to slivers, to ensure delightful chocolate pockets in every bite. Reserve approximately ¼ of the chopped chocolate to use later as a topping. Add the remaining ¾ of the chopped chocolate to the flour mixture and stir until evenly distributed.
- Add the cold, cubed salted butter to the dry ingredients. Using your fingertips or a pastry cutter, work the butter into the flour mixture until it resembles coarse, sandy crumbs with some pea-sized pieces of butter remaining. This step is crucial for achieving tender, flaky scones.
- In a separate small bowl, combine the unsweetened coconut cream, vanilla extract, and coconut extract. Pour this wet mixture into the dry ingredients and stir gently with a spatula or your hands until a cohesive dough just begins to form. The dough should not be sticky or overly wet; it should be on the drier side but hold together when pressed. If it’s too wet, add a tablespoon of flour; if too dry, add a teaspoon of coconut cream.
- Turn the dough out onto a lightly floured surface or cutting board. Gently press and shape the dough into an 8-inch (20 cm) circle, aiming for an even thickness. Smooth out the edges and press any cracks together. Using a sharp knife or a bench scraper, cut the circle into 8 equal wedges. Carefully transfer these scones to the prepared baking sheet, leaving some space between each.
- Bake the scones in the preheated oven for approximately 25 to 30 minutes, or until their edges are lightly golden brown and the tops are set. Once baked, remove them from the oven and immediately transfer them to a wire cooling rack to cool completely before icing.
Coconut Icing
- In a small bowl, whisk together the unsweetened coconut cream, coconut extract, and powdered sugar until smooth. The icing should be thick enough to pipe but still flowable. Adjust consistency by adding more powdered sugar for thickness or a tiny bit more coconut cream (or milk/heavy cream) for a thinner consistency. Transfer the icing to a piping bag with the tip snipped or a small zip-top bag with a corner cut off.
- Once the scones have cooled completely, pipe a decorative crosshatch pattern of icing over the top of each scone.
- Immediately sprinkle the tops of the iced scones with the remaining shredded coconut and the reserved chopped dark chocolate.
- Serve these delightful Chocolate Coconut Scones immediately for the freshest taste, or store them as directed below.
Notes
Storage Information
Freshly baked scones are best enjoyed on the day they are made. If you have leftovers, store them at room temperature in an airtight container for up to 2 days to maintain their tenderness and flavor.
To freeze scones, allow them to cool completely after baking. Transfer them to a freezer-safe, airtight container or a heavy-duty freezer bag, ensuring they are well-protected from freezer burn. They can be frozen for up to 3 months. Thaw frozen scones at room temperature for several hours or reheat gently in a microwave for about 20-30 seconds on medium heat for a quick treat. You can also warm them in a low oven (around 300°F/150°C) for 10-15 minutes until heated through.
Nutrition Facts
(Per serving, approximate)
- Calories: 596kcal
- Carbohydrates: 66g
- Protein: 7g
- Fat: 35g
- Saturated Fat: 25g
- Polyunsaturated Fat: 1g
- Monounsaturated Fat: 6g
- Trans Fat: 0.4g
- Cholesterol: 27mg
- Sodium: 263mg
- Potassium: 504mg
- Fiber: 5g
- Sugar: 27g
- Vitamin A: 314IU
- Vitamin C: 1mg
- Calcium: 95mg
- Iron: 5mg