
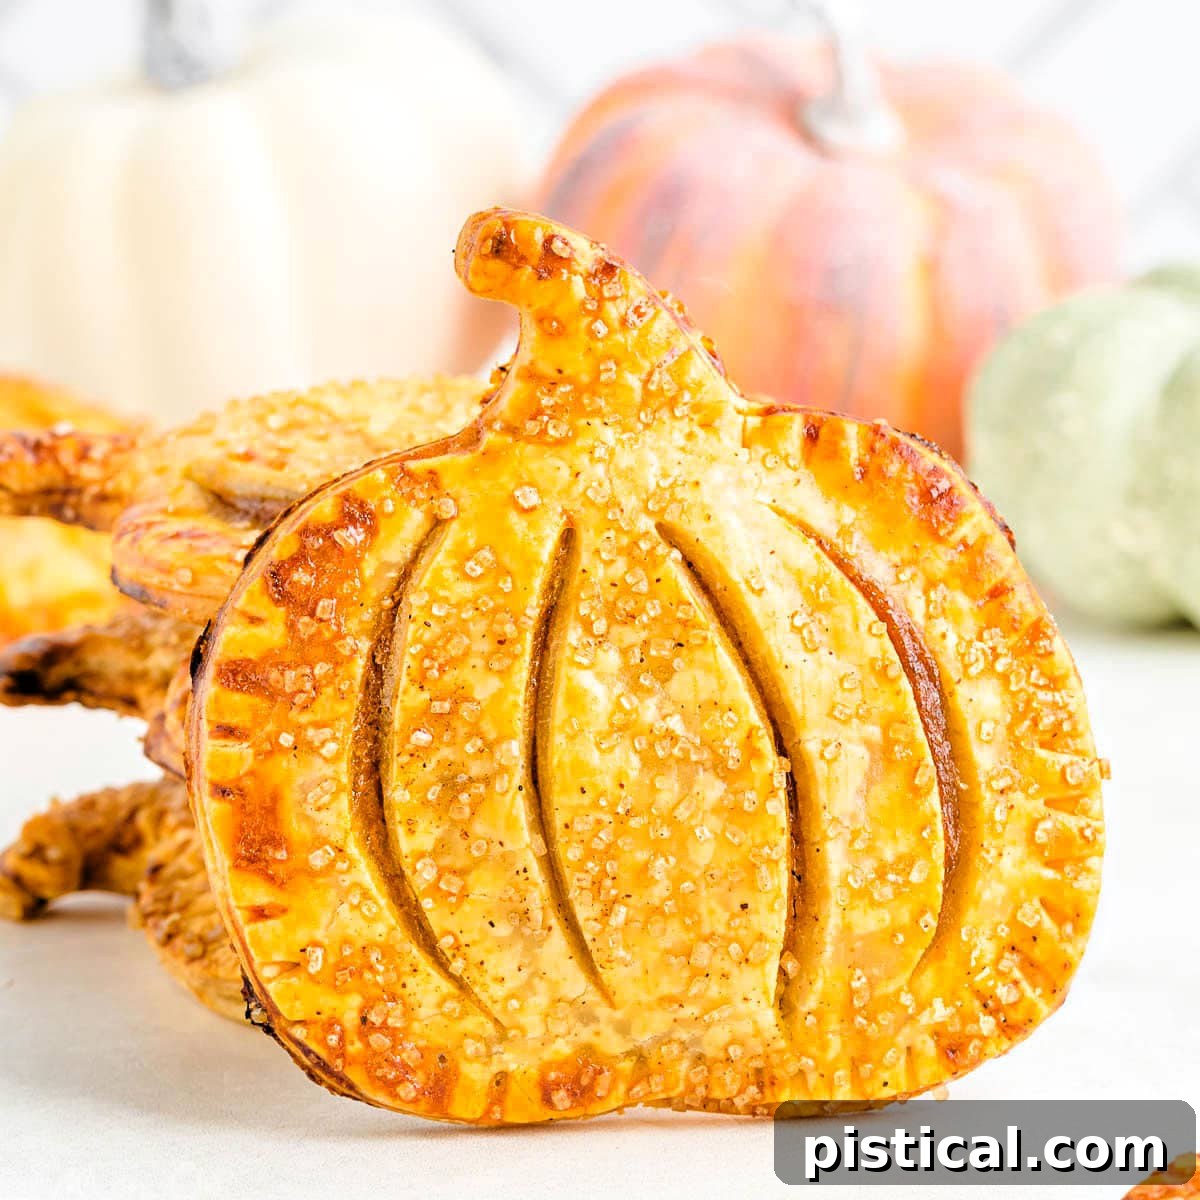
Pumpkin Hand Pies: The Ultimate Holiday Treat for Effortless Entertaining
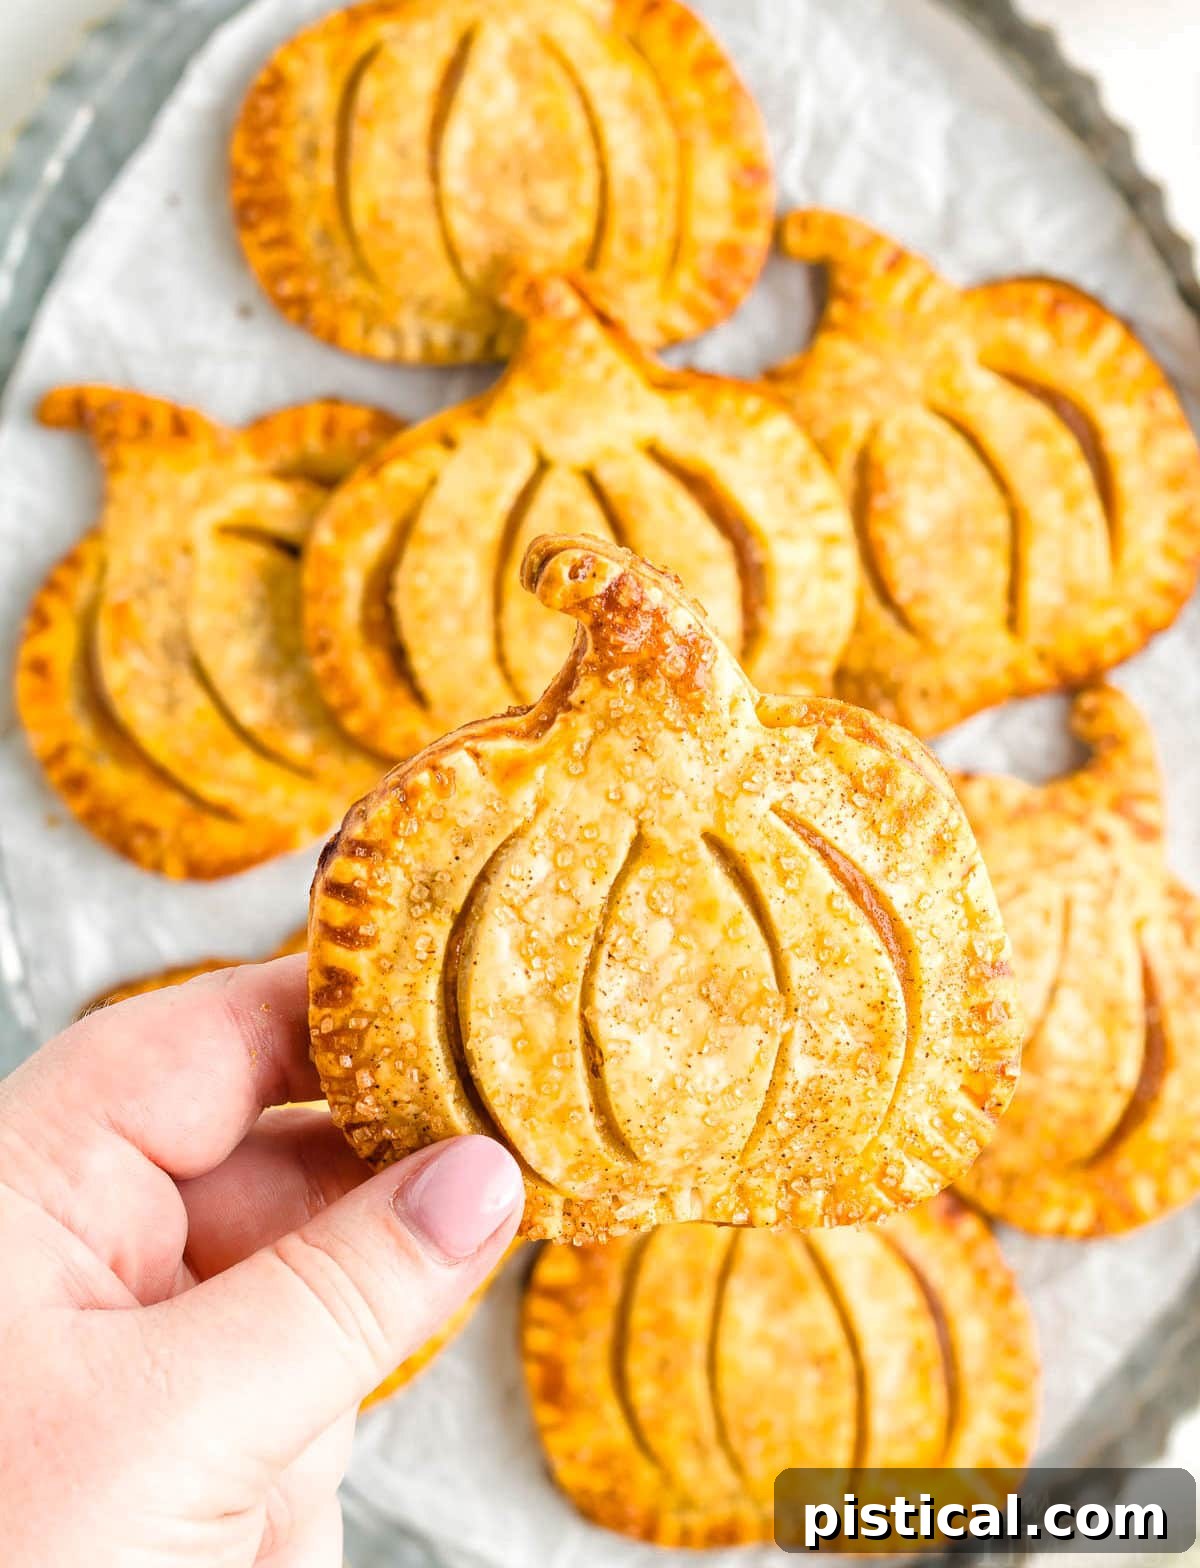
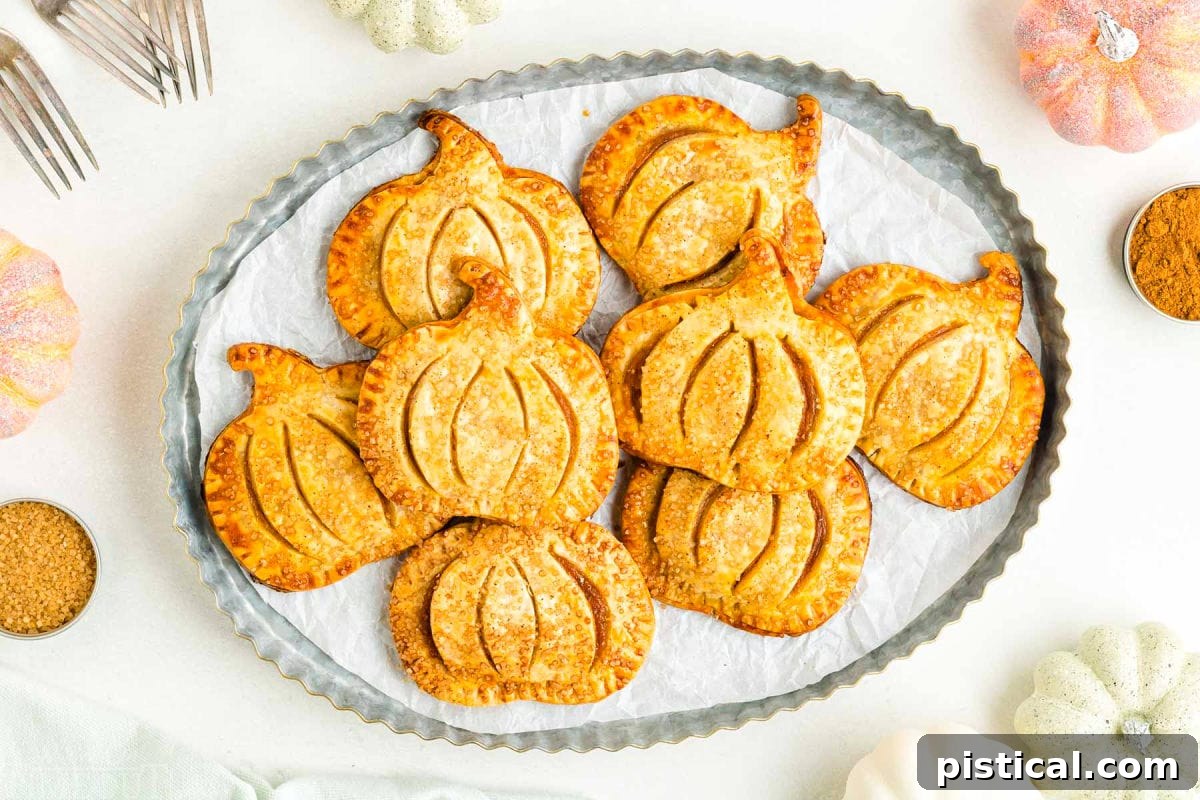
Say goodbye to the fuss of traditional pies and welcome the charm of Pumpkin Hand Pies into your autumn and holiday celebrations! These delightful mini treats offer all the beloved flavors of classic pumpkin pie in a perfectly portable, individual serving. Imagine a rich, creamy pumpkin filling, infused with aromatic spices, nestled within a golden, flaky crust. Each bite delivers a comforting taste of the season, making these hand pies an irresistible dessert for friends and family alike. Best of all, their adorable pumpkin shape makes them almost too beautiful to eat!
If your heart beats for delicious pumpkin desserts, you’ll definitely want to explore more of our favorites. Dive into the luscious layers of our Pumpkin Cheesecake Trifle, indulge in the decadent Better Than Anything Pumpkin Cake, or savor the simple joy of Pumpkin Delight!
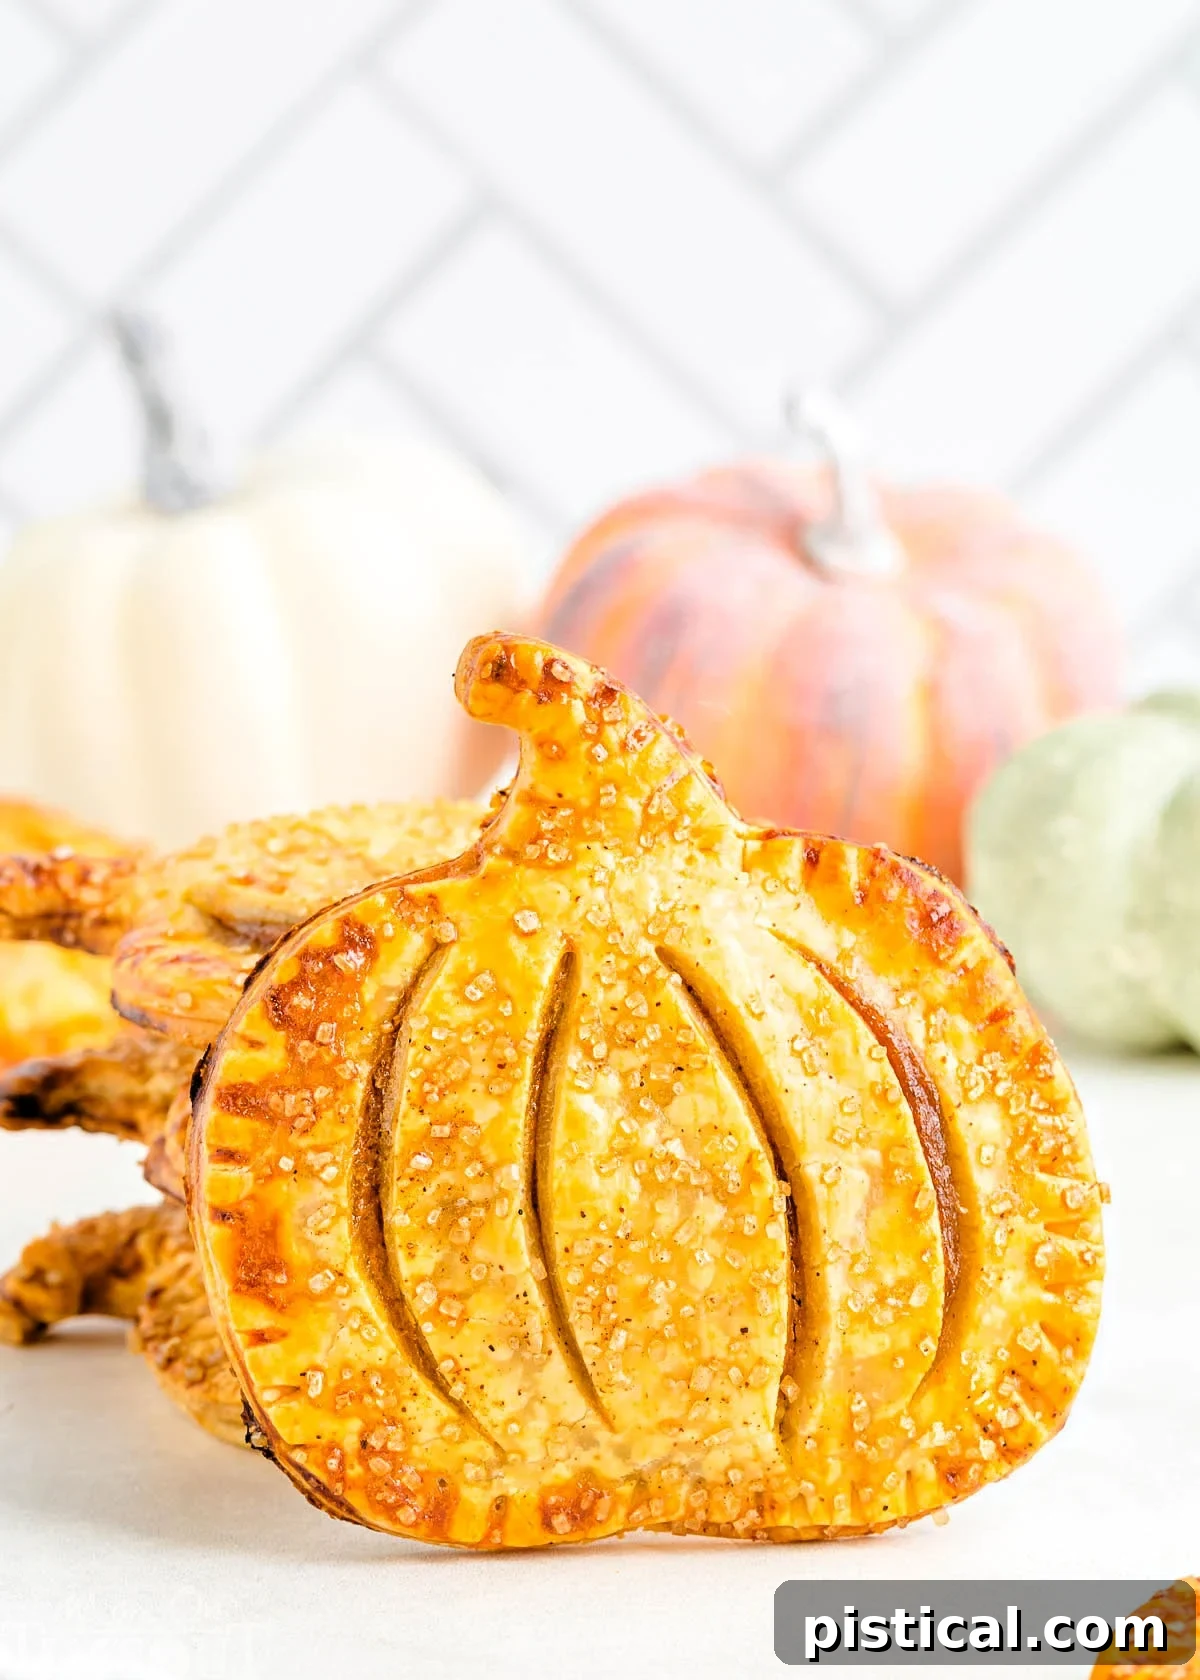
Why Pumpkin Hand Pies Are Your New Favorite Dessert
While the thought of baking a classic pie can sometimes feel daunting, these mini pumpkin pies transform the experience into something utterly enjoyable and incredibly convenient. Forget the stress of slicing and plating individual pie servings; with hand pies, it’s a simple grab-and-go affair that makes entertaining a breeze!
Effortless Serving & Perfect Portions
One of the biggest advantages of pumpkin hand pies is their inherent portability and perfect portion size. Each guest can easily pick up their own dessert, eliminating the need for plates, forks, or the often-messy process of cutting slices from a larger pie. This makes them ideal for holiday gatherings, potlucks, fall picnics, or even a cozy evening treat at home. The individual servings also help with portion control, allowing everyone to enjoy a satisfying dessert without overindulging, making them a smart choice for any occasion.
Ideal for Holiday Baking and Meal Prep
The holiday season often brings a flurry of cooking and baking, making oven space a precious commodity. This pumpkin hand pie recipe is a game-changer because it can be easily doubled or even tripled to accommodate any crowd size, big or small. More importantly, these delightful pies can be prepared in advance, freeing up your oven and your time on busy cooking days. You can bake them ahead and store them, or even assemble and freeze them unbaked, ready to be popped into the oven whenever you need a fresh, warm dessert. This flexibility is invaluable when planning your holiday menu, ensuring you spend more time with loved ones and less time in the kitchen.
A Symphony of Flavors and Textures
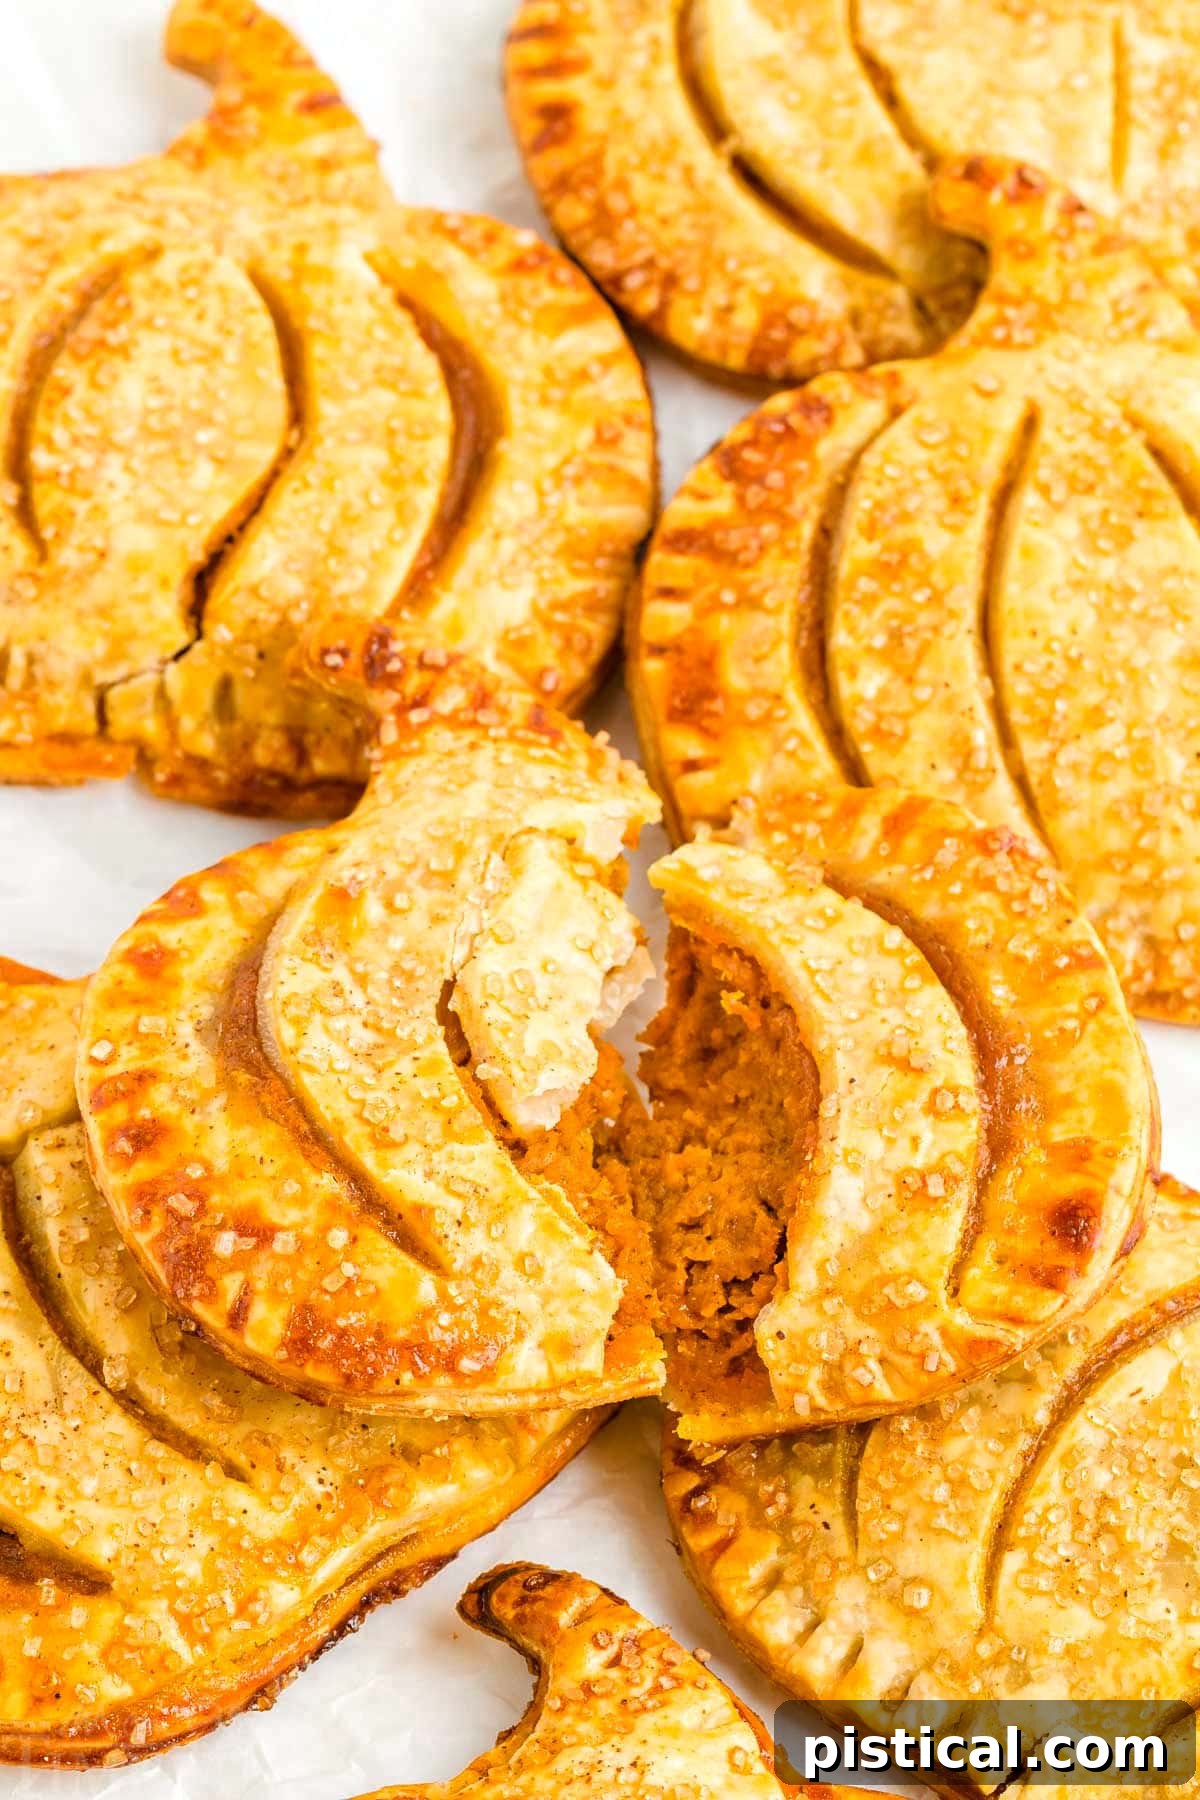
Beyond their convenience, these hand pies are a true delight for the senses. The creamy, rich pumpkin filling, bursting with traditional pumpkin pie spice, offers a warm and inviting flavor profile that evokes the essence of autumn. This delectable filling is perfectly complemented by a golden, irresistibly flaky crust that provides a satisfying contrast in texture. A sprinkle of spiced sugar on top adds a subtle crunch and a hint of sparkle, making each hand pie not just a dessert, but a miniature culinary masterpiece that’s both delicious and visually appealing.
Hand Pies are so much fun! Ready to explore more hand pie deliciousness? Don’t miss our festive Caramel Apple Hand Pies and the wonderfully simple Blueberry Hand Pies for more easy and delightful variations on this versatile dessert concept!
Discover More Irresistible Pumpkin Desserts
The versatility of pumpkin in baking means you can never have too many pumpkin dessert options! Here are even more beloved recipes to satisfy your autumn cravings and complete your festive spread:
- Pumpkin Cake with Chocolate Chips
- Pumpkin Whoopie Pies
- The BEST Pumpkin Chocolate Chip Cookies
- Pumpkin Chocolate Chip Bread
- Pumpkin Brownies
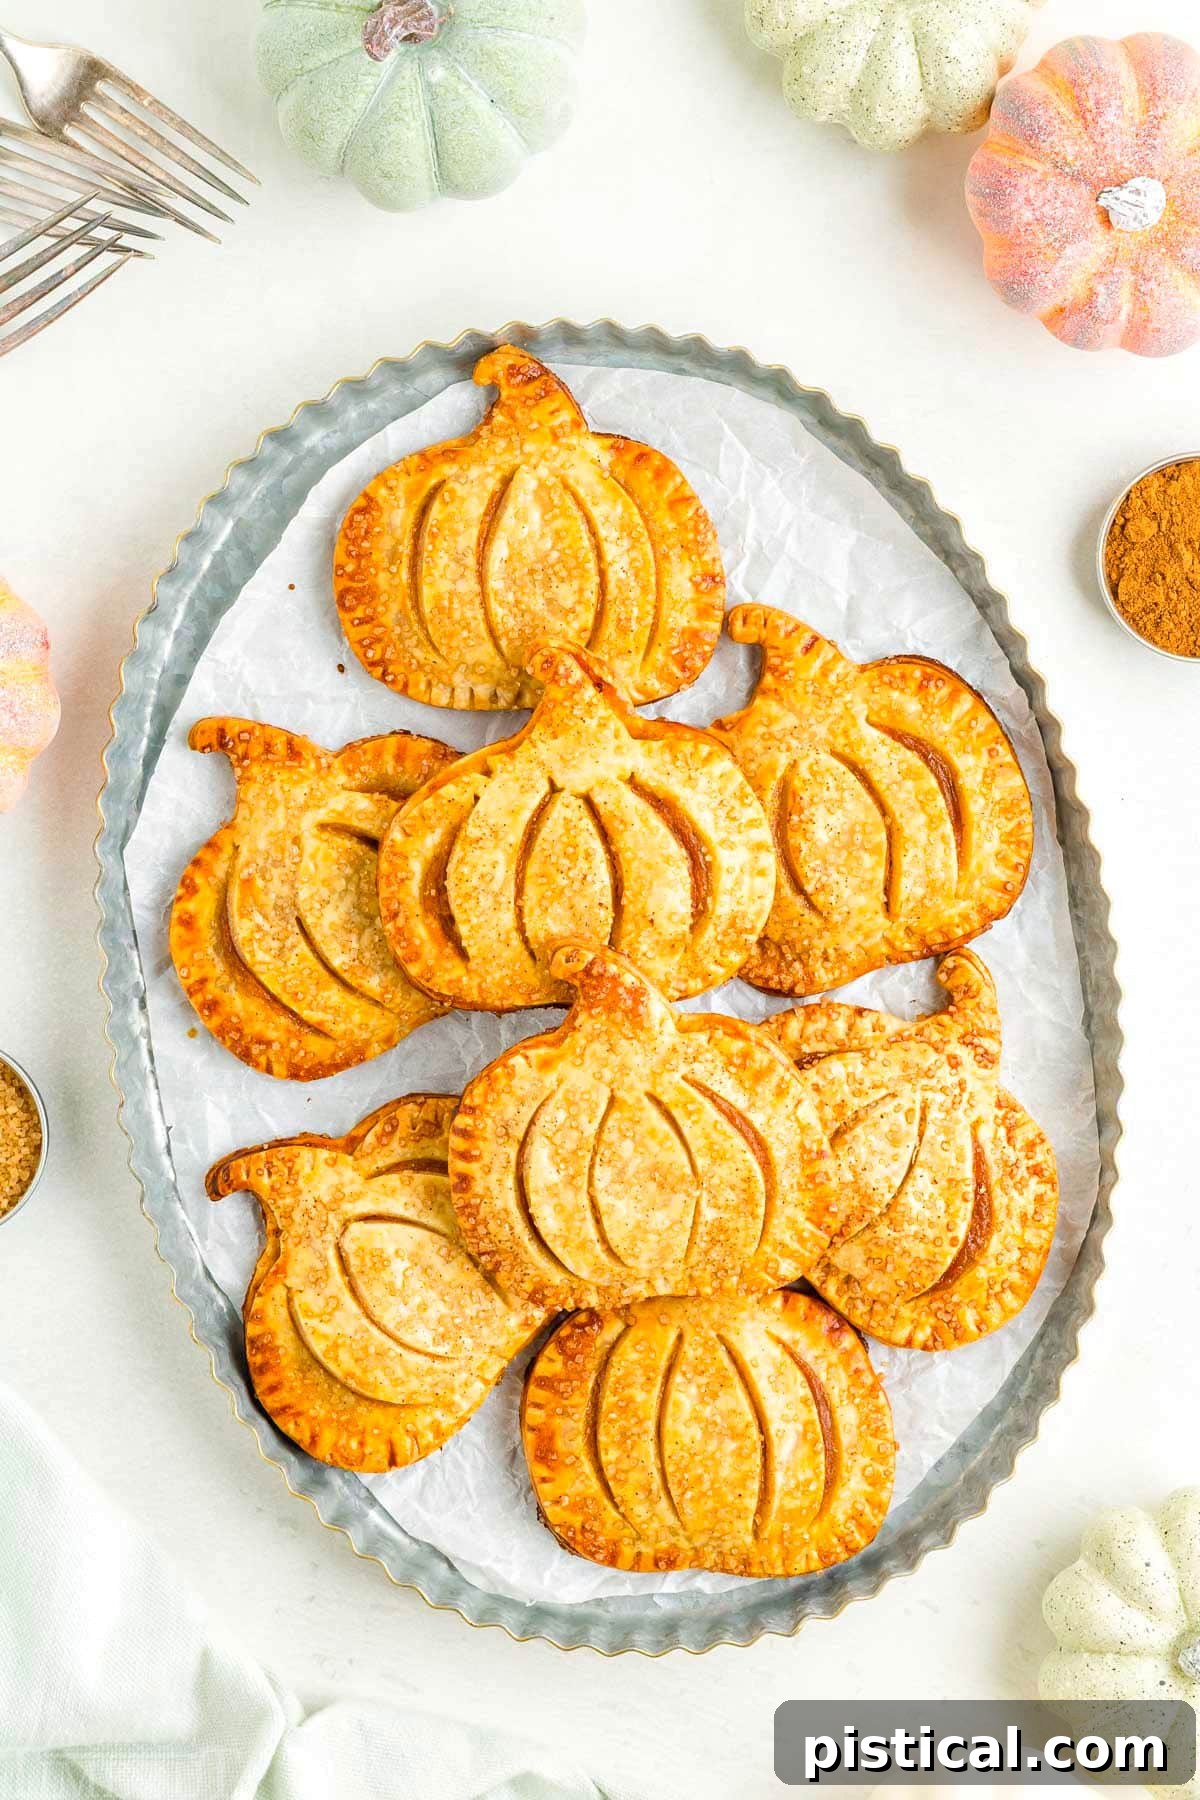
Gathering Your Ingredients for Pumpkin Hand Pies
Crafting these delightful hand pies requires just a few straightforward ingredients, most of which you likely already have in your pantry during the fall season. With a focus on flavor and convenience, this recipe keeps things simple without compromising on taste. Below is a detailed look at what you’ll need, along with tips for best results. For the full, printable recipe card with exact measurements and complete instructions, please refer to the end of this post.
For the Flaky Crust:
- Refrigerated Pie Crusts: We recommend using a package containing two pre-made pie crusts for ultimate convenience. While a homemade pie crust offers a wonderful touch, store-bought crusts significantly cut down on prep time, making this recipe accessible even on busy days. Choose your favorite brand for the best results, ensuring a buttery and flaky texture. Always make sure the crusts are chilled but not frozen; this makes them easier to unroll, handle, and prevents sticking.
For the Rich Pumpkin Pie Filling:
- Pumpkin Puree: This is a crucial distinction! Make absolutely certain you purchase canned pumpkin puree and NOT pumpkin pie filling. Pumpkin puree is 100% cooked, mashed pumpkin, offering a neutral base for our spices. Pumpkin pie filling, on the other hand, comes pre-spiced and sweetened, which would throw off the meticulously balanced flavor profile of our recipe. Always read the label carefully to ensure you have the right ingredient for the perfect filling.
- Brown Sugar: Whether you opt for light or dark brown sugar, its rich molasses notes add depth and a lovely caramel undertone to the pumpkin filling. Using packed brown sugar ensures accurate measurement and contributes to the moistness of the filling.
- Heavy Cream: This ingredient is key to achieving the filling’s luxurious, creamy texture. Heavy cream provides a rich mouthfeel that perfectly complements the pumpkin flavor. If heavy cream isn’t available, you can easily substitute it with evaporated milk or half-and-half without significantly altering the final consistency or robust flavor.
- Pumpkin Pie Spice: This quintessential blend is the heart of our pumpkin pie flavor, infusing the filling with warmth and aromatic complexity. You can use a high-quality store-bought pumpkin pie spice blend or easily whip up your own homemade version (check out our recipe for details!). It typically includes cinnamon, nutmeg, ginger, and cloves, bringing that unmistakable, cozy warmth to every bite.
- Kosher Salt: Just a small pinch of salt is essential to balance the sweetness of the sugar and enhance all the wonderful, nuanced flavors in the pumpkin filling. Sea salt can also be used as a suitable alternative, offering a similar pure salt taste.
For the Irresistible Topping:
- Egg: Whisked with a little water, this creates an egg wash. Brushing this mixture over the tops of your hand pies before baking gives them a beautiful, glossy, golden-brown finish that looks as good as it tastes. It also serves a practical purpose by helping the sparkling sugar topping adhere to the crust.
- Coarse Sanding Sugar: This is an optional but highly recommended ingredient for adding a special, professional touch. The larger, crystal-like granules of sanding sugar (such as turbinado sugar or pearl sugar) provide a lovely sparkle and a delightful textural crunch that elevates these hand pies from simply delicious to truly extraordinary. Standard granulated sugar can be used if sanding sugar isn’t on hand, though it will offer less crunch and shimmer.
- Additional Pumpkin Pie Spice: A small amount of pumpkin pie spice mixed with the coarse sanding sugar is sprinkled over the pies just before baking. This not only reinforces the warm spice flavor on the surface but also adds a beautiful visual element, enhancing the overall festive appeal of the golden crust.
How to Bake Perfect Pumpkin Hand Pies: Step-by-Step
Follow these simple, clear instructions to create your own batch of irresistible pumpkin hand pies. The process is straightforward, ensuring a delicious and picture-perfect outcome every time!
Step 1: Prepare Your Crusts and Baking Sheets
- Preheat Oven & Line Sheets: Begin by preheating your oven to a cozy 400°F (200°C). This ensures the oven is at the correct temperature for even baking and a flaky crust. Prepare two large baking sheets by lining them with parchment paper. This crucial step prevents sticking and makes for incredibly easy cleanup.
- Roll Out Pie Crusts: Gently unroll the refrigerated pie crusts onto a lightly floured flat surface. The flour prevents sticking. Use a rolling pin to carefully roll out the dough just enough to smooth out any creases. Be mindful not to over-roll the dough, as this can make it tough and reduce flakiness. The goal is a slightly thinner, more pliable crust that’s easier to cut and assemble.
- Cut Out Shapes: Using a 3 to 4-inch pumpkin-shaped cookie cutter, firmly press down to cut out as many pumpkin shapes as possible from each pie crust. Carefully transfer these delicate shapes to your prepared baking sheets, ensuring they are not touching, allowing even air circulation during baking.
- Gather Scraps & Cut More: Gently gather any dough scraps, lightly press them together to form a cohesive ball, and re-roll to cut out additional pumpkin shapes. Avoid overworking the dough excessively, which can develop the gluten and result in a tough crust. You should yield approximately 8 to 10 pumpkins from each pie crust, for a generous total of 16 to 20 hand pies.
- Chill Dough: Once all your pumpkin shapes are cut and placed on the baking sheets, transfer the sheets to the refrigerator to chill while you prepare the filling. Chilling the dough helps firm up the butter, which is essential for maintaining its flakiness and preventing excessive spreading or shrinking during baking.
Step 2: Whip Up the Creamy Pumpkin Pie Filling
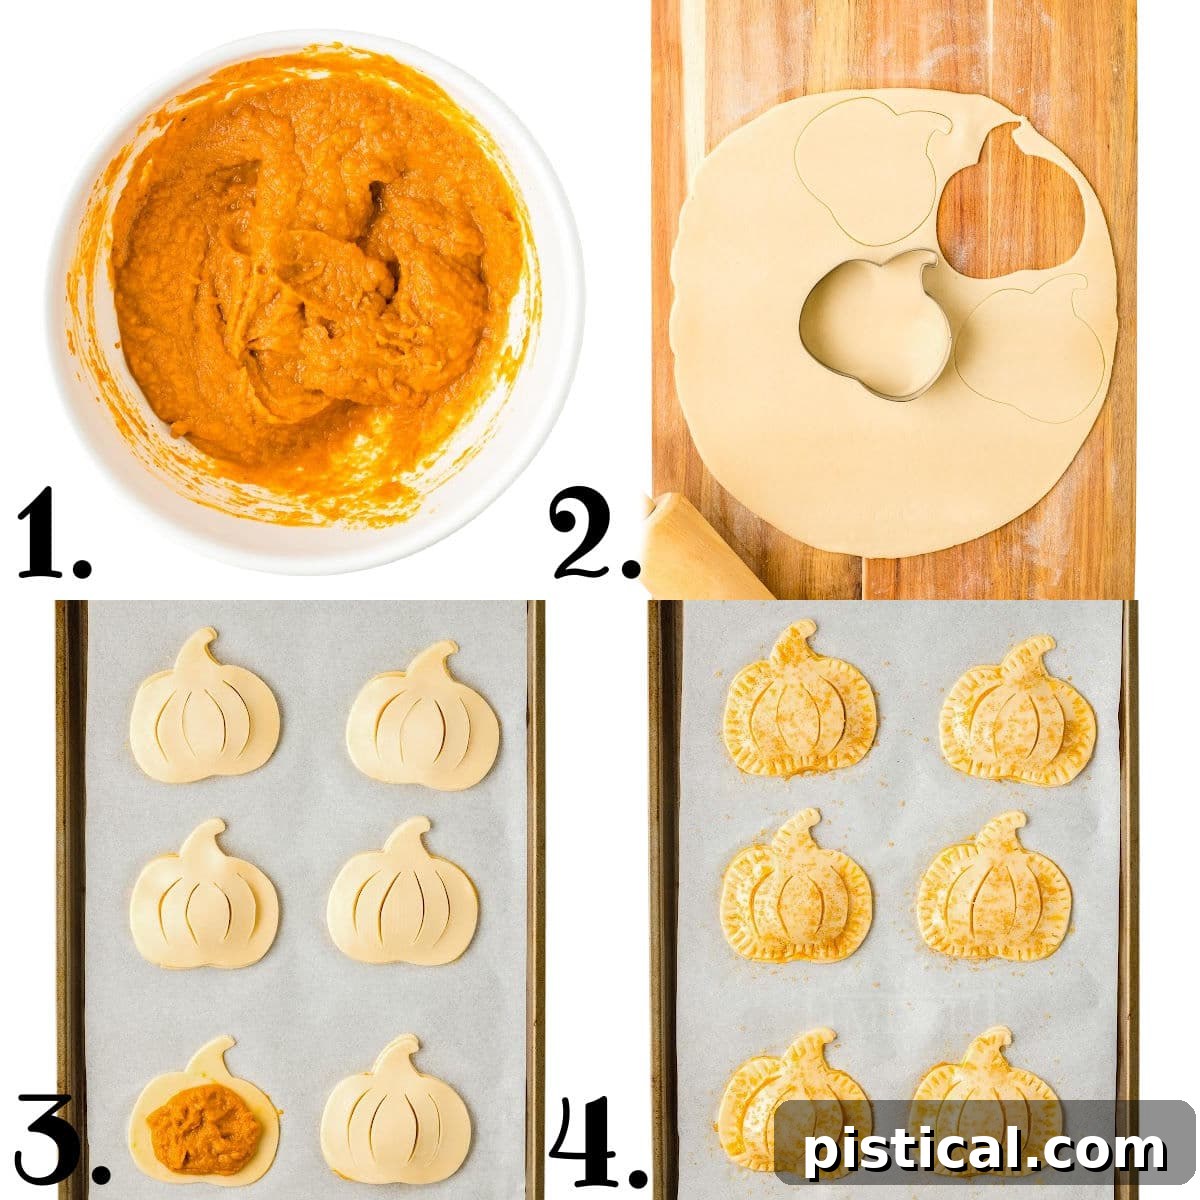
- Combine Filling Ingredients: In a medium-sized bowl, whisk together the pumpkin puree, brown sugar, heavy cream, 1 ½ teaspoons of pumpkin pie spice, and kosher salt until the mixture is completely smooth and well combined. Ensure there are no lumps of brown sugar, resulting in a silky, consistent filling.
- Fill Bottom Crusts: Retrieve one of the chilled baking sheets with pumpkin crusts from the refrigerator. Spoon 2 to 3 tablespoons of the pumpkin filling onto the center of each pumpkin shape. The exact amount will depend on the size of your cookie cutter. It’s crucial to leave a clear ⅓-inch border around the edge of each crust. This empty space is vital for properly sealing the pies later.
- Prepare Top Crusts: Take the second tray of pumpkin crusts from the refrigerator. Using a small, sharp knife, carefully cut four curved slits into the center of each remaining crust. These slits are not only decorative, mimicking the natural ridges of a pumpkin, but also serve a critical function as vents. They allow steam to escape during baking, preventing the pies from puffing up excessively or bursting open.
Step 3: Assemble, Top, and Bake to Perfection
- Create Egg Wash: In a small bowl, lightly whisk one egg with one teaspoon of water until well combined. This is your egg wash, which will help seal the pies and give them a beautiful golden sheen.
- Seal the Pies: Using a pastry brush, lightly brush the ⅓-inch border of the bottom crusts (those with filling) with the prepared egg wash. This acts as a “glue.” Carefully place a top crust (with the decorative slits) over each filled bottom crust. Gently press the edges together with your fingers to seal. Then, use the tines of a fork to crimp the edges firmly, ensuring a tight seal that will hold the filling in and adding a charming, rustic decorative touch.
- Apply Topping: Brush the tops of all assembled hand pies with the remaining egg wash. This enhances browning and helps the sugar adhere. In a separate small bowl, combine the coarse sanding sugar and the remaining ½ teaspoon of pumpkin pie spice. Evenly sprinkle this spiced sugar mixture generously over the tops of all the hand pies.
- Bake Golden Brown: Carefully transfer the baking sheets back into the preheated oven. Bake for 15 to 20 minutes, or until the crusts are beautifully golden brown, puffed, and the filling is visibly bubbly. Keep a close eye on them during the last few minutes; if the edges (especially the delicate pumpkin stems) start to brown too quickly, you can loosely cover those specific areas with small strips of aluminum foil to prevent over-browning.
- Cool and Serve: Once baked, carefully remove the hand pies from the oven. Let them rest on the baking sheets for about 5 minutes to allow the filling to set and the crusts to firm up before moving. This brief resting period prevents them from breaking. After resting, carefully transfer them to a wire cooling rack to cool completely, or enjoy them warm from the oven.
Tips and Tricks for the Best Pumpkin Hand Pies
Making these hand pies is wonderfully straightforward, but a few expert tips can elevate your baking and ensure perfect results every time:
- Embrace Variety in Shapes: Don’t limit yourself to just one pumpkin cookie cutter! Use a variety of 3 to 4-inch pumpkin shapes to create an assortment of unique hand pies. The more variety, the merrier, and they’ll look even more charming and festive on your dessert platter. Just remember to always cut out your shapes in pairs – one for the bottom and one for the top crust!
- The Importance of Vents: Those decorative slits you cut into the top crusts aren’t just for aesthetics. They are crucial for allowing steam to escape during the baking process. Without these vents, the trapped steam could cause your hand pies to puff up excessively, deform, or even burst open, leading to a less appealing presentation and potentially uneven baking.
- Preventing a Soggy Bottom: To ensure your hand pies have a perfectly crisp and flaky bottom crust, avoid overfilling them. A consistent ⅓-inch border around the edges is sufficient. Also, make sure your oven is fully preheated to the specified temperature. A hot oven helps to set the crust quickly and prevents the dough from absorbing too much moisture from the filling.
- Perfecting the Golden Crust: The egg wash is your secret weapon for achieving that beautiful, glossy golden-brown color and professional finish. Don’t be shy when brushing it on! If you notice specific areas, especially the thinner edges or “stems” of your pumpkin pies, browning too quickly during baking, simply tent those areas loosely with small strips of aluminum foil to protect them from over-browning.
- Consider a Delicious Glaze: While the spiced sugar topping is fantastic and adds a lovely crunch, for an extra touch of sweetness and visual appeal, consider drizzling a simple glaze over your cooled hand pies. A quick mix of powdered sugar, a splash of milk or cream, and a tiny pinch of pumpkin pie spice creates a wonderful, elegant complement.
- Serving Suggestions: These adorable treats are absolutely delicious on their own, offering a complete flavor profile. However, for an indulgent and truly memorable experience, serve them warm alongside a generous dollop of homemade whipped cream, a scoop of creamy vanilla ice cream, or even a drizzle of caramel sauce. The delightful contrast of warm pie and cold topping is simply divine!
- Adjust Baking Time for Smaller Pies: If you decide to use smaller cookie cutters (under 3 inches), your hand pies will bake faster due to their reduced size. To prevent overcooking, start checking them for doneness around the 10-minute mark to ensure they don’t get too dark or overly crispy.
Holiday-Approved Pumpkin Desserts to Delight Everyone
Looking for more festive pumpkin recipes to complete your holiday spread? Here are some tried-and-true favorites that are sure to be a hit with family and friends, offering a variety of textures and flavors:
- Pumpkin Bars
- Praline Pumpkin Roll
- Pumpkin Delight
- Cranberry Pecan Pumpkin Bread
- Pumpkin Lasagna
Storage, Reheating, and Freezing Guide
One of the many benefits of these pumpkin hand pies is how well they store, making them perfect for preparing in advance or enjoying leftovers without sacrificing quality.
Storage Information:
Allow any leftover pumpkin hand pies to cool completely to room temperature before storing. Once thoroughly cooled, transfer them to an airtight container. Store them in the refrigerator, where they will stay fresh and delicious for up to 4 days. Proper cooling before sealing is key to preventing condensation from making the crust soggy and maintaining its flaky texture.
To Reheat for Best Enjoyment:
For that fresh-baked warmth and crispness, reheating is highly recommended. Avoid the microwave if possible, as it can make the crust soft.
- Oven Method: Preheat your oven to 350°F (175°C). Place the chilled hand pies directly on a baking sheet. Bake for 8 to 10 minutes, or until warmed through and the crust is crisp again to the touch.
- Air Fryer Method: For a quick reheat and an extra crispy crust, pop them into an air fryer at 350°F (175°C) for just 2 to 3 minutes. Keep a close eye on them during this rapid heating to prevent any over-browning.
Freezing for Future Delights:
These hand pies are excellent candidates for freezing, either baked or unbaked, ensuring you always have a delightful treat on hand, ready when the craving strikes.
- To Freeze Unbaked Pies: Assemble the pies completely as directed in the recipe, but do not apply the egg wash or spiced sugar topping yet. Place the unbaked pies in a single layer on a parchment-lined baking sheet and flash freeze for about 30 minutes, or until they are solid. This crucial step prevents them from sticking together. Once frozen solid, transfer the pies to a freezer-safe, airtight container or a heavy-duty freezer bag. They can be stored in the freezer for up to two months. When you’re ready to bake, transfer the frozen pies to the refrigerator to thaw overnight. Once thawed, proceed with applying the egg wash and spiced topping, then bake as directed in the recipe. Baking from frozen is also possible, but may require an additional 5-10 minutes of bake time; watch for a golden crust and bubbling filling.
- To Freeze Baked Pies: Allow baked hand pies to cool completely to room temperature. Once cooled, flash freeze them on a parchment-lined baking sheet for 30 minutes. Then, transfer them to a freezer-safe bag or airtight container. Thaw them at room temperature for a few hours before enjoying, or reheat in the oven or air fryer as described above for a warm, fresh-from-the-oven taste.
Frequently Asked Questions About Pumpkin Hand Pies
Absolutely! Pumpkin hand pies are a fantastic make-ahead dessert option, perfect for holiday planning. You can prepare and bake them up to 2 days in advance. Once cooled completely, store them at room temperature in an airtight container to maintain freshness. Alternatively, you can assemble the pies up to 2 days ahead (without applying the egg wash and sugar sprinkle), store them in a single layer in an airtight container in the refrigerator, and then add the topping and bake them fresh on the day of serving for the best results.
While coarse sanding sugar (like turbinado or baking sugar) adds a wonderful sweetness, a beautiful sparkle, and a delightful textural crunch, it is completely optional. If you don’t have coarse sugar on hand or simply prefer a less crunchy topping, standard granulated sugar will work perfectly fine to add a hint of sweetness. You can even omit the sugar topping entirely if desired; the egg wash alone will still give them a lovely golden finish.
Yes, they certainly can! To freeze baked pies, allow them to cool completely to room temperature, then flash freeze them on a parchment-lined baking sheet for about 30 minutes until firm. Once solid, transfer them to a freezer-safe ziploc bag or airtight container. To enjoy, you can thaw them at room temperature for several hours or reheat gently in a 300°F (150°C) oven for about 5-10 minutes for a warm, toasted crust. For detailed instructions on freezing unbaked pies, please refer to our “Storage, Reheating, and Freezing Guide” section above.
The Full Pumpkin Hand Pie Recipe Card
Pumpkin Hand Pies
Pumpkin Hand Pies are quick to make and the easiest way to serve pumpkin pie to friends and family. With a creamy, pumpkin pie filling and a flaky crust, they are the ideal hand held treat for the holidays. These adorable pumpkin shaped hand pies are almost too pretty to eat!
Course: Dessert
Cuisine: American
Keyword: pumpkin hand pies
Prep Time: 15 minutes
Cook Time: 15 minutes
Servings: 6
Calories: 411 kcal
Author: Trish – Mom On Timeout
Ingredients
For the Crust:
- 2 refrigerated pie crusts (one 2-count package)
For the Pumpkin Pie Filling:
- 1 cup pumpkin puree (*not pumpkin pie filling)
- ⅓ cup brown sugar (packed)
- 2 tablespoons heavy cream
- 1 ½ teaspoons pumpkin pie spice (divided)
- ¼ teaspoon kosher salt
For the Topping:
- 1 egg
- 1 teaspoon water
- 2 tablespoons coarse sanding sugar (turbinado sugar or baking sugar, optional)
- ½ teaspoon pumpkin pie spice
Instructions
- Preheat the oven to 400°F (200°C). Line two large baking sheets with parchment paper, and set aside.
- Dust a flat surface with flour and carefully unroll the pie crusts. Use a rolling pin to gently roll out the dough just enough to remove any creases (being careful not to over-roll the dough and make it too thin).
- Cut out pumpkin shapes using a 3 to 4-inch pumpkin-shaped cookie cutter and place them on the prepared baking sheets. Roll out any scraps and cut out more pumpkins, being careful not to overwork the dough. You should get between 8 and 10 pumpkins from each pie crust, for a total of 16 to 20 pumpkins. Transfer the baking sheets to the refrigerator while you prepare the filling.
- For the Pumpkin Pie Filling: Whisk together pumpkin puree, brown sugar, heavy cream, 1 ½ teaspoons of pumpkin pie spice, and kosher salt in a medium bowl until smooth.
- Remove one of the trays of pumpkin crusts from the refrigerator. Spoon the filling onto the center of each pumpkin shape, about 2 to 3 tablespoons depending on the size of your pumpkins, being sure to leave a ⅓-inch border around the edge.
- Remove the other tray of pumpkin crusts and use a small knife to cut four curved slits in the crusts to resemble the ridges of a pumpkin. These slits will act as vents.
- For the Topping & Assembly: In a small bowl, lightly whisk the egg with the water to create an egg wash. Use a pastry brush to brush the border of the bottom crusts (with filling).
- Carefully place a top crust (with slits) on each hand pie and lightly press the edges together. Use the tines of a fork to crimp the edges and seal firmly.
- Use the remaining egg wash to brush the tops of the assembled hand pies. Mix the coarse sanding sugar and the remaining ½ teaspoon of pumpkin pie spice together in a small bowl and sprinkle evenly over the tops of the pumpkins.
- Bake the hand pies for 15 to 20 minutes, or until the crust is golden brown. If the edges start to get too brown, you can place small strips of foil over them to prevent over-browning (this might be necessary for the stems).
- Let the hand pies rest for 5 minutes on the baking sheet before transferring to a cooling rack or enjoying warm.
Notes
Storage Information:
Leftover pumpkin hand pies should be cooled to room temperature before transferring to an airtight storage container and stored in the refrigerator for up to 4 days.
To reheat: Preheat oven to 350°F (175°C) and bake for 8 to 10 minutes or pop in the air fryer at 350°F (175°C) for 2 to 3 minutes.
To freeze (unbaked): Assemble pies (without egg wash/sugar). Flash freeze on a parchment-lined baking sheet for 30 minutes. Transfer to a freezer-safe container/bag for up to two months. When ready to bake, thaw in the refrigerator, then brush with egg wash and top with spiced sugar before baking as directed.
Nutrition
Calories: 411kcal | Carbohydrates: 52g | Protein: 6g | Fat: 20g | Saturated Fat: 7g | Polyunsaturated Fat: 2g | Monounsaturated Fat: 9g | Trans Fat: 0.003g | Cholesterol: 33mg | Sodium: 387mg | Potassium: 186mg | Fiber: 3g | Sugar: 17g | Vitamin A: 6470IU | Vitamin C: 2mg | Calcium: 46mg | Iron: 3mg