
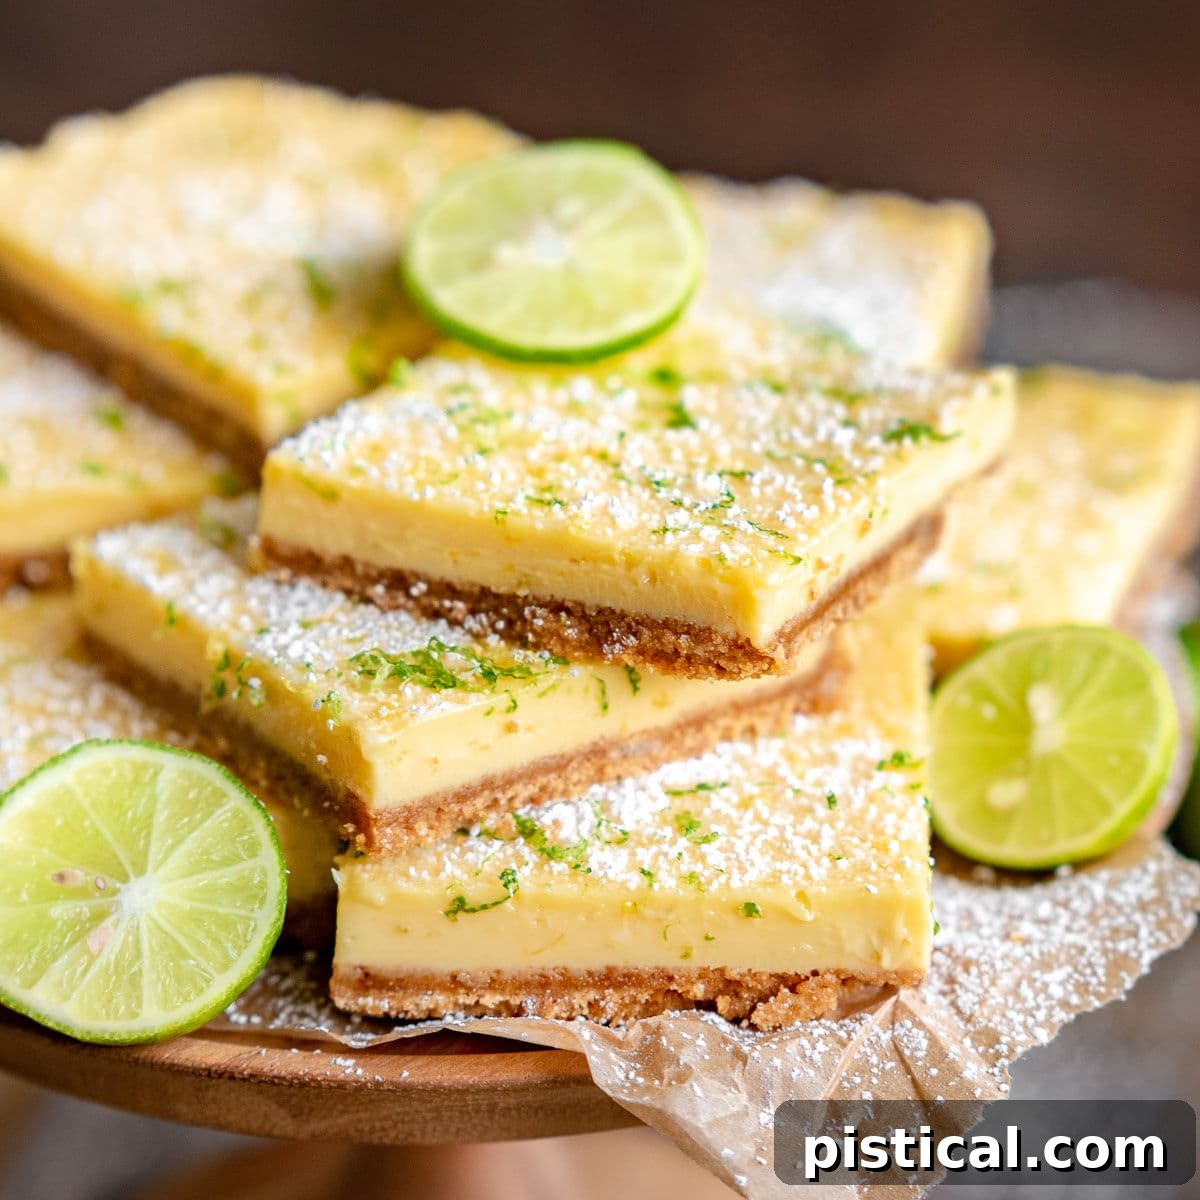
These Key Lime Pie Bars are a truly irresistible fusion of sweet and tart, delivering a burst of refreshing flavor with every bite. Featuring a perfectly buttery graham cracker crust, a velvety smooth and zesty key lime filling, and a delicate dusting of powdered sugar, they are the quintessential cool and invigorating dessert, especially perfect for warm summer days. If you’re searching for a dessert that’s both vibrant and comforting, these bars are destined to become a new favorite.
For those who adore the bright, tangy essence of key lime, you’re in for a treat! Don’t stop at these bars; be sure to explore more of our citrus-infused delights. Try our Key Lime Pie Fruit Dip for a lighter twist, whip up a batch of our delightful Key Lime Snowball Cookies, and of course, experience the classic perfection of our famous Key Lime Pie.
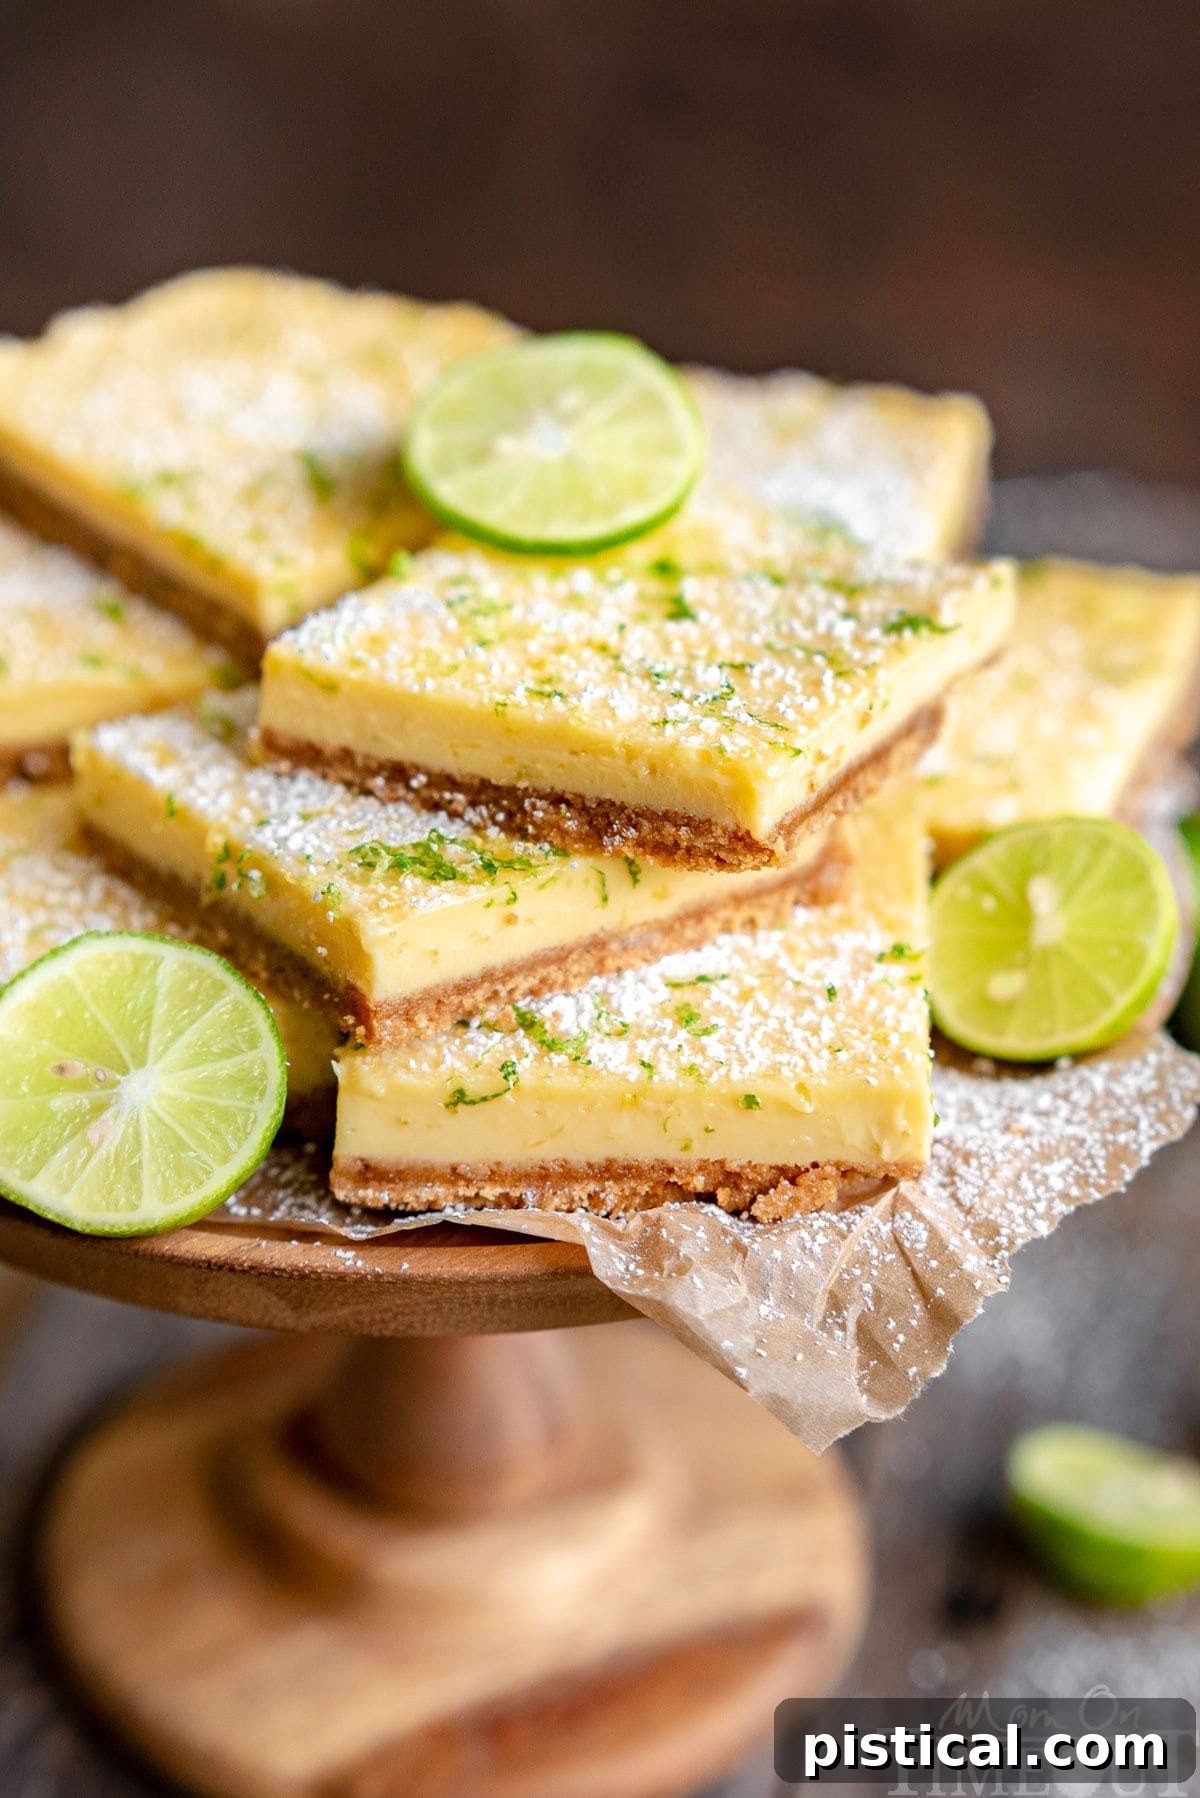
Irresistible Key Lime Bars: Your Perfect Summer Dessert
When the temperatures rise and the days stretch long, my cravings invariably turn to citrus. There’s something uniquely invigorating about the bright, zesty notes of oranges, lemons, and especially limes – key limes, to be precise. Their distinctive tartness is a delightful wake-up call for the palate, perfectly balancing sweetness and leaving a refreshing sensation that’s simply unmatched. These Key Lime Pie Bars beautifully capture that quintessential key lime essence, making them an unparalleled choice for any summer occasion.
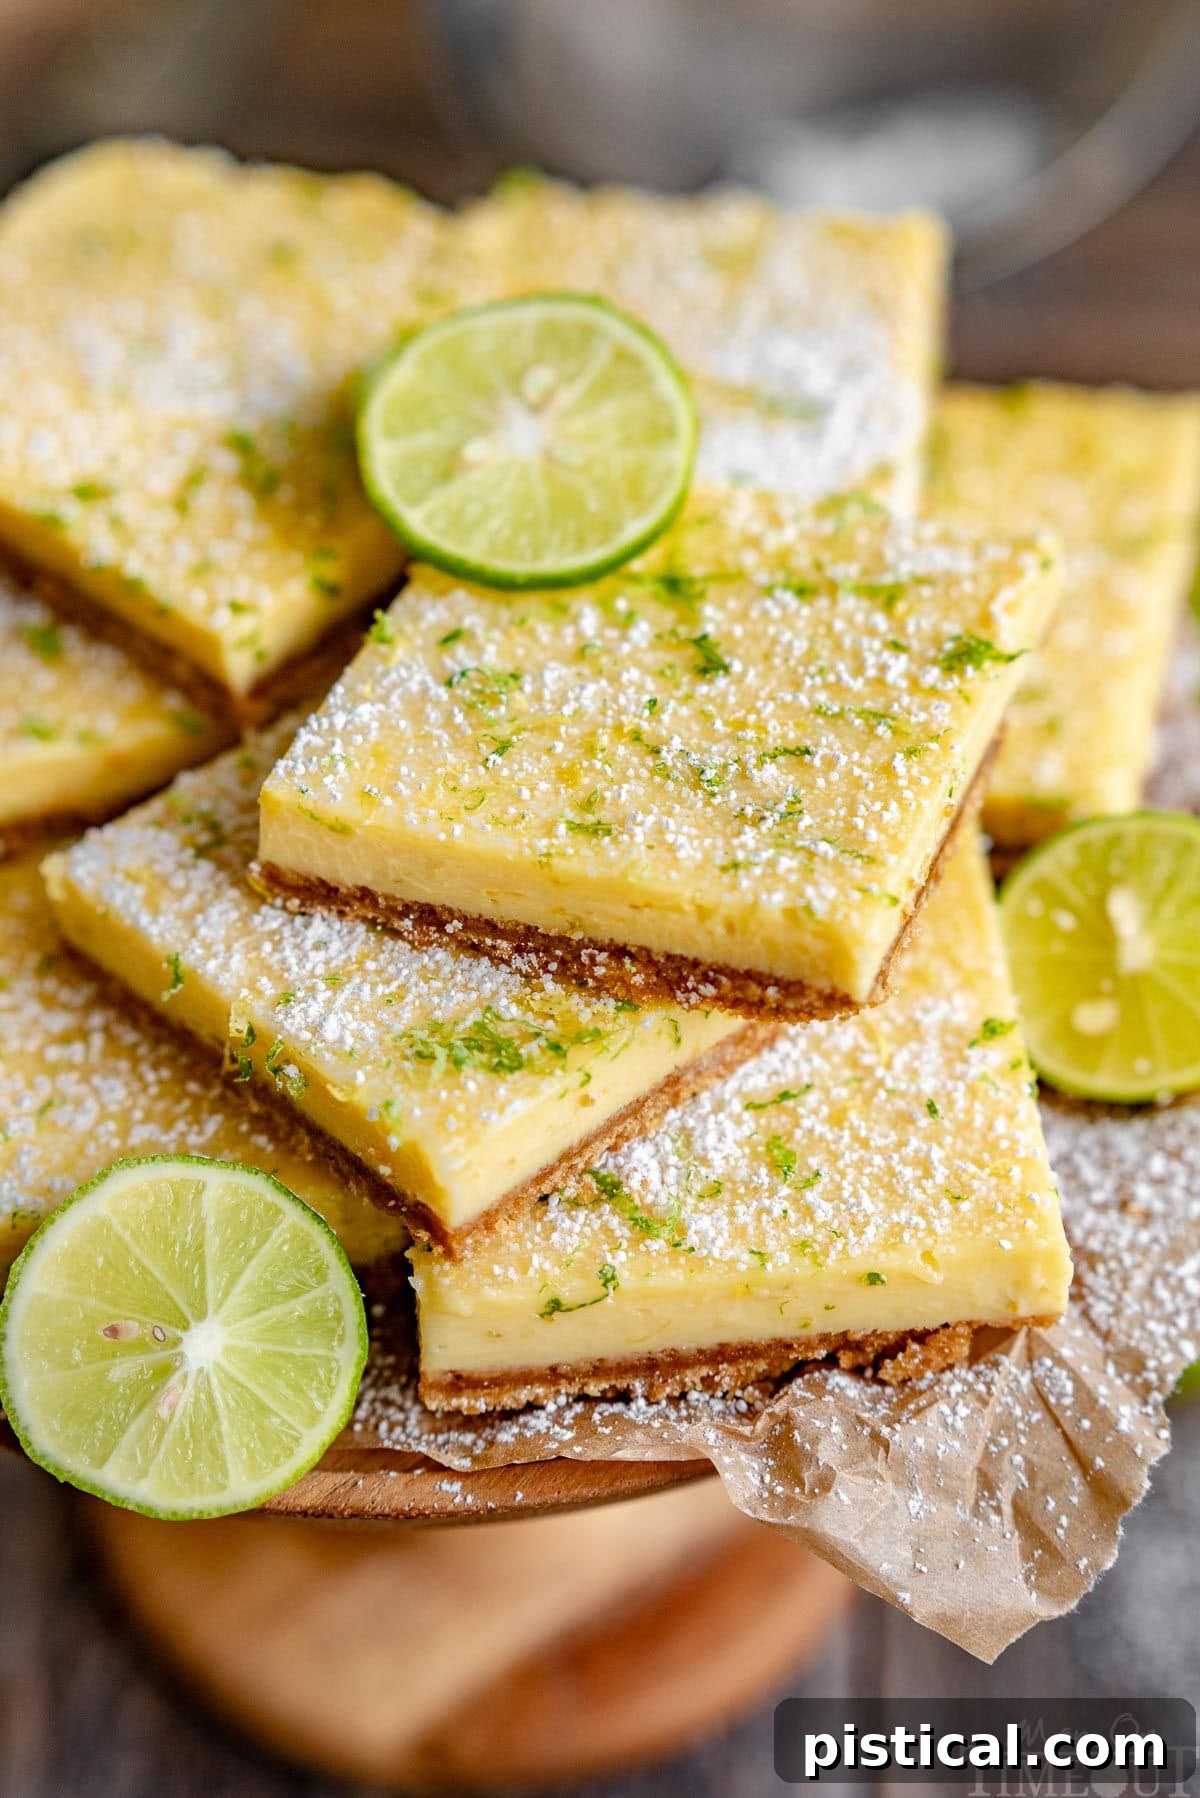
Each bar is a testament to simple perfection: a golden, crumbly graham cracker crust, a silky-smooth, intensely flavored key lime filling baked to just the right consistency, then chilled to a cool indulgence. Before serving, they receive a generous dusting of delicate powdered sugar and a vibrant sprinkle of freshly grated key lime zest, adding both visual appeal and an extra layer of aromatic citrus. These delightful bars are not just a dessert; they’re an experience. Imagine bringing them to your next backyard BBQ, a relaxed family picnic, or a lively gathering with friends – they are guaranteed to be the undisputed star of the dessert table and will have everyone asking for the recipe!
The magic of these Key Lime Pie Bars lies in their surprising simplicity. You only need FOUR essential ingredients for the creamy, tangy filling, and just three more for the crisp, buttery crust. A final flourish of zest and powdered sugar elevates them to bakery-quality perfection. Prepare for these bars to quickly become a cherished family favorite, requested year after year!
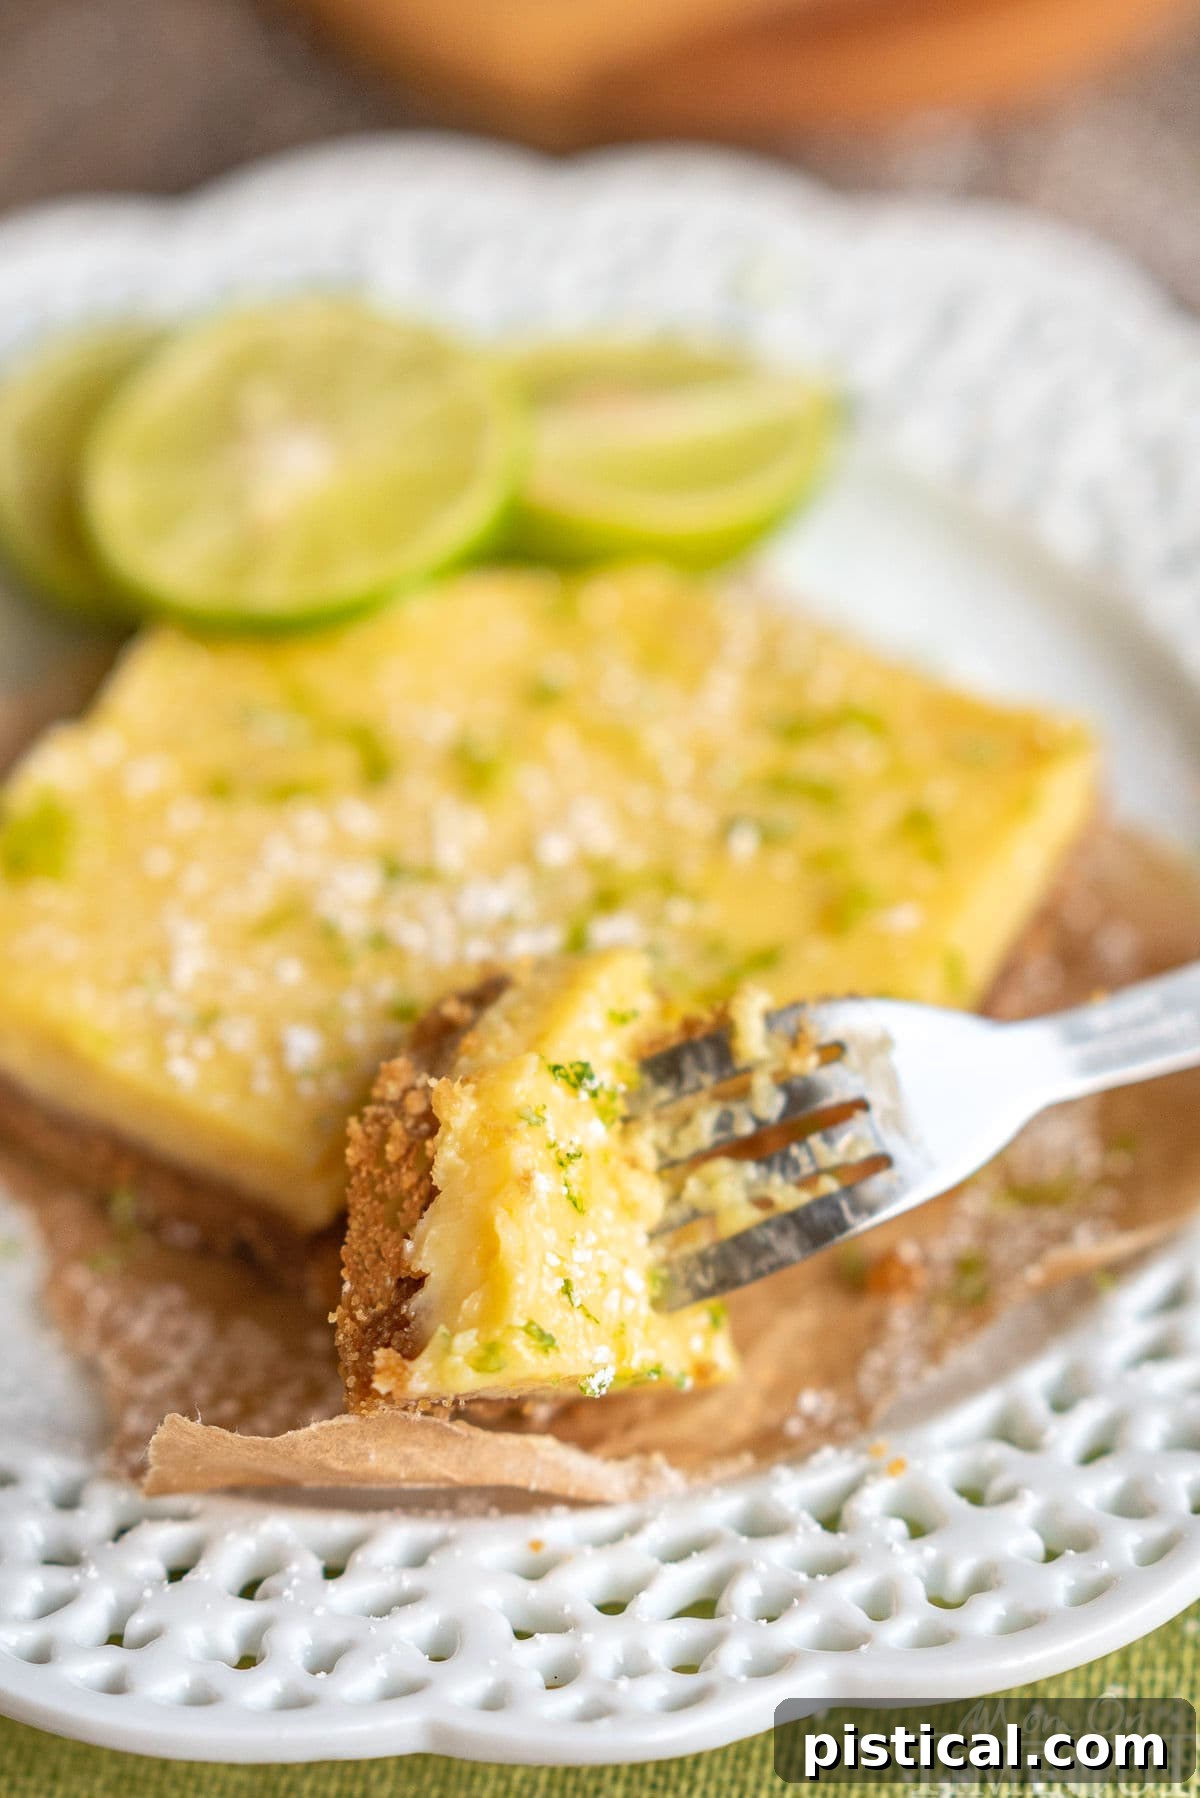
Why You’ll Absolutely Love These Key Lime Pie Bars
- The Epitome of Summer Dessert: Key lime pie bars are synonymous with summer. Their light, creamy texture and harmonious balance of sweet and tart flavors make them an incredibly refreshing escape from the heat. They are never too heavy, always satisfying, and effortlessly complement any summer meal or celebration.
- Remarkably Easy to Prepare: Don’t let their gourmet appearance fool you; this recipe is designed for ease and accessibility. With just a handful of straightforward ingredients and minimal active prep time – often as little as 5 minutes – you can achieve a show-stopping dessert without breaking a sweat. It’s the perfect recipe for busy hosts or novice bakers.
- Incredibly Versatile for Any Occasion: From casual backyard barbecues and festive picnics to elegant dinner parties and intimate family gatherings, these bars fit seamlessly into any event. They’re easy to transport, simple to serve, and universally loved, ensuring they’re always a crowd-pleaser no matter the setting.
- A Fantastic Make-Ahead Option: One of the best qualities of these key lime bars is that they require chilling, which means they are ideally suited for preparing in advance. This frees you up to enjoy your event without last-minute dessert stress, allowing the flavors to meld and the bars to set perfectly.
- Portable and Perfect for Sharing: Unlike a traditional pie, these bars are pre-portioned and easy to pack, making them ideal for potlucks, picnics, or gifting to friends and neighbors. Their sturdy crust holds up well, ensuring they arrive at their destination looking as good as they taste.
The Magic Behind the Flavors: Essential Ingredients Breakdown
These delightful key lime bars come together with surprising speed, relying on a simple yet robust combination of ingredients. The delicious graham cracker crust requires just three elements, while the vibrant filling needs only four. Below is a detailed look at what you’ll need, along with insights into why each component is crucial for achieving that perfect sweet-tart balance and creamy texture. You can find the complete, printable recipe card with precise measurements at the very end of this post.
For the Classic Graham Cracker Crust
- Graham Cracker Crumbs: The foundation of our bars. Graham crackers provide a distinct honeyed, slightly spiced flavor and a satisfying crunchy texture that perfectly complements the smooth, tangy filling. Using pre-crushed crumbs saves time, or you can crush whole crackers yourself for freshness.
- Salted Butter (Melted): Butter is the binding agent that holds the crust together, ensuring it’s firm enough to support the filling without being too hard. Salted butter adds a subtle savory note that enhances the sweetness of the crackers and balances the tartness of the lime.
- Granulated Sugar: A touch of sugar sweetens the crust, contributing to its golden-brown finish and providing a pleasant textural contrast to the filling. It also helps the crust caramelize slightly during baking.
For the Creamy Key Lime Pie Filling
- Sweetened Condensed Milk: This is the secret to the filling’s incredible creaminess and sweetness. It provides the necessary sugar to balance the intense tartness of the key lime juice and creates that signature smooth, custardy texture without the need for additional cooking on the stovetop.
- Egg Yolks (5 yolks): The egg yolks are absolutely essential for creating a rich, luxurious, and perfectly set custard-like filling. They add structure and body, preventing the filling from being too liquid while contributing a beautiful golden hue and an unparalleled velvety mouthfeel.
- Key Lime Juice: The star of the show! Freshly squeezed key lime juice offers the most authentic and vibrant flavor. Key limes are smaller and more aromatic than regular limes, with a distinctly floral and intensely tart profile. If fresh key limes are hard to find, a high-quality bottled key lime juice is an excellent substitute that we regularly use with fantastic results.
- Key Lime Zest: The zest contains the aromatic oils of the key lime, providing an intense burst of fresh lime flavor and a beautiful fragrance that elevates the entire dessert. For an extra pop of color and citrus complexity, consider using zest from regular limes if key limes are unavailable, or even a bit of lemon zest for a bright finish.
You’ll notice the emphasis on 5 egg yolks in this recipe. These yolks are not merely an ingredient; they are the architects of the filling’s extraordinary richness and unparalleled creaminess. This generous amount of yolk is what transforms a simple lime filling into a decadent, custard-like delight that will have your friends and family eagerly requesting your recipe. Paired with the luscious sweetness of condensed milk and the bright, fresh notes of key lime juice and zest, the result is a perfectly balanced, irresistibly tart, and utterly smooth filling that truly sets these bars apart!
How to Master These Key Lime Pie Bars: A Step-by-Step Guide
The delightful interplay of sweet and tart flavors in these key lime bars is truly captivating, promising to be a highlight for any dessert lover. What makes them even better is their straightforward preparation, requiring minimal ingredients and effort for maximum reward. These bars are baked to golden perfection, expertly chilled until firm, and then adorned with a generous snowfall of powdered sugar and a vibrant sprinkle of additional key lime zest. For an added touch of visual brightness and a subtle aromatic lift, I often like to include a little lemon zest as well. The simple steps below will guide you to a flawless dessert that tastes as though it came from a gourmet bakery.
As always, you can find the complete, detailed, and printable recipe card with all measurements and notes at the very end of this post.
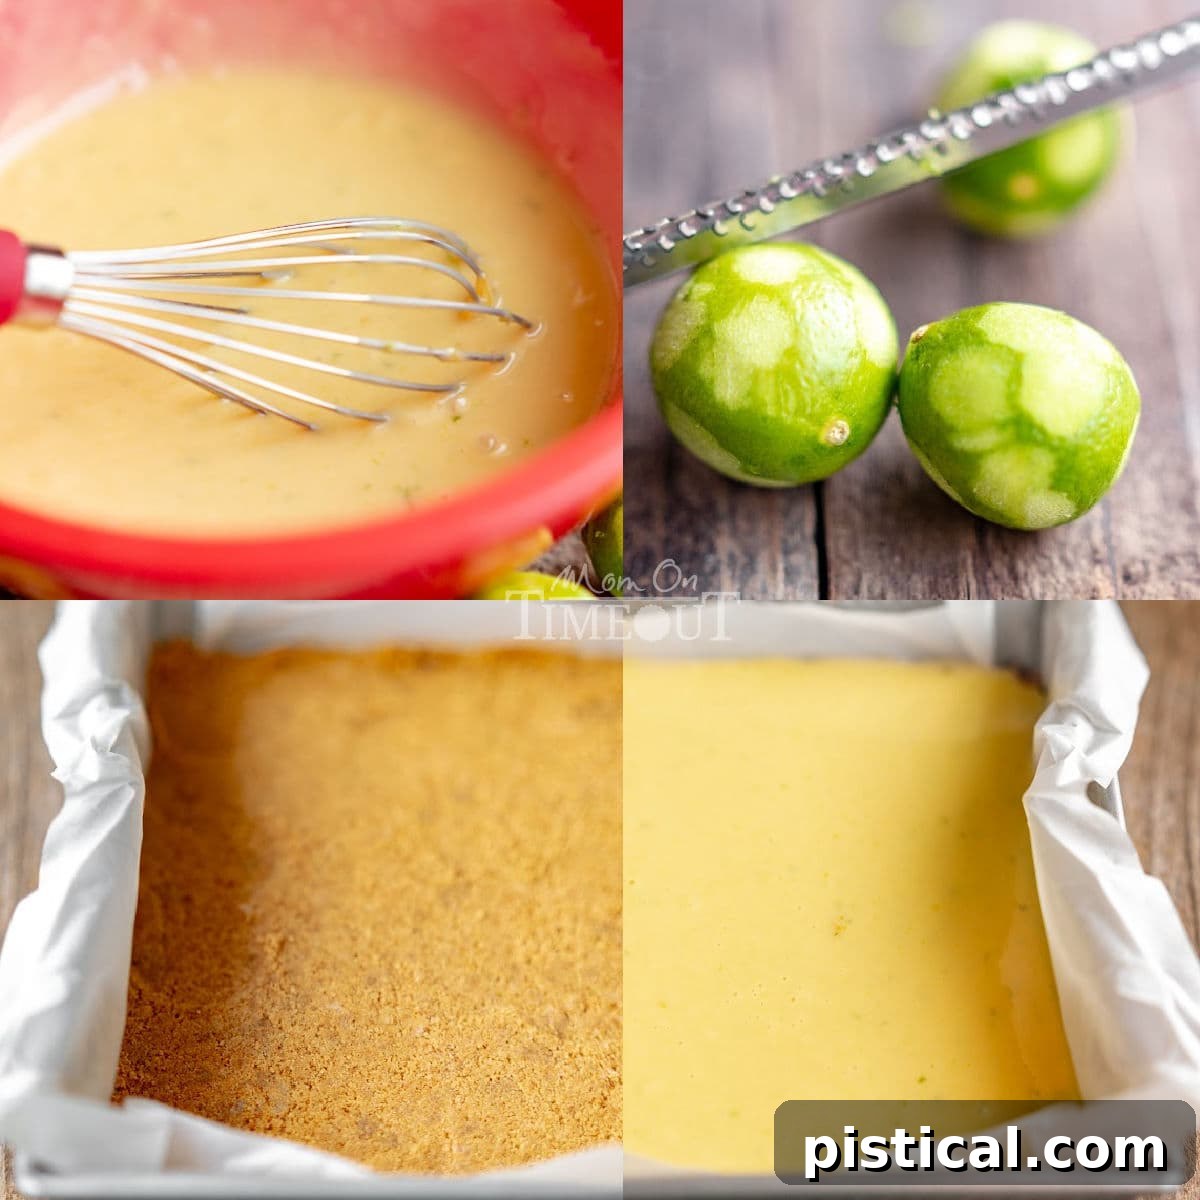
- Prepare Your Pan: Begin by preheating your oven to 375°F (190°C). Then, take an 8-inch or 9-inch square baking pan. Lightly spray the interior with cooking spray, and for easy removal, line it with parchment paper, leaving an overhang on two sides to create “handles.” This simple step makes lifting the chilled bars out effortless.
- Combine Crust Ingredients: In a medium bowl, combine the graham cracker crumbs, melted salted butter, and granulated sugar. Stir these ingredients thoroughly with a spoon or your hands until the crumbs are uniformly moistened and resemble wet sand.
- Press the Crust: Transfer the crumb mixture into your prepared baking pan. Using the bottom of a measuring cup or a flat-bottomed glass, firmly press the mixture evenly across the bottom of the pan. The key here is to pack it in very tightly to form a solid, stable crust that won’t crumble when cut.
- Pre-Bake the Crust: Place the pan with the pressed crust into your preheated oven and bake for 7 minutes. This short baking time helps to set the crust, making it crispier and less likely to become soggy once the filling is added. Remove the pan from the oven and set it aside to cool completely while you prepare the filling.
- Adjust Oven Temperature: While the crust cools, reduce your oven temperature to 350°F (175°C) for the filling.
- Whisk the Filling: In another medium bowl, combine the sweetened condensed milk, egg yolks, key lime juice, and key lime zest. Whisk vigorously until all ingredients are thoroughly combined and the mixture is smooth and uniform. Ensure there are no streaks of unmixed condensed milk or egg yolk.
- Pour and Bake: Carefully pour the prepared key lime filling over the cooled graham cracker crust in the pan. Gently spread it evenly if needed. Return the pan to the oven and bake for approximately 25 minutes, or until the edges of the filling are set and lightly golden, but the center still has a slight jiggle. This slight jiggle indicates a perfectly creamy texture once chilled.
- Chill Thoroughly: Once baked, remove the bars from the oven. Let them cool completely at room temperature on a wire rack. After reaching room temperature, transfer the pan to the refrigerator and chill for at least 3-4 hours, or ideally overnight. Chilling is crucial for the filling to set fully and for the flavors to deepen.
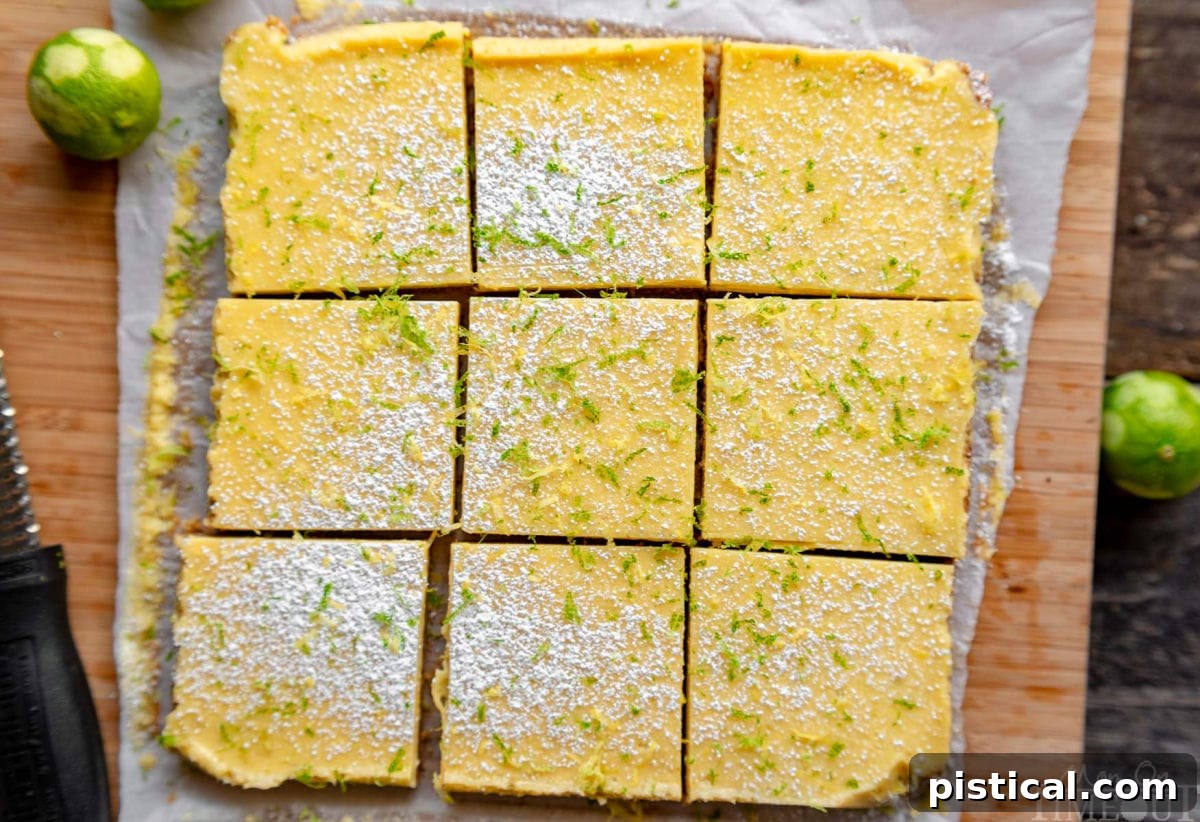
- Garnish and Serve: Once thoroughly chilled and firm, use the parchment paper overhangs to lift the entire slab of bars out of the pan. Place it on a cutting board. Dust generously with powdered sugar and sprinkle with additional key lime zest (and lemon zest for extra color, if desired). Using a sharp knife, cut into desired bar sizes. Serve immediately and enjoy the refreshing taste!
Storage Information: Keeping Your Key Lime Bars Fresh
Proper storage is key to maintaining the delicious flavor and perfect texture of your Key Lime Pie Bars. Since they contain egg yolks and a dairy-based filling, refrigeration is essential.
Refrigeration: Once the bars have cooled completely and been cut, arrange them in a single layer in an airtight container. If stacking, place a sheet of parchment paper between layers to prevent sticking. Alternatively, you can wrap individual bars tightly with plastic wrap. Store them in the refrigerator for up to seven days. The flavors tend to meld and deepen beautifully after a day or two, making them an excellent make-ahead dessert.
Freezing: For longer storage, Key Lime Pie Bars freeze exceptionally well. Wrap individual bars tightly in plastic wrap, then place them in an airtight, freezer-safe ziplock bag or container. They can be frozen for up to two months without significant loss of quality. When you’re ready to enjoy them, simply thaw the bars overnight in the refrigerator. This slow thawing process helps preserve their creamy texture and prevents condensation. You can also enjoy them slightly frozen for a more sorbet-like consistency, perfect on a hot day!
Frequently Asked Questions About Key Lime Pie Bars
Here are some common questions we receive about making the perfect Key Lime Pie Bars:
Can I use regular lime juice instead of key lime juice?
While fresh key lime juice is always preferred for its distinctive floral aroma and intense tartness, regular lime juice can certainly be used as a substitute if key limes are unavailable. Be aware that regular limes are less aromatic and can be slightly more tart, so the flavor profile will be a little different. However, the dessert will still be delicious! A fantastic alternative, and one I often rely on, is to purchase high-quality bottled key lime juice. It’s surprisingly good and delivers an authentic flavor profile. I’ve successfully used it in many recipes, including my Key Lime Pie Fruit Dip, and it always yields amazing flavor.
Do I have to make these bars with a graham cracker crust?
I absolutely recommend sticking with a graham cracker crust for these bars, as it is the traditional and most complementary crust used in classic key lime pie. The buttery, slightly sweet crunch of the graham cracker crust is a crucial element that provides a perfect textural and flavor contrast to the creamy, tangy filling. It’s also incredibly practical; the sturdy crust is essential for the bars to withstand cutting and handling before they are devoured. The simple combination of graham cracker crumbs, melted butter, and sugar creates a magic ratio that ensures a perfectly formed, delicious crust every time.
Do these key lime bars need to be refrigerated?
Yes, refrigeration is absolutely necessary for these Key Lime Pie Bars. Due to the presence of egg yolks in the rich, custard-like filling, the bars must be kept chilled to ensure food safety and to maintain their ideal set texture. Once completely cooled, cover them tightly with plastic wrap or store them in an airtight container in the refrigerator. They will stay fresh and delicious for up to one week, making them a wonderful dessert to prepare in advance.
Can I make these bars in a different pan size?
Yes, you can adjust the pan size, but you might need to modify baking times. If using a larger pan (e.g., 9×13 inch), the bars will be thinner, and the baking time for both the crust and the filling will likely decrease. Keep a close eye on them to prevent overbaking. For a thicker bar, you could use a smaller pan, but ensure the filling doesn’t overflow and adjust baking time upwards slightly.
How can I ensure my crust is perfectly packed?
After pouring the graham cracker mixture into the pan, use the bottom of a flat-bottomed measuring cup or a sturdy glass to press the crumbs down very firmly and evenly. This compaction is crucial for a crust that holds together well and doesn’t fall apart when you cut the bars. Pressing it against the sides as well will give you clean edges.
Trish’s Expert Tips for Perfect Key Lime Pie Bars
- Prioritize Fresh Key Lime Juice: While bottled key lime juice is a convenient and often excellent substitute, using freshly squeezed key lime juice will always yield the most vibrant, complex, and aromatic flavor. The difference is subtle but noticeable and truly elevates the dessert. However, if fresh is not an option, this bottled kind comes highly recommended and is a fantastic second choice!
- Don’t Overmix the Crust: When combining your graham cracker crumbs, butter, and sugar, mix until just combined and uniformly moist. Overmixing can lead to a dense, tough crust. The goal is a crumbly, yet compact, texture that provides a satisfying snap.
- Thorough Chilling is Non-Negotiable: Patience is a virtue, especially with these bars! Allowing them to cool completely at room temperature and then chilling them for at least 3-4 hours (preferably overnight) in the refrigerator is crucial. This step ensures the filling sets properly, resulting in clean, firm slices that hold their shape beautifully.
- For Maximum Zest Flavor: When zesting your key limes, use a microplane zester and only remove the bright green outer layer. Avoid the white pith underneath, as it can impart a bitter flavor. Zest just before adding to the filling and for garnishing, as the oils are most potent when fresh.
- Achieving Clean Cuts: For perfectly neat bars, use a sharp, thin-bladed knife. Before each cut, wipe the knife clean with a damp cloth to prevent the creamy filling from sticking and creating ragged edges. Heating the knife slightly under hot water can also help achieve even smoother cuts.
- Pre-Bake the Crust Properly: The quick 7-minute pre-bake for the crust is vital. It helps the crust crisp up, prevents it from becoming soggy under the filling, and ensures a solid base for your bars.
- Don’t Overbake the Filling: Watch your oven carefully during the filling’s bake time. The filling is done when the edges are set, but the center still has a slight wobble, similar to a cheesecake. Overbaking can lead to a less creamy texture and potential cracking.
More Zesty Citrus-y Treats to Brighten Your Day
If you find yourself enchanted by the refreshing tang of key lime, you’re likely to adore these other vibrant citrus desserts:
- No Bake Lemon Pie
- Lemon Lime Jello Salad
- Key Lime Pie Lush
- Lemon Bars
- Orange Creamsicle Cake

Key Lime Pie Bars
These Key Lime Pie Bars are sweet and tart and totally irresistible! Made with the perfect graham cracker crust, a creamy, zesty filling, and a dusting of powdered sugar, they’re the perfect cool and refreshing dessert for summer.
Course: Dessert | Cuisine: American | Keyword: key lime bars, key lime pie bars
Prep Time: 5 minutes | Cook Time: 32 minutes | Total Time: 37 minutes
Servings: 16 servings | Author: Trish – Mom On Timeout
Ingredients
Graham Cracker Crust
- 1½ cups graham cracker crumbs
- 6 tablespoons salted butter, melted
- ⅓ cup granulated sugar
Key Lime Filling
- 14 ounces sweetened condensed milk (1 can)
- 5 egg yolks
- ½ cup key lime juice
- 2 tablespoons key lime zest
Topping (Optional)
- Powdered sugar
- 2 tablespoons key lime and/or lemon zest
Instructions
Graham Cracker Crust
- Preheat oven to 375°F (190°C).
- Spray an 8-inch or 9-inch square pan with cooking spray and line with parchment paper, leaving an overhang on two sides.
- Combine graham cracker crumbs, melted butter, and granulated sugar in a small bowl and stir until fully combined.
- Press the graham cracker crumb mixture firmly into the bottom of the prepared pan. Use the bottom of a measuring cup to ensure it’s packed tightly.
- Bake the graham cracker crust for 7 minutes. Remove from the oven and let cool completely.
Key Lime Filling
- Reduce the oven temperature to 350°F (175°C).
- Whisk the sweetened condensed milk, egg yolks, key lime juice, and key lime zest together in a medium bowl until smooth and well combined.
- Pour the filling mixture over the cooled crust and bake for 25 minutes, or until the edges are set and the center has a slight jiggle.
- Let the bars cool completely at room temperature, then transfer to the refrigerator to chill for at least 3-4 hours before serving.
- Dust with powdered sugar and sprinkle with additional zest (key lime or lemon) if desired. Cut into bars, serve, and enjoy!
Notes
Storage Information
Refrigeration: Wrap the bars tightly with plastic wrap, or store them in an airtight container in the refrigerator for up to seven days.
Freezing: The bars can be frozen for up to two months in an airtight, freezer-safe ziplock bag. Thaw overnight in the refrigerator before serving.
Nutrition
Calories: 187kcal | Carbohydrates: 25g | Protein: 3g | Fat: 9g | Saturated Fat: 5g | Cholesterol: 81mg | Sodium: 124mg | Potassium: 121mg | Fiber: 1g | Sugar: 20g | Vitamin A: 285IU | Vitamin C: 2.9mg | Calcium: 86mg | Iron: 0.5mg
Originally published July 14, 2019.