
This sponsored post is brought to you by Mars candy. All opinions expressed are 100% my own.
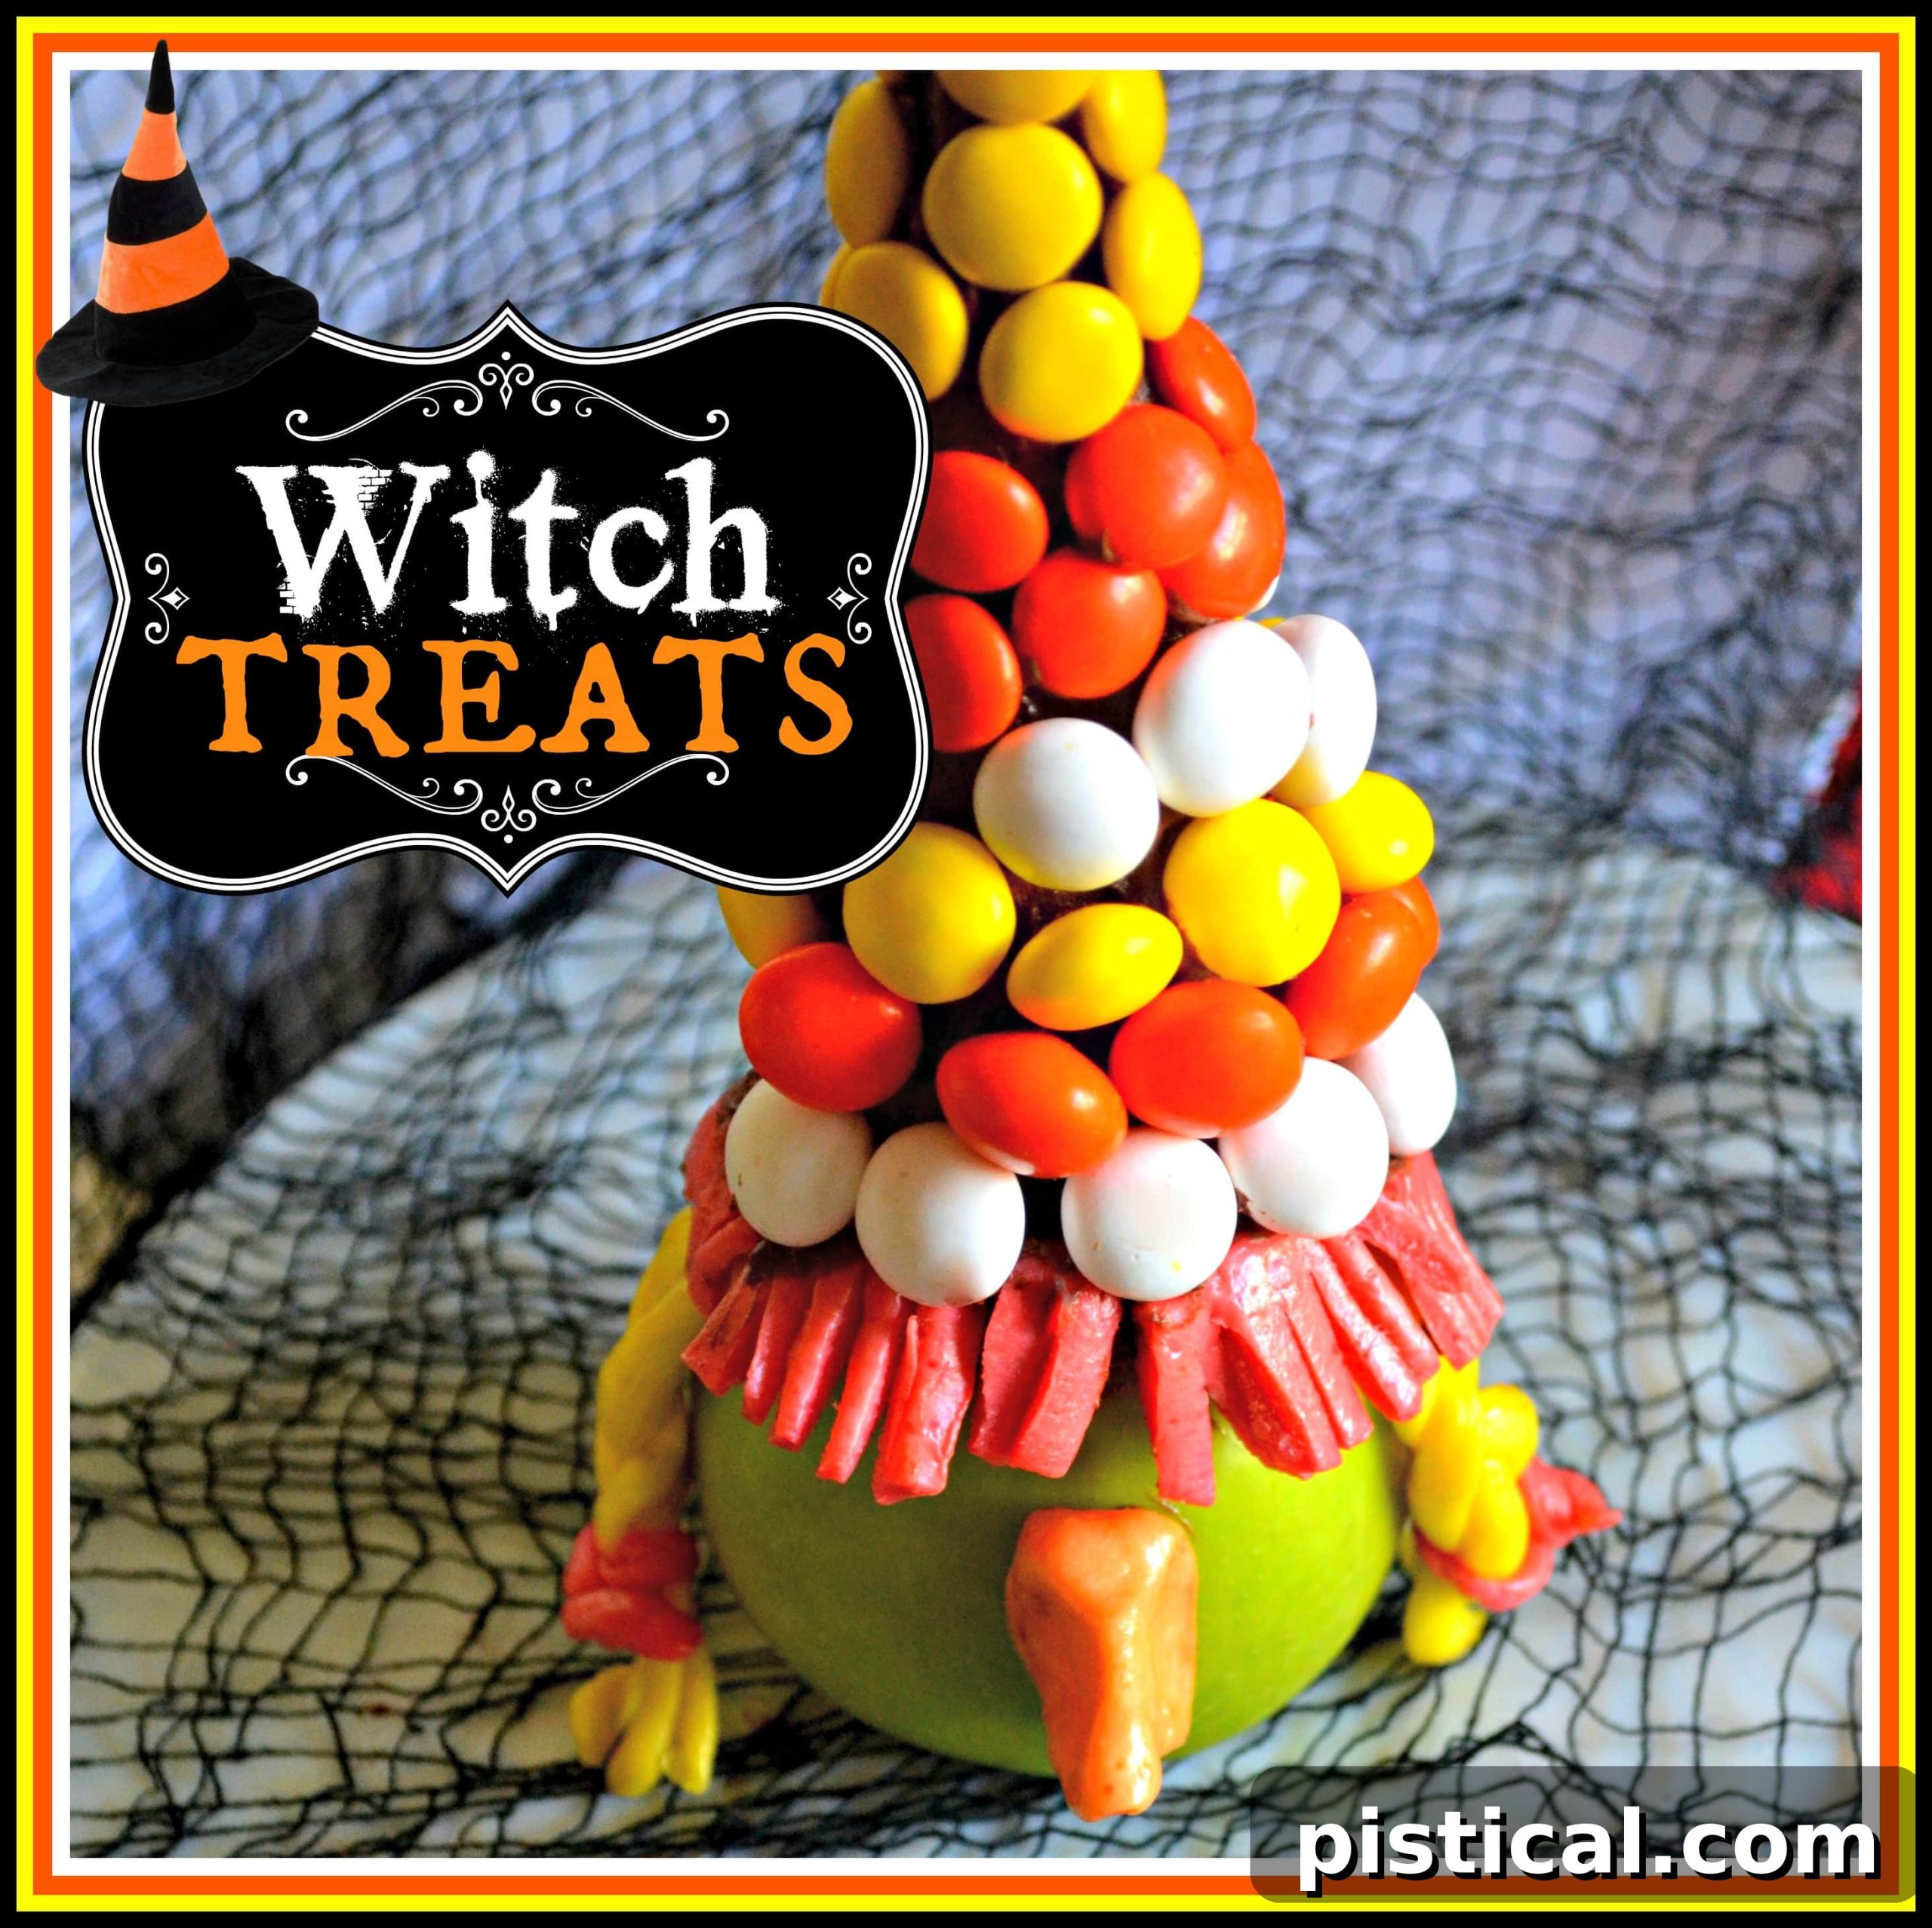
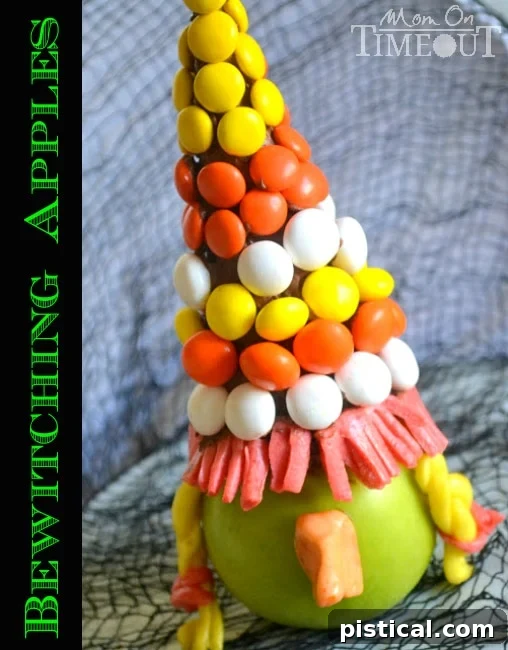
Bewitching Apple Witches: A Spooktacular & Sweet Halloween Treat!
As the crisp autumn air settles in and leaves begin to transform into breathtaking hues of orange, red, and gold, our thoughts inevitably turn to one of the most exciting holidays of the year: Halloween! More than just a night for costumes and collecting candy, Halloween is a cherished time for family traditions, friendly gatherings, and, of course, delightful treats that add a touch of magic and whimsy to the festivities. For our family, it holds a special place in our hearts. We often find ourselves hosting the neighborhood Halloween party, primarily because we’re the only family with a gaggle of little ones. And let’s be honest, Halloween is simply more fun when you’re sharing the joy, laughter, and a little bit of spooky mischief as a family. There’s nothing quite like seeing the pure excitement on everyone’s faces, from the tiniest goblins sporting their first costumes to the seasoned specters who appreciate a good, homemade snack.
Each year, my creative energy sparks as I dream up unique and memorable treats designed to surprise and delight our guests. I strive for creations that are not only visually charming but also incredibly tasty, leaving a lasting impression long after the last piece is devoured. This year, I’m thrilled to introduce these super adorable and undeniably yummy Witch Treats. They are guaranteed to bring smiles and perhaps a few delighted gasps to all who encounter them, making your Halloween celebration truly unforgettable.
The Sweet Inspiration Behind Our Bewitching Treats
My quest for the perfect Halloween treat often begins with a deep dive into the enchanting world of fun and spooky recipes. I love to scour blogs, cookbooks, and online communities for inspiration, searching for that spark that will ignite my next culinary project. It was during one of these delightful browsing sessions that I stumbled upon some charming concepts for witch caps. The whimsical design immediately captured my imagination! I envisioned something similar, but with a unique twist that would make it truly stand out—something that would transform a simple treat into a character all its own. Knowing that Mars candy offers an incredible selection of Halloween-themed sweets, from vibrant M&M’S® to chewy STARBURST® Fruit Chews, I knew exactly where to begin my ingredient hunt. Their diverse range of candies provides the perfect palette for creative holiday baking and decorating.
Armed with a fantastic $1 coupon for Mars Halloween candy, I headed to Walmart, eager to stock up on all the essentials. The festive energy was palpable as the aisles were brimming with spirited decorations, intriguing costume accessories, and an impressive array of candies, perfect for any spooky celebration. My shopping cart quickly filled with an assortment of Mars candies – from classic Milk Chocolate M&M’S® and Peanut M&M’S® to delightful Snickers® bars and the ever-colorful STARBURST® Fruit Chews. Alongside these sweet treasures, I also picked up plenty of party supplies and, crucially, a bag of crisp, green apples. These apples, little did I know then, would become the enchanting foundation of my new treat idea.
Beyond the Witches: Creating an Engaging Caramel Apple Station
While the witch treats were my primary mission, I also have a deep love for setting up a dedicated Caramel Apple Station at our harvest-themed or Halloween parties. It’s an interactive and endlessly fun activity that appeals to guests of all ages, providing a creative outlet for everyone. There’s a certain magic in letting each person customize their own caramel apple, transforming a simple piece of fruit into a decadent, personalized masterpiece. The process itself becomes a mini-activity, drawing everyone into the festive spirit. I always make sure a wide variety of toppings are available to cater to every taste and preference imaginable. Imagine rich chocolate M&M’S®, vibrant gummy worms, crunchy chopped-up Snickers® bars, mini marshmallows, colourful sprinkles, crushed cookies, and even a drizzle of white chocolate or peanut butter sauce! The possibilities are truly endless, and it’s always a huge hit, adding another layer of festive engagement and sweet anticipation to our celebrations. It’s a wonderful way to involve guests in the food preparation, turning a snack into an experience.
From Hats to Bewitching Apple Witches: A Creative Leap
As I returned home from my shopping spree and began laying out all my newfound treasures – the chocolate cookies, the ice cream cones, the creamy chocolate frosting, and the abundant bounty of Mars candies – I was ready to begin constructing the initial witch hats. My mind was focused on crafting cute, candy-covered caps, but as I organized the ingredients, a brilliant idea sparked in my mind, a creative leap that would transform the entire project.
Suddenly, it hit me! “Yup!” I thought, with an excited gasp, “I could use the apples as the witches’ heads!” This simple realization wasn’t just an amendment; it was a revelation that completely elevated the project, transforming it from a cute, static treat into an absolutely enchanting, interactive creation. The idea of these adorable witch hats perched atop crisp, green apples instantly filled me with a burst of creative energy and excitement. Not only would they be visually stunning and incredibly charming, but they would also offer a refreshing, healthy component after the initial sweet indulgence of the hat itself. It’s a true win-win: a delicious, candy-laden creation followed by a juicy, wholesome apple snack. This dual nature makes them perfect for parties where you want to offer something both indulgent and a little bit fresh. So, with this exciting new vision, let’s gather our supplies and dive into creating these truly charming and unforgettable Bewitching Apple Witches!
Crafting Your Bewitching Apple Witches: A Step-by-Step Guide
Making these Bewitching Apple Witches is a wonderfully creative and enjoyable process that’s perfect for getting the whole family involved. It’s an opportunity to let your imagination run wild and create unique characters for your Halloween festivities. Here’s everything you’ll need and how to bring these adorable characters to life, step by delightful step.
Ingredients & Supplies {for 8 Witch Treats}:
- 40 pieces STARBURST® Fruit Chews FUN SIZE® (approximately 5 per witch, choose various colors for vibrancy)
- 1 cup M&M’S® Brand Chocolate Candies for Halloween (or a mix of your favorite classic M&M’S® colors for visual appeal)
- 1 can (or about 16 oz) of prepared chocolate frosting (store-bought works perfectly for convenience)
- 8 (3 1/2-inch) packaged chocolate cookies (e.g., chocolate wafers, fudge rounds, or similar flat, round chocolate cookies for the brim)
- 8 ice cream cones (standard sugar cones or waffle cones work best for their shape)
- 8 medium-sized green apples (such as Granny Smith), thoroughly washed and dried to ensure cleanliness and a good base
- Sharp kitchen scissors or a small, sharp paring knife (for intricate cutting of Starburst)
- Wax paper or parchment paper (for easy cleanup and a non-stick workspace)
- Small bowl of warm water (optional, for softening Starburst if needed)
Detailed Directions for Assembly:
- Prepare the Witch Hat Base: Begin by taking your packaged chocolate cookies; these will form the wide, flat brim of your witch’s hat. Using a butter knife or an offset spatula, generously cover the top surface of each cookie with a layer of chocolate frosting. This frosting not only acts as a strong adhesive but also adds an extra layer of chocolatey goodness to the treat. Carefully center one ice cream cone on top of each frosted cookie, gently pressing down to ensure it’s firmly secured. Once the cone is stable, proceed to generously frost the entire ice cream cone, ensuring it’s completely covered in a smooth, even layer of chocolate. Don’t worry too much about achieving absolute perfection; a slightly rustic charm is part of the fun in these homemade treats! This generous frosting layer will also serve as the sticky base for all your delightful candy decorations.
- Create the Starburst Fringe (Hair or Hat Accent): For the playful fringe around the base of the hat (which can effectively double as the witch’s hair or a decorative band), you’ll need approximately 4 STARBURST® Fruit Chews per hat. First, carefully unwrap each STARBURST® and, if they are a bit firm, you can gently warm them in your hands or microwave for a few seconds to make them more pliable. Cut each STARBURST® in half lengthwise. Now, with sharp kitchen scissors or a small paring knife, carefully cut small, thin strips along one long edge of each STARBURST® half, creating a fringe effect. Be careful not to cut all the way through, leaving a solid, uncut edge for easy attachment. Arrange these fringed STARBURST® pieces around the base of the frosted ice cream cone, pressing them gently into the still-wet frosting. You can let the fringe hang down slightly over the cookie brim for a more dramatic and whimsical effect, truly mimicking flowing hair.
- Decorate the Witch Hat: Now for the most colorful and creative part – decorating the hat! While the frosting on the cone is still tacky, begin arranging your M&M’S® Brand Chocolate Candies in random, whimsical patterns all over the frosted cone. You can use a vibrant mix of colors for a cheerful witch, or stick to classic Halloween hues like orange, purple, and green for a more traditional look. I particularly love using a combination of M&M’s White Chocolate Candy Corn and classic plain M&M’s to create a visually appealing, textured hat that really pops. Press each candy gently but firmly to ensure it adheres well to the frosting. Let your creativity guide you here – remember, no two witch hats need to be exactly alike, and their individuality adds to their charm!
- Add Optional Braided Hair (My Favorite Touch!): This next step is entirely optional, but it truly adds an extra layer of charm, personality, and intricate detail to your witch, making her even more special. The STARBURST® fringe from the previous step can certainly serve as the witch’s hair, but if you’re like me and have a soft spot for braids, this is a wonderful addition! Perhaps it’s because I don’t have any little girls myself, but I even incorporated braids into my delightful B-Witchin’ Pumpkins! To make the braids, choose STARBURST® Fruit Chews in your desired color (yellow, orange, or even purple work wonderfully for witchy hair). Unwrap them, then flatten, roll, and gently stretch each STARBURST® until it’s nice and long, thin, and pliable. Cut the stretched STARBURST® in half lengthwise to create two long strands. Now, carefully braid these two strands together, just as you would braid hair. For an extra cute detail, use another small piece of STARBURST® (perhaps a contrasting color like pink or white) to create tiny “ribbons” to tie off the ends of your braids – it’s a simple touch that makes a big, adorable difference!
- Assemble the Witch’s Head and Hat: Once your braids are ready (if you choose to use them), firmly press the top ends of the braids onto the chosen green apple, positioning them strategically to look like flowing hair. You can secure them further with a tiny dab of chocolate frosting if needed. Next, generously cover the top portion of the apple where the hat will sit with more chocolate frosting. This will act as the “glue” to hold the hat securely in place. Carefully pick up your decorated witch hat (the assembled cookie and cone) and place it on top of the frosted apple, pressing down gently but firmly to ensure a stable attachment. The frosting will help everything adhere beautifully.
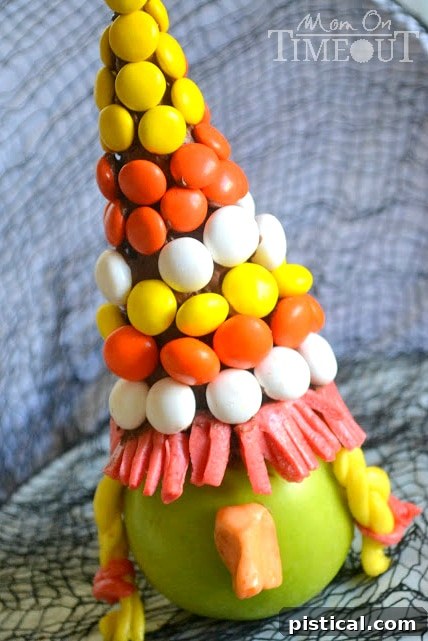
- Give Your Witch a Nose: I was initially going to leave them just with their elaborately decorated hats, but then I realized my little witches needed a distinctive, whimsical nose to complete their character! Out came another STARBURST® Fruit Chew. Simply pinch off a small piece, shape it into a tiny, pointy, or slightly crooked nose, and gently press it onto the front of the apple face, just below the hat brim. This final detail brings your Bewitching Apple Witch to life!
Perfection! Your Bewitching Apple Witches are now complete and ready to enchant your Halloween guests with their charm and deliciousness!
Halloween Safety First: Tips for a Worry-Free Celebration
Beyond the fun costumes and delicious, homemade treats, Halloween safety is always a top priority, especially for parents and guardians. I vividly recall coming home after an exhilarating night of trick-or-treating as a child, brimming with excitement over my candy haul, only for my parents to insist on thoroughly inspecting each and every piece. Back then, I secretly suspected it was just an elaborate excuse for them to pilfer the “good stuff” (and, perhaps, a little bit of that was true!). But now, as a parent myself, I understand that their main concern was far more serious: ensuring the candy hadn’t been tampered with and was entirely safe to eat. This vigilance is a crucial, non-negotiable part of a responsible and enjoyable Halloween.
To ensure your family and community have a safe, secure, and wonderfully happy Halloween, here are a few essential recommendations and tips:
- Stick to Familiar Neighborhoods: Always prioritize trick-or-treating in neighborhoods you are intimately familiar with. Ideally, stick to houses where you know the residents personally. This significantly reduces the risk of encountering anything suspicious or unfamiliar.
- Explore Community Events: Many communities, schools, local churches, and civic organizations now offer organized “Trunk-or-Treat” events or designated safe trick-or-treat nights in controlled, well-lit environments. These events can be just as much fun, if not more so, offering a carnival-like atmosphere and a great way to eliminate some of the common worries associated with traditional door-to-door trick-or-treating. Look for events at local community centers, malls, or even fire stations.
- Visibility is Absolutely Key: As daylight fades, visibility becomes paramount. Ensure children’s costumes are brightly colored or incorporate reflective tape into costumes and trick-or-treat bags. Provide flashlights, headlamps, or glow sticks for every child and supervising adult in your group. This makes everyone easily seen by drivers and other pedestrians.
- Adult Supervision is a Must: Never let children, especially young ones, trick-or-treat alone. Always accompany them, even if they are in a familiar neighborhood. Older children should go in groups with a designated adult leader. Establish a clear route and a return time.
- Meticulously Check the Candy: Before allowing children to consume any candy, make it a family tradition to meticulously inspect each and every piece. Discard any items that are unwrapped, have torn or altered packaging, appear opened or tampered with, or look suspicious in any way. Stick exclusively to factory-sealed, individually wrapped treats from reputable brands.
- Home Safety for Hosts: If you’re hosting trick-or-treaters, ensure your pathways, steps, and porch are well-lit and completely free of any tripping hazards like toys, garden tools, or loose decorations. Consider using battery-operated LED candles for pumpkins and other decorations instead of open flames to prevent fire hazards, especially with flowing costumes around.
- Pet Safety: Keep pets safely secured indoors. The constant ringing of doorbells and presence of strangers can be stressful for animals, and many Halloween candies (especially chocolate) are toxic to them.
In our vibrant neighborhood, we are fortunate to have a continuous stream of enthusiastic trick-or-treaters, and we always make sure to stock up on an abundance of individually wrapped candy from trusted brands like Mars. This ensures that parents can feel completely confident about the treats their children receive, and kids can enjoy their well-earned haul without any lingering worries. A little thoughtful planning and attention to detail go a very long way in ensuring everyone has a ghoulishly good, but most importantly, safe and secure Halloween!
Get Ready for a Ghoulishly Good Time!
Writing about these festive treats and revisiting all the joyful aspects of Halloween has me feeling even more excited for the holiday! The air is truly buzzing with anticipation, and I can almost smell the comforting scents of pumpkin spice, crisp autumn leaves, and the sweet promise of candy in the air.
Have you and your family picked out your costumes yet? It’s always one of the absolute highlights of the season, a chance for everyone to transform into something magical, spooky, or heroic! This year, our family is embracing the heroic spirit, and we’ll be stepping out as various Avengers characters. So, if you happen to live in our area, you can rest easy knowing that Thor and Captain America will be on patrol, ready to protect the ones you love (and maybe snag a few extra pieces of candy from generous neighbors!). It’s a tradition that brings so much laughter and creates wonderful photo opportunities.
From crafting deliciously spooky treats like these Bewitching Apple Witches to ensuring everyone’s safety while trick-or-treating, Halloween is a truly wonderful time to create lasting family memories. It’s a season of imagination, community, and sweet indulgences. I wish you and your loved ones a very safe, incredibly happy, and utterly bewitching Halloween! May your trick-or-treat bags be overflowing with goodies and your hearts be light with joy.

Connect with me for more recipes and family fun!
Linking up at some of these amazing parties.